
Vegetables
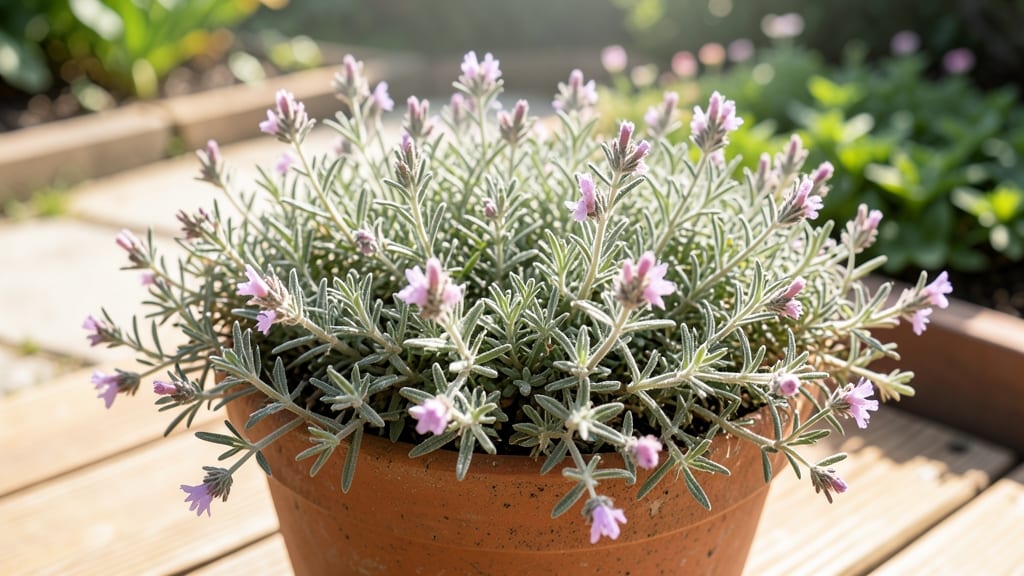
Growing thyme after thyme means never running out of this fragrant herb again. 🌿 My kitchen garden produces more than enough for cooking all year, and the secret is simple: a sunny spot, well-draining soil, and just enough water to keep it happy—not soggy.
This hardy perennial thrives with minimal fuss, so you’ll have fresh thyme for soups, roasts, and seasoning long after store-bought bundles turn brown.
The key to continuous harvests starts with the right setup. Plant thyme in 6 inches of well-draining soil mixed with a little sand or gravel if your yard stays damp. It loves full sun (6+ hours daily) but tolerates partial shade, making it perfect for containers or garden edges.
Water only when the top inch of soil feels dry—overwatering is the fastest way to kill it. Once established, thyme barely needs care, which is why it’s my go-to herb for lazy gardeners.
Harvest thyme anytime by snipping sprigs from the top, leaving at least 2-3 inches of growth. The more you trim, the bushier it grows—my plants look like tiny evergreen shrubs by summer.
For year-round use, bring potted thyme indoors before the first frost, and it’ll keep producing in a sunny kitchen window. The aroma alone makes the effort worth it, but the taste? That’s the real reward.
This method works for common thyme, lemon thyme, or woolly thyme, and it’s foolproof for beginners. No fancy tools, no complicated schedules—just a patch of soil and a pair of scissors. Once you try it, you’ll wonder why you ever bought thyme at the store again.
📚 In This Guide
- What you need
- Instructions
- Tips and common mistakes
- Wrapping up and next steps
What you need
- ● Thyme plants or seeds: Choose Thymus vulgaris (common thyme) or Thymus citriodorus (lemon thyme). Start with 3–5 plants (or seeds) for a small harvest.
- ● Well-draining soil: Mix 1 part potting soil with 1 part perlite or coarse sand (or use pre-made cactus/succulent mix).
- ● Containers (if potted): 6–8-inch diameter pots with drainage holes (or a raised bed with at least 12-inch depth).
- ● Organic compost: 1 cup per plant to enrich soil before planting.
- ○ Slow-release fertilizer (optional): Balanced 10-10-10 or organic options like fish emulsion.
- ● Gloves & hand trowel for planting.
- ● Watering can with a fine rose nozzle (or a spray bottle for seedlings).
- ● Pruning shears (sharp, clean pair for harvesting).
- ● Sunlight access: 6+ hours of full sun daily (partial shade tolerates 4–5 hours).
- ○ Drip irrigation or soaker hose (optional): For consistent moisture without overwatering.
How to grow thyme for continuous harvests all year
This is the method I use to keep thyme thriving indoors and out—no fuss, just steady growth and endless snipping.
🪴 Step 1: Choose the Right Containers and Soil
Thyme loves good drainage, so pick containers with drainage holes—terracotta pots or fabric grow bags work best. I use 6-inch diameter pots for each plant since thyme spreads but doesn’t need deep soil. Fill with a mix of 50% potting soil and 50% coarse sand or perlite to prevent root rot.
Don’t compact the soil when planting—thyme roots need air. Tap the pot gently to settle the mix, then water until moisture reaches 2 inches deep. Let excess water drain completely before planting. This prevents soggy soil, which thyme hates.
☀️ Step 2: Plant in Full Sun and Water Sparingly
Thyme thrives in full sun (6+ hours daily), so place pots in the brightest spot you have—south-facing windows or under grow lights. If outdoors, a sunny patio or garden bed works perfectly. I’ve seen thyme grow in partial shade, but the leaves lose their intense flavor.
Water only when the top inch of soil feels dry. Thyme is drought-tolerant, so underwatering is better than overwatering. After watering, let the soil dry out completely before adding more moisture. This mimics its Mediterranean native habitat and keeps the plant healthy.
✂️ Step 3: Harvest Regularly to Encourage Growth
Here’s the secret to endless thyme: prune it often. Snip stems just above a set of leaves (where new growth appears) whenever they reach 3-4 inches tall. I harvest about ⅓ of the plant every 4-6 weeks—this keeps thyme bushy and prevents it from becoming woody.
Use clean scissors or fingers to pinch off sprigs. Avoid cutting into old, bare stems—always harvest from the top or sides where fresh growth is happening. This encourages the plant to branch out and produce more flavorful leaves.
🌿 Step 4: Overwinter Indoors for Year-Round Use
When temperatures drop below 40°F, move thyme indoors near a sunny window. Reduce watering to every 2-3 weeks since growth slows in winter. I’ve kept thyme alive for years this way—just keep the soil slightly moist and avoid drafts.
If leaves yellow or drop, it’s usually from overwatering. Thyme is tough, but it won’t tolerate wet roots in winter. A quick fix is to let the soil dry out completely for a week before watering again. With proper care, your thyme will stay vibrant and ready for cooking all year.
⏰ Step 5: Divide and Propagate Every 2-3 Years
Thyme gets woody over time, so every 2-3 years, dig up the plant and divide it into smaller sections. Separate at the base where roots meet, then replant the healthiest divisions. This rejuvenates the plant and gives you free thyme for friends or extra pots.
I do this in early spring before new growth starts. Just trim any dead stems, replant in fresh soil, and keep in bright light. Your divided thyme will bounce back quickly—it’s like giving it a fresh start. This keeps your plants productive for years.
Tips & tricks for growing thyme year-round
Between us, growing thyme isn't rocket science—but these little tricks make all the difference between a struggling plant and a thriving herb garden that never stops producing.
Container Selection: While 6-inch pots work perfectly, you can also use hanging baskets or window boxes for vertical growing. Just make sure they have drainage holes—thyme roots will rot if they sit in soggy soil. I’ve seen thyme grow beautifully in old terracotta pots I found at thrift stores, so don’t stress about buying new ones.
Light Boost: If your windows don’t get enough sunlight, supplement with a simple LED grow light for 12-14 hours daily. I’ve kept thyme thriving under a basic 10-watt bulb placed 6 inches above the plants. The key is consistency—thyme needs that sun exposure to develop its signature aromatic oils.
Harvesting Hack: When harvesting, focus on the outer stems first—they’re the oldest and already have plenty of flavor. This encourages the plant to produce new growth in the center where the leaves are tender and more flavorful. I like to harvest in the morning when the oils are at their peak concentration.
Winter Care: If your indoor space gets too dry in winter, place a small pebble tray with water near your thyme. The evaporation creates humidity without soaking the soil. I’ve kept my thyme thriving through winter this way, even in dry apartments. Just avoid letting the pot sit directly in water—thyme still needs that drainage!
Pro Tips for Thyme After Thyme
- Between us, growing thyme isn't rocket science—but these little tricks make all the difference between a struggling p...
- Container Selection: While 6-inch pots work perfectly, you can also use hanging baskets or window boxes for vertical ...
- Light Boost: If your windows don’t get enough sunlight, supplement with a simple LED grow light for 12-14 hours daily...
Frequently asked questions
Got questions about growing thyme after thyme? You’re not alone!
Here are answers to the most common queries—from timing to troubleshooting—so you can keep your herb thriving with ease.
How often should I harvest thyme to encourage regrowth?
Harvest thyme lightly and frequently—about 1/3 of the plant—every 4-6 weeks during its growing season (spring to fall). Avoid over-pruning, or you’ll stress the plant. For year-round harvests, trim lightly in winter too, but expect slower growth. Pro tip: Snip just above a leaf node to promote bushier regrowth!
Can I grow thyme indoors year-round, and what’s the best setup?
Thyme thrives indoors with 6+ hours of sunlight daily (a south-facing window or grow light works). Use well-draining soil and a pot with drainage holes. Keep the soil slightly moist but never soggy, and fertilize lightly every 2-3 months with a balanced herb fertilizer. Bonus: Prune regularly to keep it compact and lush.
Why is my thyme turning yellow or brown? How do I fix it?
Yellowing leaves often signal overwatering or poor drainage, while brown tips usually mean underwatering or low humidity. Let the soil dry slightly between waterings, and ensure your pot has drainage. If the soil feels soggy, repot with fresh, well-draining potting mix. Pro tip: Mist leaves occasionally in dry climates to boost humidity!
What’s the best alternative if thyme won’t grow in my climate?
If your zone is too cold (below Zone 5) or too wet, try oregano or marjoram—they’re hardy and drought-tolerant. For a similar flavor, French tarragon or summer savory are great substitutes. Just check their light and soil needs!
How do I preserve homegrown thyme for later use?
Preserve thyme’s flavor by drying (tie sprigs and hang upside down in a dark, dry place for 2 weeks) or freezing (chop leaves and store in ice cube trays with water or oil). For freshness, freeze whole sprigs in a bag—they’ll last 6+ months! Bonus: Dry thyme keeps its aroma for up to a year.
Wrapping up and next steps
Growing thyme after thyme isn’t just about harvesting fresh herbs—it’s about embracing a low-maintenance, rewarding garden experience that pays off year after year. Whether you’re a seasoned gardener or a beginner, this versatile herb thrives with minimal effort, offering flavor, fragrance, and beauty with every snip.
Now that you’re armed with the right tools, tips, and troubleshooting know-how, roll up your sleeves and plant that first cutting—your kitchen (and taste buds) will thank you!
Ready to dive in? Start with a single pot or patch and let thyme’s resilience inspire your green thumb. Happy growing—one harvest at a time! 🌱✨