
Vegetables
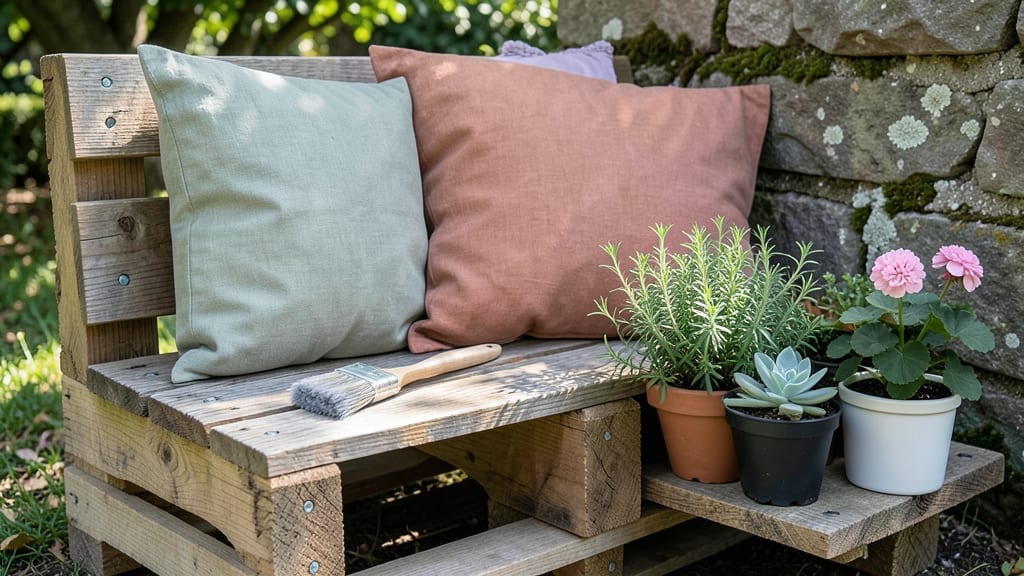
Transforming old pallets into a rustic bench using pallets saves money and adds charm to your outdoor space. 🌿 I've turned forgotten wood into a functional planter that doubles as seating—perfect for small gardens or patios where space is precious. The best part?
You're upcycling materials that would otherwise end up in a landfill. Start with heat-treated pallets (marked "HT") to avoid toxic chemicals, then sand them smooth for a comfortable surface. A quick coat of outdoor sealant keeps the wood weather-resistant and extends its life for years.
You'll end up with a sturdy bench that holds pots or serves as a cozy spot to enjoy your garden. The design works equally well as a standalone piece or against a fence, creating instant visual interest.
My own bench now holds herbs and flowers while providing seating for morning coffee. It's the kind of project that makes your garden feel more intentional and welcoming. Works for any outdoor space, from urban balconies to country backyards. Here's how to build yours!
📚 In This Guide
- What you need
- Instructions
- Tips and common mistakes
- Wrapping up and next steps
What you need
- ● Wooden pallets: 2–3 standard-sized pallets (heat-treated or stamped "HT" to ensure safety). Avoid chemically treated pallets (marked "MB" or "CH").
- ● Sandpaper: 80- and 120-grit (1–2 sheets per pallet for smoothing rough edges).
- ● Outdoor wood stain or paint: 1–2 gallons (weather-resistant, like spar urethane or exterior-grade paint).
- ● Wood screws: 2.5–3-inch deck screws (1–2 lbs box, corrosion-resistant like galvanized or stainless steel).
- ● Drill & drill bits: Cordless drill (1/4" and 3/16" bits for screws).
- ● Measuring tape: 16-foot tape (for precise cuts and spacing).
- ● Saw: Circular saw or handsaw (for cutting pallet wood to size).
- ● Wood glue: 1 small bottle (for extra reinforcement at joints).
- ○ Hinges (optional for lift-up seat): 2 heavy-duty hinges (if designing a bench with a removable seat).
- ● Clamps: 2–4 adjustable clamps (for securing pieces during assembly).
- ● Paintbrush or roller: 2-inch angled brush or foam roller (for smooth stain/paint application).
- ● Level: 4-foot level (to ensure your bench sits evenly).
- ● Pallet jack or friends with a truck: For heavy lifting! (Pallets weigh ~40–50 lbs each—teamwork makes the dream work 💪).
- ● Staple gun & landscape fabric: For attaching cushions or lining the planter section (if adding greenery).
Step-by-Step instructions for building a rustic pallet bench
Turn those old pallets into a charming garden bench with just a few tools and some elbow grease.
🪴 Step 1: Gather and Prep Your Pallets
Start by finding 2-3 clean, sturdy pallets—check local listings, construction sites, or even your neighbor’s recycling bin. Avoid chemically treated pallets (marked with "MB" stamps) and choose ones with solid, intact slats. Use a screwdriver or pry bar to remove any loose or broken boards, keeping the best pieces for your project.
Sand any rough edges or splinters with 80-grit sandpaper—this makes handling safer and ensures your bench won’t snag on clothing or skin. I like to work outside while sanding to avoid dust buildup indoors. If your pallets have nails or staples, remove them completely for a cleaner look and safer build.
✂️ Step 2: Cut and Assemble the Frame
Measure and mark your pallet pieces to create a bench frame about 4 feet long, 18 inches wide, and 18 inches tall. You’ll need two long side pieces (4 feet), two short end pieces (18 inches), and two legs (16 inches). Use a hand saw or circular saw to cut the pieces—measure twice, cut once, to avoid waste.
Lay out the pieces on a flat surface and pre-drill 1/4-inch holes where the corners meet to prevent wood splitting. Secure the frame with 2-inch deck screws or galvanized nails, driving them in at a slight angle for extra strength. Check for square by measuring diagonally—both sides should be equal length.
🌿 Step 3: Attach the Seat and Backrest
For the seat, use two 4-foot pallet slats spaced about 4 inches apart and screwed into the frame. If your pallets have uneven gaps, fill them with scrap wood strips to create a smooth surface. For the backrest, attach three vertical slats (about 12 inches tall) to the back of the frame, spacing them evenly for support.
Leave a 2-inch gap between the seat and backrest for comfort. Use 2-inch wood screws to secure everything—pre-drilling holes first prevents cracking. Test the bench by sitting on it before finalizing screws. If it wobbles, reinforce the frame with additional corner brackets or wooden blocks glued and screwed underneath.
💧 Step 4: Sand, Seal, and Weatherproof
Once assembled, sand the entire bench again with 120-grit sandpaper to smooth any rough spots. Wipe away dust with a damp cloth before applying a non-toxic wood sealant or outdoor paint—this protects against moisture and extends the bench’s life. I prefer a semi-transparent stain to keep the rustic look while adding durability.
Let the sealant dry completely (24 hours) before placing the bench outdoors. If you want extra longevity, add plastic feet to the legs to prevent water damage from ground contact. Avoid placing it directly on grass or soil—elevate it slightly with bricks or pavers for airflow underneath.
☀️ Step 5: Position and Enjoy Your New Bench
Find the perfect spot in your garden—near a shady tree, under a pergola, or alongside a flower bed. The bench should be level (use a spirit level or eyeball it against a wall). If needed, adjust the legs by sanding them down or adding wood shims underneath.
Fill the gaps between slats with mulch or small rocks to deter pests and add a finished look. Now, sit back and enjoy your zero-cost, upcycled garden bench—it’s sturdy, stylish, and perfect for relaxing with a cup of tea or tending to your plants.
Tips & tricks for perfect pallet bench building
Here's what nobody tells you about turning pallets into a sturdy, stylish garden bench—tricks that'll save you time and frustration.
Pallet Selection Tip: Look for pallets with uniform slats and minimal damage—these give you the cleanest finished look. I've found that wooden pallets with "HT" stamps (heat-treated) work better than chemically treated ones for outdoor projects. If you see pallets with "MB" markings, skip them entirely—they contain methyl bromide, which isn't safe for garden use. Check the underside too: solid, intact bottom boards mean fewer repairs later.
The Cutting Game-Changer: When marking your 4-foot side pieces and 18-inch end pieces in Step 2, use a straightedge and pencil to draw your cut lines—this prevents crooked cuts that'll make your bench wobble. I like to clamp a scrap board against the pallet as a guide while cutting. For the legs (16 inches), consider making them slightly tapered at the bottom—this adds stability and prevents the bench from rocking when someone sits on it.
Assembly Secret: Before you start screwing in Step 2, do a dry run with all your pieces laid out. This helps you visualize how everything fits together and lets you rearrange if needed. When pre-drilling your 1/4-inch holes, go slow—drilling too fast can cause the wood to split. I've ruined more pallet projects from over-drilling than from any other mistake. For extra strength, use a combination of screws and corner brackets at the frame joints.
Weatherproofing Wisdom: That 24-hour drying time for your sealant in Step 4 is non-negotiable—rushing this step means your bench won't weather well. If you're working in humid conditions, consider adding a second coat of sealant for extra protection. For a more natural look, try a clear matte finish instead of stain. And here's a pro move: brush on the sealant in the direction of the wood grain for a smoother, more professional appearance.
Pro Tips for Bench Using Pallets
- Here's what nobody tells you about turning pallets into a sturdy, stylish garden bench—tricks that'll save you time and frustration.
- Pallet Selection Tip: Look for pallets with uniform slats and minimal damage—these give you the cleanest finished look.
- The Cutting Game-Changer: When marking your 4-foot side pieces and 18-inch end pieces in Step 2, use a straightedge and pencil to draw your cut lines—this prevents crooked cuts that'll make your bench wobble.
Frequently asked questions
Got questions about building your own pallet bench planter? We’ve got answers!
Whether you’re curious about stability, materials, or creative tweaks, here’s what you need to know before getting started.
How long does it take to build a bench using pallets?
Most DIY pallet benches take 1–3 hours to complete, depending on your skill level and design complexity. Simple designs with basic tools (like sanding and screws) go faster, while adding planters or decorative touches may extend the time. Plan ahead if you’re short on tools—borrowing or renting can save you hours!
Are pallet benches safe for gardening?
Yes, but with a few precautions! Ensure pallets are heat-treated or stamped "HT" (avoid chemically treated ones). Sand rough edges and seal with outdoor paint or varnish to prevent splinters and weather damage. For extra stability, anchor the bench to the ground with stakes if placed in windy areas.
Can I use this bench for raised garden beds too?
Convert your pallet bench into a raised garden bed by lining the interior with landscape fabric, filling it with soil, and planting veggies or herbs. Just ensure the pallet is sturdy enough to hold the weight. For deeper beds, stack two pallets or add a wooden frame for extra support.
What if my pallets are damaged or uneven?
No problem! Uneven pallets can be leveled by stacking them or adding shims (like scrap wood) underneath. For damaged boards, reinforce weak spots with screws or replace sections entirely. A little creativity—like mixing pallets—can actually add rustic charm to your bench!
Are there cheaper alternatives to pallet benches?
If pallets aren’t available, try repurposing old crates, wooden planks, or even cinder blocks for a similar look. Check local "free" sections on Facebook Marketplace or Craigslist for discarded wood. Upcycling other materials keeps costs low while achieving the same cozy, functional vibe.
Wrapping up and next steps
Transforming pallets into a rustic garden bench isn’t just budget-friendly—it’s a creative way to breathe new life into old materials while adding charm to your outdoor space. 🌿 Whether you’re a seasoned DIYer or just starting, this project proves that sustainability and style go hand in hand.
Now that you’ve got the know-how, grab those pallets, roll up your sleeves, and turn your vision into reality!
Ready to take it further? Consider adding planters or cozy cushions to make your bench the heart of your garden oasis. Happy building!