
Vegetables
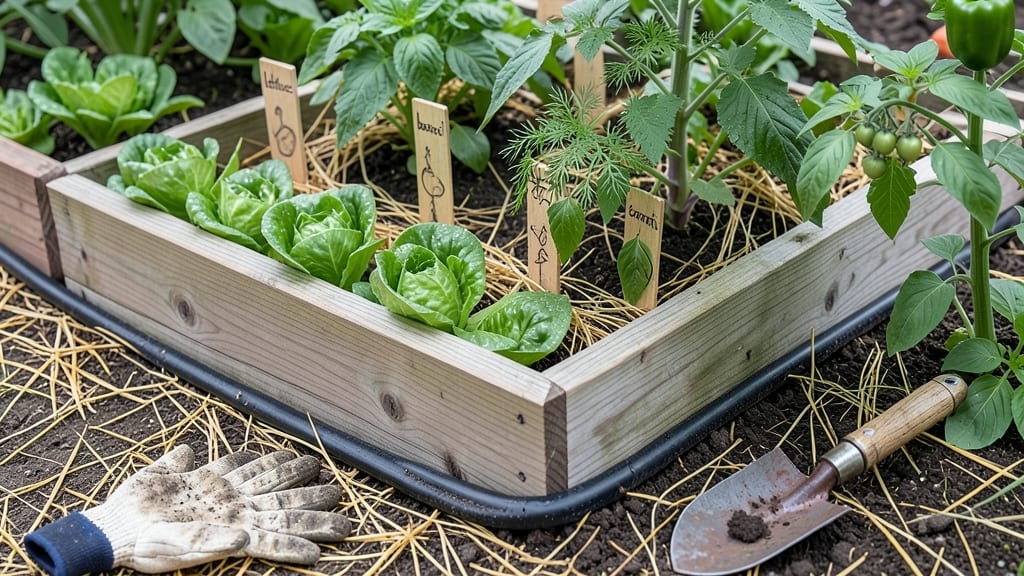
My raised vegetable beds transformed my gardening game—no more weeding, no more soil compaction, and yields that put my neighbors' gardens to shame. 🌱 The secret isn't just the elevated design; it's how you customize the soil, space, and sunlight to match what your veggies actually need.
Start with 4x8-foot beds for easy access and efficient space use—my second attempt at 3x6 feet was too cramped for tomatoes and peppers. Cedar or untreated lumber lasts years, and adding drip irrigation means less water waste.
The real magic happens when you layer compost-rich soil and mulch right from day one. By midsummer, you'll be harvesting 2-3 times more than in-ground rows, with fewer pests and zero back-breaking bending.
The beds stay warm longer in spring, so you can plant earlier, and the contained soil means you control nutrients perfectly. Works in small backyards, urban patios, or even as movable planters for sun-chasing plants. Here's how to design yours for maximum productivity!
📚 In This Guide
- What you need
- Instructions
- Tips and common mistakes
- Wrapping up and next steps
What you need
- ● Untreated lumber or cedar planks: 4 pieces (2x6” or 2x8” boards, 8–12 ft long, depending on bed size). Cedar resists rot naturally!
- ● Galvanized or stainless steel screws: 2.5” exterior-grade screws (12–20 screws, depending on bed dimensions).
- ● Landscape fabric or hardware cloth: Enough to line the bottom (prevents weeds and burrowing pests).
- ● High-quality soil mix: 2–3 cubic feet per square foot of bed space. Use a blend of topsoil, compost, and perlite (or pre-mixed raised bed soil).
- ● Garden hose or watering can: For initial watering and setup.
- ● Measuring tape, pencil, and level: To ensure straight, even sides and proper drainage.
- ● Work gloves and safety goggles: For handling screws and lumber.
- ● Corner brackets or L-brackets: Reinforces joints for sturdier beds.
- ● Drip irrigation kit or soaker hoses: Saves time and water in the long run.
- ● Wood preservative or sealant: Extends lumber life (skip if using cedar).
- ● Mulch (straw, wood chips, or leaves): Retains moisture and suppresses weeds.
- ● Raised bed frame kit: Pre-cut kits with assembly instructions (great for beginners!).
Step-by-step guide to building raised vegetable beds
Here's how to create a weed-free, high-yield growing space that works for any yard size.
🪴 Step 1: Choose and Prepare Your Location
Pick a spot that gets at least 6 hours of sunlight daily—most vegetables need full sun to thrive. I like to place mine where the morning sun warms the soil early, especially for cool-season crops like lettuce and peas. Avoid low spots where water pools after rain, as raised beds need excellent drainage.
Clear the area of grass, weeds, and debris down to bare soil. You'll want a flat, level surface to prevent tipping. If your yard has slopes, build beds along the contour lines to reduce erosion. I use a string line and stakes to mark a perfectly straight edge before laying down the first board.
🪴 Step 2: Build the Frame Structure
For a 4-foot by 8-foot bed (standard for easy reaching), use untreated cedar or redwood lumber—these resist rot naturally. Cut four 4-foot long boards for the short ends and two 8-foot long boards for the long sides. Assemble them into a rectangular frame using 2.5-inch deck screws or galvanized nails.
Elevate the frame at least 6 inches off the ground using cinder blocks, bricks, or short wooden legs. This prevents soil compaction from foot traffic and improves drainage. I like to leave a 1-foot gap between beds for easy access and tool storage. If building multiple beds, space them evenly for a clean, organized look.
🌱 Step 3: Fill With the Right Soil Mix
Fill the frame with a mix of equal parts topsoil, compost, and perlite or coarse sand—this ensures drainage while holding moisture. I start with a 2-inch layer of cardboard (no tape or glossy ink) to smother weeds, then add the soil mix in 4-inch layers, tamping each layer lightly to eliminate air pockets.
For the best results, use a minimum of 12 inches of soil depth—this accommodates root growth for deep vegetables like carrots and potatoes. Water the soil thoroughly after filling to help settle the mix. I like to let it sit for a week before planting to allow any remaining weeds to surface and die.
☀️ Step 4: Plan Your Planting Layout
Design your bed with companion planting in mind—pair fast-growing crops like radishes with slower ones like tomatoes to maximize space. I use a simple grid system: mark planting rows with a string line, then space seeds or seedlings according to their mature size. For example, place bush beans 4 inches apart in rows 18 inches apart.
Leave 12-18 inches of walkways between beds for easy maintenance. Mulch the soil surface with 2-3 inches of straw or wood chips to retain moisture, suppress weeds, and regulate soil temperature. This is where the zero-weed promise comes into play—mulch keeps the soil covered, preventing light from reaching weed seeds.
💧 Step 5: Water and Maintain for Long-Term Success
Water immediately after planting to settle the soil around roots. Use a soaker hose or drip irrigation to deliver moisture directly to the roots without wetting the leaves—this reduces disease risk. Water deeply 1-2 times per week, depending on rainfall, until the soil is 6-8 inches deep and evenly moist. You'll know it's right when water runs out the bottom of the bed.
Monitor the bed weekly for pests or nutrient deficiencies. Add a 1-inch layer of compost around plants in early spring and late summer to replenish nutrients. I also rotate crops yearly to prevent soil depletion and disease buildup. With proper care, your raised bed will produce bountiful harvests for years with minimal weeding.
Tips & tricks for perfect raised vegetable beds
Common pitfalls—and how to sidestep every one. Real talk: Building raised beds sounds simple, but small mistakes can turn your project into a headache. Here's what nobody tells you about making them right the first time.
Location is Everything: That 6 hours of sunlight requirement isn't just a suggestion—it's non-negotiable for most vegetables. I learned this the hard way after planting tomatoes in partial shade where they produced tiny, bitter fruits. For cool-season crops like lettuce and peas, morning sun is especially important to prevent bolting. If your yard has afternoon shade, consider building beds along the north side of structures to catch those early rays.
Frame Stability Matters: When elevating your 4-foot by 8-foot frame 6 inches off the ground, don't skimp on support. I've seen beds collapse under the weight of wet soil when using flimsy supports. Use cinder blocks or bricks at all four corners and add a center support if your frame feels wobbly. For extra stability, consider using 2x12 lumber instead of 2x6s—it handles the weight better and lasts longer.
Soil Layering Secret: The 4-inch layers of soil mix aren't just about depth—they're about creating the perfect environment. When tamping each layer, use the back of a shovel or your boot to press firmly but not compact too tightly. Too much pressure creates air pockets that prevent root growth, while too little leaves gaps that dry out quickly. Think of it like making a firm mattress—not too soft, not too hard.
Mulch Maintenance: That 2-3 inches of straw or wood chips isn't just for looks—it's your weed barrier. But here's the catch: refresh it every 3-4 months or after heavy rains. I've seen mulch break down into a thick mat that actually prevents water from reaching the soil. When refreshing, pull back the old mulch, fluff the soil underneath, then add fresh mulch to maintain that zero-weed promise.
Pro Tips for Raised Vegetable Beds
- Common pitfalls—and how to sidestep every one. Real talk: Building raised beds sounds simple, but small mistakes can ...
- Location is Everything: That 6 hours of sunlight requirement isn't just a suggestion—it's non-negotiable for most veg...
- Frame Stability Matters: When elevating your 4-foot by 8-foot frame 6 inches off the ground, don't skimp on support. ...
Frequently asked questions
Got questions about raised vegetable beds? You’re not alone! Here are answers to the most common queries to help you get started with confidence.
What’s the best size for a raised vegetable bed?
Aim for 4’ x 8’ (the standard wheelbarrow-friendly size) to balance accessibility and space efficiency. For smaller gardens, 3’ x 6’ works well—just ensure you can reach the center without stepping inside. Pro tip: Avoid beds wider than 4’ to prevent soil compaction and uneven watering.
When is the best time to build raised beds?
Build in early spring or late fall to let the soil settle before planting. If starting in summer, water thoroughly and mulch to retain moisture. Fall construction gives soil time to decompose and warm up naturally—ideal for spring planting!
Are raised beds more expensive than in-ground gardening?
Upfront costs are higher (materials like lumber or cinder blocks), but they pay off long-term. Reduced weeds, fewer pests, and extended growing seasons often mean higher yields per square foot. Reuse materials (e.g., untreated wood or bricks) to cut costs!
How do I prevent pests in raised beds?
Use row covers, companion planting (e.g., marigolds with tomatoes), and diatomaceous earth for bugs. Elevation deters burrowing pests like gophers, but add hardware cloth at the bottom if needed. Pro tip: Healthy soil = fewer pests—amend with compost regularly!
Can I use raised beds for containers or small spaces?
Window-box-style beds
or vertical planters work great for balconies or patios. Choose self-watering designs (like fabric grow bags) for herbs or greens. Just ensure 6+ inches of soil depth for root crops like carrots.
What if my soil drains too fast or stays soggy?
For fast-draining soil, mix in peat moss or coconut coir. For poor drainage, add perlite or compost to improve aeration. Elevate beds on gravel or landscape fabric if waterlogging is an issue. Test soil moisture weekly—adjust as needed!
Wrapping up and next steps
Raised vegetable beds are a game-changer for gardeners—offering higher yields, easier weed control, and healthier soil with minimal effort. Whether you're a beginner or a seasoned gardener, these elevated plots make growing vegetables more efficient and rewarding. 🌱
Ready to elevate your garden? Start small—build one bed this season, experiment with your favorite veggies, and watch your harvest thrive! For even better results, track your progress and adjust next year based on what works best for your space and climate.