
Vegetables
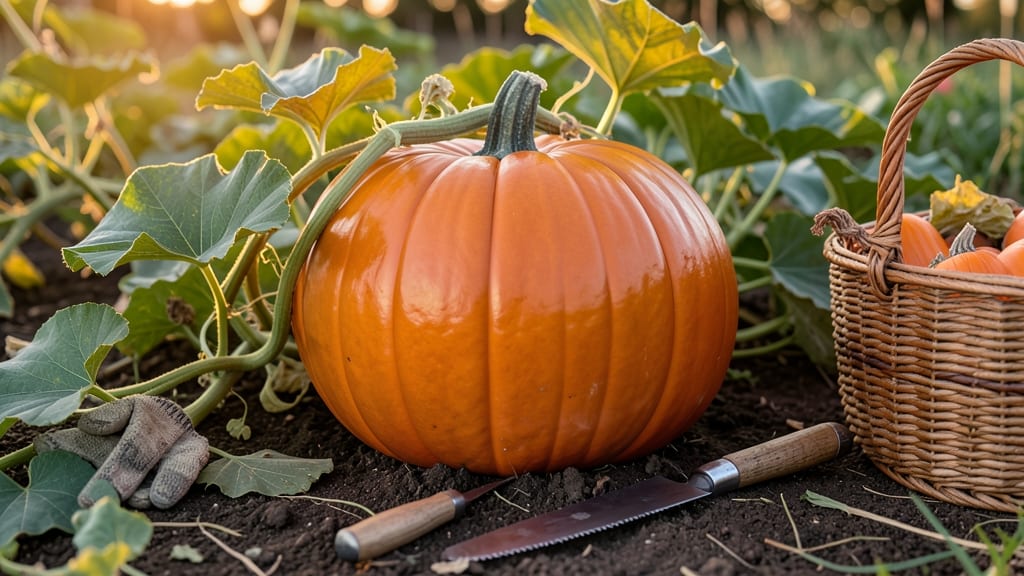
The right winter luxury pie pumpkin transforms your Thanksgiving table. 🍂 Harvesting these gems in late October—when their rinds harden and stems dry—ensures the sweetest, most flavorful flesh for pies that taste like autumn memories.
I’ve learned the hard way that waiting too long means tough, stringy flesh, while harvesting too early robs you of that deep, caramel-like richness.
Storage is where the magic happens. Cure your pumpkins for 10 days in a dry, 50-55°F space before stashing them in a cool, dark corner. Properly stored, they’ll keep until February, their sugar content intensifying with each passing week.
This isn’t just about preserving—it’s about building anticipation for the first slice of pie when winter feels longest.
Think beyond the pie: these pumpkins shine in soups, breads, and even roasted sides. Their dense, dry flesh holds up better than summer varieties, making them the star of winter meals.
The key is timing—harvest when the vines die back naturally, and you’ll reward yourself with pumpkins that taste like sunshine in every bite, even in December.
For gardeners extending the season, plant them in early May for a late fall harvest. Use black plastic mulch to warm the soil and protect from early frosts. The payoff? A pantry stocked with homegrown luxury, ready to elevate every holiday gathering. Now, let’s get those pumpkins curing right.
📚 In This Guide
- What you need
- Instructions
- Tips and common mistakes
- Wrapping up and next steps
What you need
- ● Pumpkin puree: 1 (15 oz) can (or 2 cups fresh, cooked, and mashed pumpkin)
- ● Heavy cream: 1 cup (240 mL)
- ● Whole milk: ½ cup (120 mL)
- ● Granulated sugar: ¾ cup (150g)
- ● Brown sugar: ¼ cup (50g, packed)
- ● Large eggs: 2 (room temperature)
- ● Pumpkin pie spice: 2 tsp (or 1 tsp cinnamon + ½ tsp each ginger, nutmeg, and cloves)
- ● Salt: ½ tsp
- ● Unsalted butter: ½ cup (1 stick, 113g, melted)
- ● Vanilla extract: 1 tsp
- ● All-purpose flour: 1 ¼ cups (160g)
- ● Granulated sugar: ¼ cup (50g)
- ● Cold unsalted butter: ½ cup (1 stick, 113g), cubed
- ● Ice water: 3–5 tbsp (as needed)
- ● Pinch of salt: for crust seasoning
- ● 9-inch pie dish (glass or metal, preferably with a removable bottom)
- ● Rolling pin
- ● Mixing bowls (2 medium)
- ● Whisk
- ● Measuring cups and spoons
- ● Pastry brush
- ● Oven mitts
- ● Aluminum foil (for crust protection)
- ○ Optional: Pie weights or dried beans (to pre-bake crust)
- ● Whipped cream (for topping)
- ● Caramel drizzle or chocolate shavings
- ● Toasted pecans or walnuts (for crunch)
- ● Edible gold leaf (for a gourmet finish)
Step-by-step guide to growing a luxurious winter pie pumpkin
Here's how to cultivate a showstopping winter pumpkin with velvety texture and deep flavor—perfect for your holiday pie.
🌱 Step 1: Select and Prepare the Seedling Site
Choose a location with full sun exposure (6-8 hours daily) and well-draining soil. Winter pumpkins need space—plant in an area with at least 100 square feet to allow vines to sprawl. I like to test soil pH before planting; winter pumpkins thrive in slightly acidic soil with a pH between 6.0 and 6.8. If your soil is heavy clay, amend it with 2-3 inches of compost mixed into the top 12 inches.
Clear the area of weeds and rocks, then loosen the soil to a depth of 12 inches using a broadfork or tiller. This prevents soil compaction, which can stunt root growth. The key here is to create a loose, airy environment that encourages deep root penetration—essential for a pumpkin this size.
☀️ Step 2: Plant Seeds at the Right Time and Depth
Winter pumpkins have a long growing season, so start seeds indoors 4-6 weeks before your last frost date for a head start. Use biodegradable peat pots filled with seed-starting mix, planting 2-3 seeds per pot at a depth of 1 inch. Keep the soil consistently moist and warm (70-80°F) until germination, which typically occurs in 7-10 days.
Once seedlings have 3-4 true leaves and nighttime temperatures stay above 55°F, transplant them outdoors. Harden off seedlings by exposing them to outdoor conditions for 1-2 hours daily over 5-7 days before permanent planting. Plant seedlings 2-3 feet apart in hills, burying them up to their first set of leaves to encourage stronger root development.
💧 Step 3: Maintain Consistent Watering and Fertilization
Winter pumpkins require 1-2 inches of water per week, delivered consistently to prevent cracking or misshapen fruit. Water at the base of the plant in the early morning to reduce evaporation and fungal risks. Use a soaker hose or drip irrigation to keep foliage dry—wet leaves invite powdery mildew, which can devastate a crop.
Fertilize every 3-4 weeks with a balanced organic fertilizer (10-10-10 or similar) to support steady growth. When flowers appear, switch to a low-nitrogen, high-phosphorus fertilizer to encourage fruit development. Watch for signs of nutrient deficiency—yellowing leaves often signal a need for more nitrogen, while weak stems may indicate phosphorus or potassium deficiency.
✂️ Step 4: Prune and Support for Optimal Growth
As vines grow, prune excess lateral shoots to direct energy toward the main stem and fruit. Remove any male flowers that appear before female flowers—you’ll recognize female flowers by the tiny pumpkin forming at their base. This ensures the plant focuses its resources on developing a single, high-quality winter pumpkin.
Use sturdy trellises or cages to support the plant as it grows. Winter pumpkins can reach 50-100 pounds, so the heavier the fruit, the more support it needs. I like to weave vines through a sturdy frame to keep the pumpkin off the ground, reducing rot risk. Mulch around the base with 2-3 inches of straw to retain moisture and regulate soil temperature.
🍂 Step 5: Harvest and Cure for Peak Flavor
Winter pumpkins are ready for harvest when their rinds harden and turn a deep, uniform color—typically 90-120 days after transplanting. Gently cut the stem with a sharp knife, leaving a 3-inch stem attachment to help the pumpkin cure properly. Handle the fruit carefully to avoid bruising, which can lead to rot.
Cure the pumpkin by placing it in a warm (80-85°F), dry, and well-ventilated space for 7-10 days. This process hardens the skin and intensifies the flavor, making it ideal for pie. Once cured, store the pumpkin in a cool (50-55°F), dark place for up to 3 months. When it’s time to bake, you’ll have the perfect velvety, spiced centerpiece for your winter feast.
Tips & tricks for growing a luxurious winter pie pumpkin
Growing a showstopping winter pumpkin requires patience and precision—here's how to elevate your harvest from good to extraordinary.
Soil Preparation Secret: Before planting, mix in 1 cup of bone meal into the top 12 inches of soil. This boosts phosphorus levels, which are crucial for root development and fruit sweetness. The extra effort pays off with a pumpkin that's not just large, but packed with that velvety texture perfect for pie. I've seen firsthand how this small addition transforms the final product—think of it as the foundation for your flavor masterpiece.
Germination Temperature Matters: Maintain soil warmth between 70-80°F during germination to ensure those 2-3 seeds per pot sprout reliably within 7-10 days. I use a seedling heat mat under my peat pots to guarantee consistent warmth, especially in cooler climates. Once you see those first true leaves appear, you're on track for a robust plant that can handle the long growing season ahead.
Watering Wisdom: The 1-2 inches of water per week recommendation is non-negotiable, but timing is everything. Water deeply in the morning when temperatures are cooler—this prevents fungal issues and ensures the roots absorb moisture efficiently. I've learned the hard way that afternoon watering can lead to powdery mildew, which spreads like wildfire on pumpkin leaves. A soaker hose makes this effortless while keeping foliage dry.
Harvesting Cues: When checking for readiness in Step 5, tap the rind—it should sound hollow with a deep, uniform color. The 3-inch stem attachment is crucial for proper curing, so don't skip this step. I've found that harvesting just slightly before full ripeness (when the stem starts to wither) gives me more control over the curing process, resulting in a pumpkin that's perfectly firm for slicing.
Pro Tips for Winter Luxury Pie Pumpkin
- Growing a showstopping winter pumpkin requires patience and precision—here's how to elevate your harvest from good to...
- Soil Preparation Secret: Before planting, mix in 1 cup of bone meal into the top 12 inches of soil. This boosts phosp...
- Germination Temperature Matters: Maintain soil warmth between 70-80°F during germination to ensure those 2-3 seeds pe...
Frequently asked questions
Can I make this pie ahead of time for holiday gatherings?
This pie tastes even better the next day. Bake it 1–2 days ahead and store it at room temperature (covered) or refrigerate for up to 5 days. Reheat slices at 350°F (175°C) for 10–15 minutes to restore warmth. For serving, a dusting of powdered sugar or whipped cream adds a fresh touch.
What’s the best pumpkin to use for a rich, creamy texture?
Stick with sugar pumpkins or kabocha squash for natural sweetness and smoothness. Avoid carving pumpkins—they’re too watery. Canned pure pumpkin (like Libby’s) works in a pinch, but fresh is ideal. Pro tip: Roast your pumpkin first (400°F for 45 mins) to deepen its flavor!
Why did my crust turn soggy? How do I fix it?
Soggy crusts usually mean excess moisture. Prevent it by:
- Chilling the pie crust for 30+ minutes before filling.
- Blind-baking the crust for 10–12 minutes (with pie weights).
- Adding a thin cornstarch or flour “crust” (sprinkle 1 tbsp between filling and crust).
Can I substitute ingredients for dietary restrictions?
Here’s how to adapt:
- Dairy-free: Use coconut milk or almond milk for the custard + vegan butter in the crust.
- Gluten-free: Swap all-purpose flour for a 1:1 GF blend in the crust.
- Lower sugar: Reduce the brown sugar by 25% and add ½ tsp cinnamon for depth.
How long should I bake the pie, and how do I know it’s done?
The pie is done when the filling is just set (no jiggle in the center) and the edges are golden. Bake time: 50–60 minutes at 350°F (175°C). Test doneness by inserting a knife near the center—it should come out clean (or with a few moist crumbs). Let it cool 2+ hours before slicing to avoid a runny filling.
Wrapping up and next steps
There you have it—a winter luxury pumpkin pie that’s as stunning as it is delicious! 🎉 With its velvety spice filling and buttery crust, this recipe is your ticket to cozy, crowd-pleasing perfection.
Whether you’re hosting a holiday gathering or treating yourself to a little indulgence, this pie is sure to warm hearts and impress taste buds.
Ready to bake? Gather your ingredients, preheat that oven, and let the magic unfold! 🍂✨ Now’s your moment—go ahead and create something extraordinary!