
Vegetables
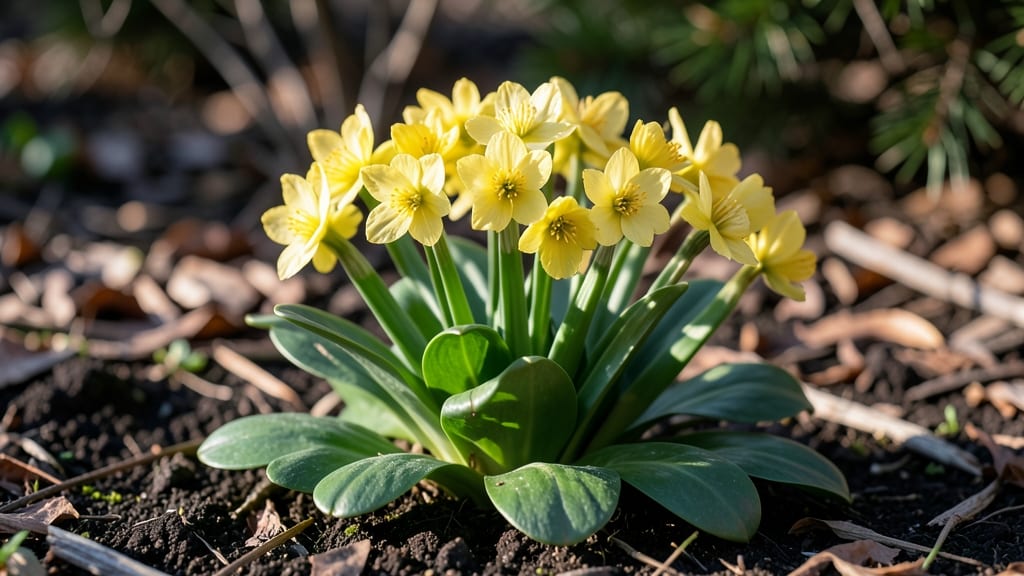
Winter aconite (Eranthis hyemalis) punches through snow with cheerful yellow blooms that feel like nature’s secret gift. 🌱 I’ve grown these delicate bulbs for years, and their early spring appearance never fails to lift my spirits—even when the rest of the garden is still asleep.
The key to success? Planting them in late summer when most gardeners have already put their tools away.
These bulbs thrive in partial to full shade, making them perfect for under trees or along north-facing walls where other plants struggle. Well-draining soil is non-negotiable—waterlogged roots spell disaster—but once established, they’re shockingly low-maintenance. I’ve seen them multiply over time, popping up in unexpected spots like little surprises.
By late winter, you’ll watch those glossy green leaves unfurl, followed by bright yellow flowers that seem to glow against bare soil. The blooms last just a few weeks, but their early appearance makes them worth every bit of patience.
A light top-dressing of compost in early spring keeps them happy without extra fuss.
If you’ve ever wanted a garden that wakes up before the snow melts, winter aconite delivers. The secret? Plant them deep enough (4-6 inches) and give them space—they’ll reward you with years of cheerful color. Here’s how to make it happen without the guesswork.
📚 In This Guide
- What you need
- Instructions
- Tips and common mistakes
- Wrapping up and next steps
What you need
- ● Winter Aconite tubers: 3–5 healthy, firm tubers (choose organic if possible).
- ● Well-draining potting mix: 1–2 gallons (use a blend of peat, perlite, and compost for aeration).
- ● Containers or garden bed: Containers: 6–8" deep pots with drainage holes (3–5 tubers per pot).
- ● Garden bed: A sunny spot with loose, sandy soil (amend with compost if needed).
- ● Watering can or spray bottle: For gentle hydration (avoid soggy soil!).
- ○ Mulch (optional but helpful): A thin layer of straw or shredded leaves to insulate tubers in colder climates.
- ● Garden trowel or small shovel: For planting tubers 2–3" deep.
- ○ Gloves (optional): To protect hands from sharp soil or cold.
- ● Sunlight access: At least 4–6 hours of partial shade (morning sun is ideal).
- ● Patience! Winter Aconite thrives in late winter/early spring—plant tubers in fall (September–October) for spring blooms.
- ● Slow-release fertilizer: A pinch of 10-10-10 mixed into soil at planting time.
- ● Cold frame or cloche: To extend the blooming season in harsh winters.
- ● Garden journal: Track blooming times and tuber health for future reference!
Step-by-step instructions for planting winter aconite (Eranthis hyemalis)
Here's how to grow these cheerful winter blooms with minimal fuss—just follow these simple steps.
🌱 Step 1: Choose the Right Location and Soil
Winter aconite thrives in partial shade to full shade, making it perfect for under deciduous trees or along north-facing walls. The key is well-draining soil—these bulbs rot quickly in soggy conditions. If your soil drains poorly, mix in sand or grit to improve airflow around the roots.
I always test the soil by digging a small hole and filling it with water. If it drains within 10-15 minutes, it’s ready. If not, amend it before planting. The bulbs prefer slightly acidic to neutral soil (pH 6.0-7.0), so a light application of composted leaf mold helps mimic their natural woodland habitat.
🪴 Step 2: Plant the Bulbs at the Right Depth and Spacing
Plant the 2-inch-wide bulbs about 3 inches deep—deeper than most spring bulbs, since they’ll sit dormant through winter. Space them 4-6 inches apart in clusters of 3-5 for a natural, drifty look. I like to plant them in early fall (September-October), giving the roots time to establish before frost.
Don’t cover the bulbs with mulch right away—wait until after the first hard freeze. This prevents rodents from digging them up. If you’re planting in a windy spot, tuck the bulbs into a shallow trench to keep them secure until the ground freezes.
☀️ Step 3: Water and Protect Through Winter
After planting, water deeply once to settle the soil around the bulbs. Then, let nature take over—winter aconite stores moisture in its bulbs and doesn’t need extra water until spring. If your winters are mild with little snow, give them a light drink in late winter (February) to encourage blooming.
Here’s the thing—these bulbs need cold to flower. If you live in a Zone 8 or warmer, protect them with a thick layer of mulch (4-6 inches) after the first frost. I use shredded bark or straw, piling it high enough to insulate the soil. In colder zones, they’ll handle snow naturally—just avoid heavy foot traffic.
⏰ Step 4: Enjoy Blooms and Maintain for Next Year
The bright yellow flowers appear in late winter to early spring (February-March), often pushing through melting snow. Once they fade, leave the foliage alone—it photosynthesizes for 6-8 weeks, feeding the bulb for next year’s blooms. Only remove dead leaves when they turn brown and crispy (late spring).
After flowering, fertilize lightly with a balanced, slow-release bulb food in early fall. I sprinkle a quarter-inch layer of compost around the base and scratch it into the top inch of soil. Avoid high-nitrogen fertilizers—they encourage leaf growth at the expense of flowers.
🌿 Step 5: Divide and Expand Every 3-4 Years
Winter aconite multiplies quickly, so divide clumps in early fall when the foliage yellows. Dig up the bulbs, separate the offsets, and replant the healthiest ones. I replant half the clump each year to avoid disturbing the whole patch—this keeps the display consistent while expanding your garden.
If you notice fewer blooms over time, it’s a sign the bulbs are crowded. Dividing also prevents disease, since old clumps can harbor fungal issues. Store any extra bulbs in a cool, dry place (40-50°F) until replanting in fall.
Tips & tricks for perfect winter aconite planting
These simple strategies will help your winter aconite thrive and deliver those stunning yellow blooms year after year.
Soil Prep Secret: When testing your soil's drainage in that 10-15 minute water test, look for clear water at the bottom of the hole—not murky water. If your soil drains too quickly (under 5 minutes), add a bit of organic matter like compost to help retain moisture without suffocating the roots. The goal is drainage that mimics their woodland habitat without becoming waterlogged.
Planting Depth Insight: Those 3-inch-deep bulbs need that extra depth because they'll be exposed to freeze-thaw cycles all winter. Think of it like tucking them into a cozy blanket—the deeper they go, the better they'll survive winter's ups and downs. If your soil is particularly heavy, consider planting in a raised bed for even better drainage.
Winter Protection Hack: For Zone 8 gardeners, that 4-6 inch mulch layer is your best friend. I like to use straw because it breaks down slowly and adds organic matter as it decomposes. Pro tip: Spread a thin layer of mulch now (after planting) to protect the soil surface, then add more after the first frost for maximum insulation.
Foliage Timing: Those 6-8 weeks of foliage are non-negotiable for next year's blooms. Set a reminder for when you planted them—subtract 6 weeks to know when to stop cutting back. The leaves are working hard to feed the bulb, so resist the urge to tidy up too early. You'll know it's time when the leaves turn completely brown and crispy, not just yellow.
Pro Tips for Winter Aconite Eranthis Hyemalis
- These simple strategies will help your winter aconite thrive and deliver those stunning yellow blooms year after year.
- Soil Prep Secret: When testing your soil's drainage in that 10-15 minute water test, look for clear water at the bott...
- Planting Depth Insight: Those 3-inch-deep bulbs need that extra depth because they'll be exposed to freeze-thaw cycle...
Frequently asked questions
about growing Winter Aconite (Eranthis hyemalis)—because even the hardiest gardeners have questions! Here are answers to the most common ones to help you cultivate these cheerful early bloomers with confidence.When is the best time to plant Winter Aconite?
Plant Eranthis hyemalis in fall (September–October), about 6–8 weeks before the first frost. This gives the tubers time to establish roots before winter. Avoid planting in late fall or spring—they need cold stratification to thrive!
Can Winter Aconite survive harsh winters?
Yes! These hardy perennials tolerate USDA Zones 4–8 and even bloom through light snow. Just ensure they’re planted in well-draining soil to prevent rot. Mulch lightly in extreme cold for extra protection.
Why aren’t my Winter Aconite bulbs blooming?
Common culprits include:
- Too much shade—they need partial sun (4–6 hours/day).
- Improper planting depth—tubers should be 2 inches deep.
- Overcrowding—divide clumps every 3–4 years for better blooms.
- Lack of dormancy—they need winter cold to trigger flowers.
Are there alternatives to Winter Aconite for early spring color?
If you love early bloomers, try these Eranthis hyemalis lookalikes:
- Snowdrops (Galanthus)—delicate white flowers, shade-tolerant.
- Crocuses (Crocus)—vibrant purple/white blooms, deer-resistant.
- Winter Hellebore (Helleborus niger)—evergreen foliage with nodding flowers.
- Glory-of-the-Snow (Chionodoxa)—bright blue star-shaped blooms.
Are Winter Aconite bulbs toxic to pets or wildlife?
Yes, Eranthis hyemalis contains protoanemonin, a toxin that can irritate mouths/stomachs if ingested. Keep them away from dogs, cats, and small children. Plant in areas with limited access if pets roam freely.
Wrapping up and next steps
Winter aconite (Eranthis hyemalis) isn’t just a hardy plant—it’s a bold statement in your garden, defying winter’s chill with its cheerful yellow blooms.
Whether you’re a seasoned gardener or a curious beginner, adding this early spring gem is a rewarding way to bring color and life to your outdoor space. 🌱
Ready to plant your future sunshine? Start small with a few bulbs, experiment with companion plants, and soon you’ll have a winter garden that turns heads—and melts hearts. Grab your gloves and get growing!