
Vegetables
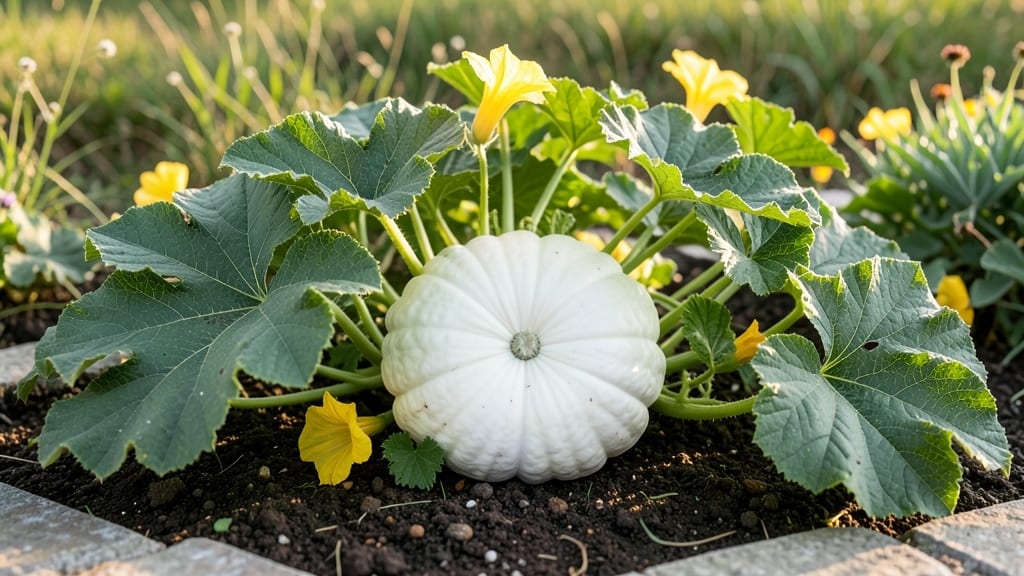
Growing white patty pan squash transforms your garden into a zero-fuss harvest machine—imagine 12-inch wide edible flowers that taste like sweet, buttery zucchini. 🌿 I’ve grown them for three seasons now, and they’ve never failed to deliver, even when other squash plants wilted in the heat.
The secret lies in their shallow roots and heat tolerance, making them perfect for both hot climates and cooler summers.
Start with well-draining soil mixed with compost, and plant seeds ½ inch deep after the last frost when soil reaches 60°F. They thrive in full sun (6-8 hours daily) and need consistent moisture—about 1 inch per week—but avoid soggy soil to prevent rot.
Mulch around plants to retain moisture and keep weeds at bay, and you’ll see first harvests in just 45-50 days.
📚 In This Guide
- What you need
- Instructions
- Tips and common mistakes
- Wrapping up and next steps
What you need
- ● White Patty Pan Squash Seeds: 5–10 seeds (start with a few to test viability; they’re easy to save and replant!)
- ● Well-draining potting mix or garden soil: 1–2 cubic feet (enrich with compost for nutrient-boosted growth 🌿)
- ● Containers or garden bed space: Containers: 5–10 gallon pots (with drainage holes) for each plant
- ● Garden beds: Full sun (6+ hours/day) and space 12–18 inches apart
- ○ Organic fertilizer (optional but recommended): Balanced 10-10-10 or compost tea for a nutrient kick
- ● Gloves & knee pads: For comfortable planting and weeding
- ● Trowel or small shovel: For transplanting seedlings
- ● Watering can or hose with gentle spray nozzle: Avoid blasting seeds!
- ● Mulch (straw or shredded leaves): 1–2 inches to retain moisture and suppress weeds
- ○ Trellis or stakes (optional): If growing in containers, lightweight supports help vines climb
How to grow white patty pan squash for continuous harvests
This squash thrives with minimal fuss—here's how to coax its prolific production all season long.
🌱 Step 1: Select and Prepare the Planting Site
White patty pan squash loves warmth and space, so choose a location that gets full sun (6-8 hours daily) and has well-draining soil. I always test soil pH first—aim for 6.0-6.8. If your soil is heavy clay, mix in 2-3 inches of compost to improve drainage and fertility.
This squash spreads aggressively, so give each plant 3-4 feet of space in all directions. If growing in containers, use at least a 15-gallon pot with drainage holes. I plant mine in raised beds where roots can spread freely without competing weeds.
🌱 Step 2: Plant Seeds After Frost
Wait until soil temperatures reach 70°F or warmer—cold soil delays germination and invites rot. Plant seeds 1 inch deep, spacing them 2-3 feet apart in rows 4-5 feet apart. I use a dibble tool to make clean holes without disturbing the soil surface.
Plant 3-4 seeds per hill and thin to the strongest seedling after germination. Thin carefully with scissors to avoid disturbing roots. Cover seeds lightly with soil and water gently to settle everything. Germination takes 7-14 days—be patient, especially in cooler spring soil.
☀️ Step 3: Provide Consistent Water and Support
Water deeply 1-2 times per week, aiming for 1 inch of water per week. Keep soil consistently moist but never soggy—this prevents blossom-end rot and powdery mildew. I water at the base in the morning to allow foliage to dry before evening, which reduces fungal diseases.
As vines spread, they'll need support. Install 5-foot-tall trellises or stakes when plants are 4-6 inches tall. Gently weave vines through trellis netting or tie them to stakes with soft plant ties. This keeps fruit clean, improves air circulation, and makes harvesting easier.
🌿 Step 4: Fertilize and Monitor Growth
Feed plants with a balanced organic fertilizer (10-10-10) when vines start running. I use 1 tablespoon per plant mixed into the soil around the base. Avoid high-nitrogen fertilizers—they promote leafy growth at the expense of fruit production.
Watch for squash bugs and cucumber beetles. Remove eggs by hand (they look like tiny footballs under leaves) and use row covers for young plants. Prune any yellowed or diseased leaves immediately with clean pruners to prevent spread. Healthy plants produce 50-100 squash per season.
⏰ Step 5: Harvest at Peak Ripeness
Harvest when squash are 3-4 inches wide, firm to the touch, and have a pale yellow-green color. Use a sharp knife to cut stems, leaving 1 inch of stem attached to the fruit. This prevents rot and makes storage easier.
Harvest every 2-3 days to encourage continuous production. Store in a cool, dry place for 1-2 weeks. For long-term storage, cure squash in a 80°F environment for 10 days before refrigerating. I always leave a few to mature fully on the vine—they'll develop sweet, nutty flavor and store for months.
Tips & tricks for growing white patty pan squash
These key strategies will help you maximize your harvest with minimal effort—trust me, your garden will thank you.
Soil Preparation Secret: Before planting, mix in 2-3 inches of compost into heavy clay soil to improve drainage and fertility. I also recommend adding a handful of bone meal at planting time—it provides phosphorus for strong root development and early vine growth. This step is especially important if your soil pH is below 6.0, as white patty pan thrives in slightly acidic conditions.
Germination Timing: The 7-14 day germination window can feel like forever, but there's a trick to speed things up. Soak seeds overnight in warm water before planting—this jumpstarts the process. Also, place a clear plastic dome or row cover over newly planted seeds to create a mini greenhouse effect, raising soil temperatures and encouraging faster sprouting. Just remember to remove it once seedlings emerge to prevent fungal issues.
Watering Wisdom: Those 1-2 weekly waterings should be deep and consistent, but timing matters just as much as quantity. I water my plants in the early morning so foliage has all day to dry, which dramatically reduces powdery mildew risk. For container growers, check soil moisture daily—15-gallon pots dry out faster than in-ground beds. A simple finger test (1-2 inches deep) tells you when it's time to water again.
Harvesting Hack: The 2-3 day harvesting interval might seem frequent, but it's what keeps your plants producing continuously. I've found that harvesting in the morning—when the fruit is cool and crisp—preserves quality better than waiting for afternoon heat. For long-term storage, focus on the 3-4 inch size range—these store best while maintaining their sweet flavor. If you notice any fruit starting to yellow beyond this size, harvest immediately to prevent over-maturation.
Pro Tips for White Patty Pan Squash
- These key strategies will help you maximize your harvest with minimal effort—trust me, your garden will thank you.
- Soil Preparation Secret: Before planting, mix in 2-3 inches of compost into heavy clay soil to improve drainage and f...
- Germination Timing: The 7-14 day germination window can feel like forever, but there's a trick to speed things up. So...
Frequently asked questions
Got questions about growing or using white patty pan squash? You’re not alone!
Here are answers to the most common queries—from planting to harvest—so you can enjoy this versatile veggie with confidence.
How long does it take for white patty pan squash to mature?
White patty pan squash typically matures in 70–90 days from transplanting, depending on your climate and growing conditions. Start seeds indoors 2–3 weeks before your last frost date, then transplant seedlings after all danger of frost has passed. Pro tip: Watch for the first female flowers (smaller than males) to appear—this signals fruit development is underway!
Can I grow white patty pan squash in containers?
This compact variety thrives in 5-gallon containers or larger with well-draining soil. Ensure pots have drainage holes and provide 6–8 hours of sunlight daily. Use a high-quality potting mix with compost, and fertilize lightly every 2–3 weeks. Troubleshooting: If squash struggle, check for root-bound roots or overwatering—containers dry out faster than garden beds!
What’s the best way to store harvested white patty pan squash?
Store unwashed squash in a cool (50–55°F), dark, and dry place (like a pantry or root cellar) for up to 2 weeks. For longer storage, blanch and freeze them—peel, slice, and plunge into boiling water for 3 minutes before freezing. Alternative: Use them fresh within 5–7 days for peak flavor and texture!
Why aren’t my white patty pan squash producing fruit?
Several factors can stall fruit production:
- Lack of pollination: Hand-pollinate flowers with a small brush if bees are scarce.
- Inconsistent watering: Keep soil evenly moist (not soggy) during flowering.
- Nutrient deficiencies: Add compost or a balanced fertilizer (like 10-10-10) if leaves yellow.
- Temperature stress: Squash thrive in 70–85°F; extreme heat or cold can halt growth.
What can I substitute for white patty pan squash in recipes?
If you can’t find white patty pan squash, try these flavorful and texturally similar swaps:
- Yellow patty pan squash (same shape, slightly sweeter).
- Zucchini or summer squash (milder, but great for grilling or sautéing).
- Hubbard or acorn squash (for baked dishes—adjust cooking time!).
- Cabbage or Brussels sprouts (for stir-fries or roasting).
Wrapping up and next steps
White patty pan squash is a versatile, low-maintenance superstar—perfect for gardeners and cooks alike! 🌱 Whether you’re drawn to its bold flavor, easy-growing nature, or nutrient-packed goodness, this squash delivers year after year with minimal fuss.
Ready to level up your harvests? Start by planting a few seeds this season, then experiment in the kitchen with its unique shape and taste.
🌟 Your Next Step:
- Pick a spot in your garden (or a container!) and get growing.
- Try a new recipe—roasted, stuffed, or even grilled!
- Share your harvest with friends (or save seeds for next year!).