
Vegetables
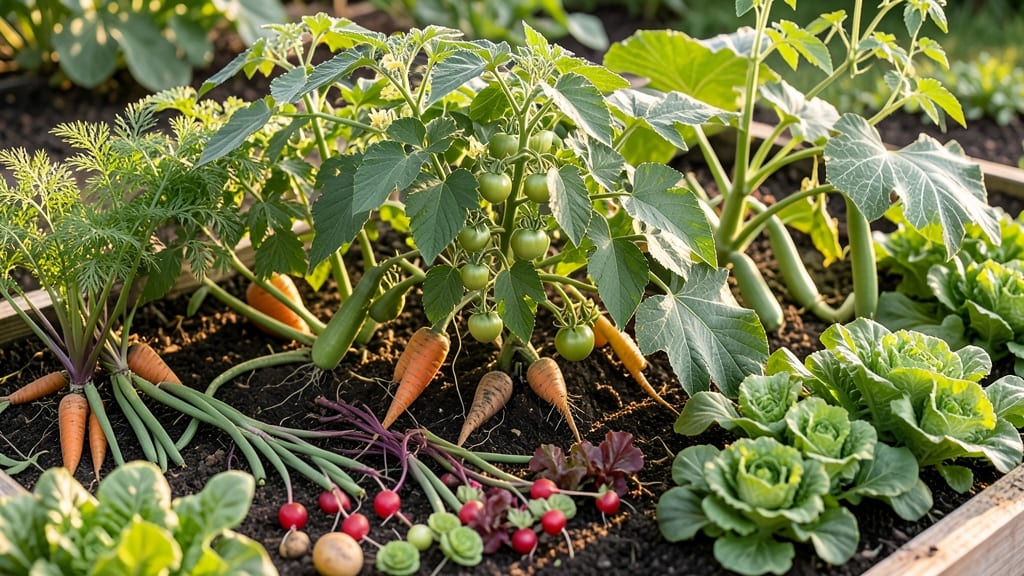
Growing vegetables in the ground gives you the most flavorful harvests with the least effort. 🌱 The secret lies in understanding which crops thrive best in loose, fertile soil—think carrots, potatoes, and heirloom tomatoes—plus a few simple soil prep tricks that make all the difference.
Most people skip soil testing or overlook drainage, which leads to stunted roots and wasted seeds. I learned the hard way when my first batch of potatoes grew misshapen because the soil was too dense. A simple fork test and compost mix changed everything—now my plants grow strong and productive.
You'll end up with vegetables that taste better than anything from the store, plus the satisfaction of pulling fresh produce straight from your own plot. The best part? Root crops store well for winter, so you can enjoy your harvest long after the growing season ends.
This method works for both beginners and experienced gardeners, whether you have a small backyard patch or a larger plot. Let’s get those roots growing!
📚 In This Guide
- What you need
- Instructions
- Tips and common mistakes
- Wrapping up and next steps
What you need
- ● Garden Soil: Loamy, well-draining soil (pH 6.0–7.0) – at least 10–12 inches deep.
- ● Compost or aged manure (5–10 gallons per 10 sq ft) for nutrient boost.
- ● Seeds or Seedlings: Carrots, beets, potatoes, radishes, turnips, or parsnips (choose heirloom or organic if preferred).
- ● Quantity: 1–2 lbs of seeds or 20–30 seedlings per 10 sq ft.
- ● Gardening Tools: Hand trowel (for precision planting).
- ● Garden fork (to loosen soil).
- ● Rake (for leveling beds).
- ● Watering can or hose with a gentle spray nozzle.
- ○ Protective Gear (Optional but Recommended): Garden gloves (to protect hands from thorns or soil).
- ● Knee pads (for comfort during planting/harvesting).
- ● Sunlight: Full sun (6–8 hours daily) for most root crops.
- ● Water Access: Consistent moisture (avoid soggy soil).
- ● Spacing: Follow seed packet guidelines (e.g., 2–4 inches apart for radishes, 12+ inches for potatoes).
- ○ Pest Control (Optional): Row covers or netting (to deter insects).
- ● Organic pest repellent (e.g., neem oil).
How to plan and plant root crops for consistent harvests
Here’s how I transform my garden into a year-round root-crop machine—no fancy tools, just smart timing and soil prep.
🌱 Step 1: Test and Amend Your Soil for Root Success
Root crops like carrots, beets, and turnips need loose, stone-free soil to grow straight and sweet. I start by digging a 6-inch deep trench and checking for rocks or clay clumps—anything larger than a pea will deform roots. If your soil feels dense when squeezed, mix in 2-3 inches of compost and fork it in until the top 12 inches are fluffy.
For sandy soil, add 1 part peat moss to 3 parts garden soil to help retain moisture without compacting. The goal is soil that crumbles easily between your fingers—roots should glide through it, not fight. Test your soil’s pH too; most root crops thrive in 6.0-7.0 range. If yours is off, a handful of lime (for acid) or sulfur (for alkaline) per square foot will balance it over time.
☀️ Step 2: Time Plantings for Overlapping Harvests
Root crops grow best in cool weather, so I stagger plantings every 2-3 weeks from early spring until 6 weeks before first frost. For example, I sow carrots in March, then again in May, and finally in July for a fall harvest. Beets and turnips can handle slightly warmer soil, so I plant them a week earlier than carrots or parsnips.
Use a hardware cloth barrier if slugs or cutworms are a problem—they’ll chew through young seedlings overnight. Water the soil 1 inch deep the day before planting, then sow seeds ½ inch deep in rows 12-18 inches apart. Thin seedlings to 2-3 inches apart once they’re 2 inches tall—this prevents crowding and ensures straight roots.
💧 Step 3: Water Deeply and Keep Soil Evenly Moist
Root crops need consistent moisture to prevent woody textures or cracking. I water 1 inch per week, aiming for the soil—not the leaves—to avoid fungal diseases. Use a soaker hose or drip irrigation to deliver water slowly at the base. The soil should feel damp 2 inches down; if it’s dry, roots will split or develop bitter flavors.
Mulch with 2 inches of straw or shredded leaves to lock in moisture and keep soil temperatures stable. This is especially critical during hot summers—uneven watering causes carrots to fork (split) or develop tough, stringy fibers. A thick mulch layer also suppresses weeds, which compete for nutrients and moisture.
✂️ Step 4: Harvest at Peak Maturity for Best Flavor
Most root crops improve in flavor after a frost, but don’t wait too long—overmature roots become woody or sprout. Carrots and beets are ready when their shoulders are 1 inch above soil level and roots feel firm when pressed. Turnips and rutabagas should be harvested before the greens bolt (send up flower stalks).
Pull roots gently but firmly—twisting can break them. Shake off excess soil and store in a cool, humid place (40-50°F) for up to 3 months. For long-term storage, cure beets and carrots by leaving them in the ground with just the tops exposed for 2-3 weeks before harvesting and storing. This toughens their skins naturally.
🌿 Step 5: Rotate Crops and Plan for Next Year
Root crops are heavy feeders and attract specific pests, so I rotate their planting spots yearly. After harvesting, I add 3-4 inches of compost to replenish nutrients and break up old root channels. Avoid planting root crops in the same spot again for 3 years—this prevents soil-borne diseases and nutrient depletion.
Save seeds from your best-performing plants for next season. Most root crops self-seed easily, but for heirloom varieties, let a few go to flower and dry the seeds in a paper bag. Label everything—next year’s garden will thank you for the forethought!
Tips & tricks for perfect root-crop planting
Here's the secret to turning your garden into a year-round root-crop powerhouse—without the guesswork.
Soil Texture Test: The key to straight, sweet roots starts with soil that feels like a cloud. After amending with compost as instructed, do this quick test: Grab a handful of soil and squeeze it—it should crumble apart easily when you open your hand. If it sticks together like wet sand, you need more compost. For sandy soil, that 1:3 peat moss mix is non-negotiable—it's the only way to prevent roots from drying out or splitting. I've seen carrots fork like lightning bolts when soil stays too dry, and nobody wants that.
Planting Precision: When sowing seeds at that ½-inch depth in Step 2, here's my trick: Use a stick or dowel to make small holes, then drop 2-3 seeds per hole. This gives you backup seedlings if some don't germinate. After thinning to 2-3 inches apart, water gently with a fine spray—no blasting! The goal is to settle the soil around roots without disturbing them. I learned this the hard way when my first batch of beets grew lopsided from uneven water pressure.
Frost Timing Strategy: For that fall harvest window, mark your calendar 6 weeks before your first frost date. But here's the pro move: Plant a final batch of cold-hardy crops like kale or winter radishes alongside your root crops. These act as living mulch, protecting tender roots from early frosts while adding greens to your harvest. The roots will actually sweeten after light frosts—just don't let them freeze solid!
Storage Hack: When curing beets and carrots in the ground for long-term storage (Step 4), here's my secret: Leave just 1 inch of greens attached. This creates a natural seal that keeps moisture in while allowing airflow. Store them in wooden crates or cardboard boxes—plastic traps too much moisture and causes rot. At 40-50°F, they'll keep for months, but check periodically for any that start sprouting or softening.
Pro Tips for Vegetables Grown In The Ground
- Here's the secret to turning your garden into a year-round root-crop powerhouse—without the guesswork.
- Soil Texture Test: The key to straight, sweet roots starts with soil that feels like a cloud. After amending with com...
- Planting Precision: When sowing seeds at that ½-inch depth in Step 2, here's my trick: Use a stick or dowel to make s...
Frequently asked questions
Got questions about growing root crops and other vegetables in the ground? You’re not alone! Here are answers to the most common queries to help you cultivate a thriving underground harvest.
What are the easiest vegetables to grow in the ground for beginners?
Start with hardy, low-maintenance picks like radishes (ready in 3-4 weeks!), carrots, potatoes, or green beans. These tolerate beginner mistakes and reward patience with bountiful harvests. For extra resilience, try turnips or beets—they’re forgiving and packed with flavor!
How long does it take for vegetables grown in the ground to mature?
Harvest times vary widely! Fast growers like radishes or leafy greens (e.g., spinach) mature in 3–6 weeks, while root crops such as parsnips or sweet potatoes need 3–6 months. Check seed packets for exact timelines—soil temperature and sunlight speed things up!
Can I grow vegetables in the ground year-round, or do they need specific seasons?
Most root crops thrive in cool to moderate climates (spring/fall), but some, like potatoes or onions, prefer cooler weather. In warmer zones, opt for heat-tolerant varieties (e.g., yam beans) or extend seasons with row covers. Pro tip: Plant winter squash or garlic in late summer for harvests into winter!
How do I protect my underground vegetables from pests and diseases?
Prevention is key! Rotate crops yearly, use row covers for early planting, and handpick pests like cabbage worms or cutworms. For soil-borne issues (e.g., blight), amend soil with compost and avoid overwatering. Natural deterrents: Plant marigolds near roots to repel nematodes!
What are good alternatives if my soil is too rocky or compacted for root crops?
Loosen heavy soil with organic matter (compost, peat moss) or grow shallow-rooted veggies like bush beans, turnips, or radishes. For rocky patches, try container gardening with deep pots (12+ inches) for carrots or beets. Bonus: Raised beds improve drainage and root growth!
Why are my vegetables grown in the ground not producing well?
Common culprits: poor soil (test pH—most roots prefer 6.0–7.0), inconsistent watering (drought stress stunts growth), or overcrowding. Thin seedlings early, mulch to retain moisture, and fertilize with balanced organic fertilizer (e.g., 10-10-10) at planting time. Check for: yellowing leaves (nutrient deficiency) or stunted tops (root-bound!).
Wrapping up and next steps
Growing your own vegetables grown in the ground isn’t just rewarding—it’s a celebration of fresh, flavorful harvests year-round! 🌱 Whether you’re a beginner or a seasoned gardener, root crops like carrots, beets, and potatoes offer effortless satisfaction with minimal space and care.
Start small, experiment with varieties, and watch your garden thrive—your future meals (and wallet!) will thank you.
Ready to dive in? Pick one root crop from this guide, gather your supplies, and plant your first row today! 🚀 Happy digging!