
Vegetables
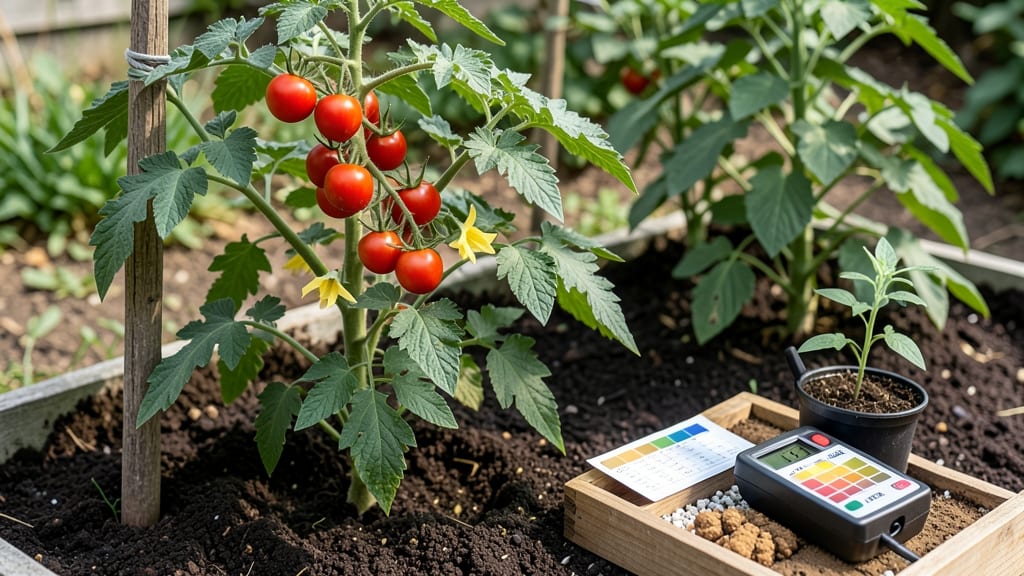
Your tomatoes won’t thrive in just any dirt—they demand the right tomato soil requirements to produce those juicy, vine-ripened fruits you crave. 🌱 After years of trial and error (and a few sad, blighted plants), I learned that the perfect blend isn’t just about pH—it’s about texture, nutrients, and drainage working together like a well-oiled machine.
Most gardeners overlook how their local soil type affects tomatoes. Clay soils suffocate roots, while sandy soils drain too fast, both leading to stunted plants. The fix? Amend your soil with 3-4 inches of compost before planting, then top-dress with worm castings mid-season for a steady nutrient boost.
Your goal is loamy, crumbly soil that holds moisture but never stays soggy—think of it as the Goldilocks of growing mediums. By the time your plants hit 6 inches tall, they’ll be flexing with strength, not struggling.
The leaves stay deep green, not yellow or purple-tinged, and those first blossoms appear reliably. This isn’t just theory—my heirloom Brandywines now average 12 pounds per plant thanks to these soil tweaks.
Regional differences matter too: Northern gardeners need extra organic matter to warm up cold soils, while Southerners should focus on mulching to retain moisture. Let’s get your soil ready for a harvest that’ll make your neighbors green with envy.
📚 In This Guide
- What you need
- Instructions
- Tips and common mistakes
- Wrapping up and next steps
What you need
- ● Soil: Well-draining, nutrient-rich soil with a pH between 6.0–6.8 (test with a pH meter or kit). Mix: 60% high-quality garden soil or potting mix
- ● 30% compost (aged, not fresh)
- ● 10% perlite or vermiculite (for aeration)
- ● Fertilizer: Balanced fertilizer (10-10-10 or 5-5-5) – 1 tbsp per plant at planting
- ● Slow-release organic fertilizer (e.g., bone meal or worm castings) – ½ cup per plant mid-season
- ● Tools: Garden trowel or shovel
- ● Gloves (to protect your hands!)
- ● Watering can or hose with a gentle spray nozzle
- ○ pH testing kit (optional but recommended)
- ● Mulch (straw or shredded leaves) – 2–3 inches to retain moisture and suppress weeds
- ● Epsom salt (magnesium sulfate) – 1 tbsp per gallon of water for leafy growth (use sparingly!)
- ● Cage or stakes for support (especially for indeterminate varieties)
- ● Drip irrigation system (for consistent moisture)
Step-by-step guide to testing and amending soil for tomato success
Healthy tomatoes start with the right foundation—here's how to assess and optimize your soil for maximum yields.
🌱 Step 1: Test Soil pH and Nutrient Levels
Tomatoes thrive in soil with a pH between 6.2 and 6.8—acidic enough for nutrient uptake but not so low that iron becomes unavailable. Grab a soil test kit (or send a sample to your local extension service) to check pH and key nutrients like nitrogen, phosphorus, and potassium. I like to test in early spring, about 6-8 weeks before transplanting, so I have time to amend.
Dig a small hole about 6 inches deep—this is where tomato roots will spread. Collect samples from multiple spots in your garden (at least 5) and mix them together for an average reading. If your pH is below 6.0, you'll need to raise it; above 7.0, you'll need to lower it. Most garden centers sell quick-test kits that give results in minutes, but lab tests provide more detailed nutrient analysis.
🌿 Step 2: Improve Soil Texture for Better Root Growth
Tomatoes hate compacted or clay-heavy soil—roots need air and water to move freely. If your soil feels dense when squeezed or holds water like a sponge, it's time to improve drainage. Work in 2-3 inches of compost (or well-rotted manure) into the top 12 inches of soil to loosen texture and add organic matter.
For sandy soil that drains too quickly, mix in 1-2 inches of peat moss or coconut coir to help retain moisture without suffocating roots. I like to use a broadfork to aerate the soil before amending—this breaks up compaction without disturbing the soil structure too much. The goal is loamy soil: crumbly when dry, moist but not soggy when wet, and rich with organic material.
☀️ Step 3: Add Tomato-Specific Amendments
Tomatoes are heavy feeders, so they need extra phosphorus for root development and potassium for fruit production. Mix in 1-2 cups of bone meal (for phosphorus) and 1-2 cups of greensand or wood ash (for potassium) per 100 square feet of garden bed. Sprinkle these amendments over the soil surface and gently scratch them into the top 2-3 inches—don't bury them too deep.
For a slow-release boost, add 1-2 inches of composted leaf mold or well-aged compost. This improves soil structure while providing a steady supply of nutrients. Avoid fresh manure—it can burn tender tomato roots and disrupt soil pH. If your soil test shows a deficiency in micronutrients like magnesium or calcium, add 1-2 tablespoons of Epsom salt (for magnesium) or 1 cup of crushed eggshells (for calcium) per plant at planting time.
💧 Step 4: Build a Nutrient-Rich Planting Bed
About 2 weeks before transplanting, create a 12-inch-deep planting hole for each tomato plant. Fill the bottom 6 inches with a mix of compost, aged manure, and a handful of balanced fertilizer (like 10-10-10). This creates a nutrient-rich zone where roots can quickly establish themselves. Top this with a 2-inch layer of soil, then place your transplant in the center.
Backfill the hole with the remaining soil, pressing gently to remove air pockets but not compacting too tightly. Water deeply to settle the soil around the roots. The amended soil should feel light and crumbly, like a well-aerated cake batter. Avoid walking on the bed—this can compress the soil and make it harder for roots to grow into the enriched layer.
⏰ Step 5: Maintain Soil Health Throughout the Season
Once tomatoes are planted, keep the soil moist but never soggy—aim for 1-2 inches of water per week, delivered either through rainfall or irrigation. Mulch with 2-3 inches of straw or shredded leaves to retain moisture, regulate temperature, and prevent soil-borne diseases from splashing onto leaves. Replenish mulch as it breaks down.
Side-dress plants with 1-2 tablespoons of compost or balanced fertilizer every 4-6 weeks to keep up with their heavy feeding demands. Watch for signs of nutrient stress—yellowing leaves (nitrogen deficiency), weak stems (phosphorus deficiency), or poor fruit set (potassium deficiency)—and adjust amendments accordingly. A healthy tomato plant will have deep green leaves, strong stems, and vigorous root growth that you can see when you gently scratch the soil surface.
Tips & tricks for perfect tomato soil preparation
Here's what I've learned after years of growing tomatoes—these small details make all the difference between average yields and garden-fresh abundance.
Testing Timing: The 6-8 week window before transplanting is non-negotiable for pH adjustments. Lime (to raise pH) takes about 2-3 months to fully integrate, while sulfur (to lower pH) works faster—usually 2-4 weeks. I test again 2 weeks before planting to confirm the pH is stable in the 6.2-6.8 range. This prevents last-minute panic when your soil still isn't ready!
Texture Troubleshooting: For clay-heavy soil, mix in 2-3 inches of compost AND 1-2 inches of perlite or vermiculite—this creates air pockets while maintaining moisture. Sandy soil? Add 1-2 inches of coconut coir and work it into the top 12 inches using a broadfork. The goal is that perfect loamy texture: when squeezed, it should hold its shape but crumble easily when dry. I test this by digging a small hole—if water drains too fast or pools, you know you need more organic matter.
Amendment Strategy: When mixing in bone meal and greensand, sprinkle them over the surface and scratch into the top 2-3 inches—this prevents nutrient burn to delicate roots. For micronutrients, I make a "tea" with Epsom salt (1 tablespoon per gallon of water) and water my plants with it every 2 weeks during fruiting. This targeted approach avoids overloading the soil while giving tomatoes exactly what they need.
Planting Bed Secret: The 12-inch-deep hole with 6 inches of compost mix at the bottom creates a nutrient reservoir that feeds roots all season. Pro tip: Add a handful of mycorrhizal fungi to this mix—it helps roots absorb nutrients more efficiently. And here's what nobody tells you: After backfilling, water deeply but slowly to avoid displacing the amended soil. A gentle rain setting is perfect for this step.
Pro Tips for Tomato Soil Requirements
- Here's what I've learned after years of growing tomatoes—these small details make all the difference between average ...
- Testing Timing: The 6-8 week window before transplanting is non-negotiable for pH adjustments. Lime (to raise pH) tak...
- Texture Troubleshooting: For clay-heavy soil, mix in 2-3 inches of compost AND 1-2 inches of perlite or vermiculite—t...
Frequently asked questions
Got questions about growing tomatoes? You’re not alone! Here are some of the most common queries about tomato soil requirements—plus quick answers to help you grow like a pro.
What is the best soil pH for tomatoes?
Tomatoes thrive in slightly acidic to neutral soil with a pH between 6.0 and 6.8. Test your soil with a kit or meter—if it’s too high (alkaline), amend with sulfur or peat moss. If too low (acidic), add lime. Pro tip: Aim for 6.5 for the sweet spot!
Can I grow tomatoes in clay soil?
Clay soil can work, but it drains poorly and compacts easily. To improve it, mix in compost, sand, or perlite to loosen texture and boost aeration. Raised beds or containers with well-draining potting mix are great alternatives for heavy clay.
How often should I fertilize tomato plants?
Feed tomatoes every 2–3 weeks during the growing season with a balanced fertilizer (like 10-10-10) or organic options like compost tea or worm castings. Stop fertilizing 4–6 weeks before harvest to avoid bitter fruit. Watch for leafy growth over fruit—this means it’s hungry!
Why are my tomato leaves turning yellow?
Yellow leaves often signal nutrient deficiencies (like nitrogen or magnesium), overwatering, or poor drainage. Check soil moisture and amend with compost or Epsom salt (for magnesium). If roots are waterlogged, improve drainage immediately. Yellowing lower leaves are normal as plants age, but new leaves should stay green!
Can I reuse potting soil for tomatoes year after year?
Reusing soil risks disease buildup (like blight) and nutrient depletion. Refresh potting mix annually by adding 1/3 fresh compost or organic matter. Sterilize old soil with heat or replace it entirely for disease-prone plants. Safety first!
Wrapping up and next steps
Growing juicy, flavorful tomatoes starts with the right soil—now you’ve got the pH and texture secrets to maximize your harvest! 🌱 Whether you’re tweaking your garden beds or prepping containers, remember: well-draining, nutrient-rich soil with a pH of 6.0–6.8 is your golden ticket.
Don’t let soil stress hold you back—your plants (and taste buds) will thank you!
Ready to plant with confidence? Grab your gloves, test that soil, and watch those vines thrive. Next up: Pro tips for transplanting seedlings—let’s grow those tomatoes!