
Vegetables
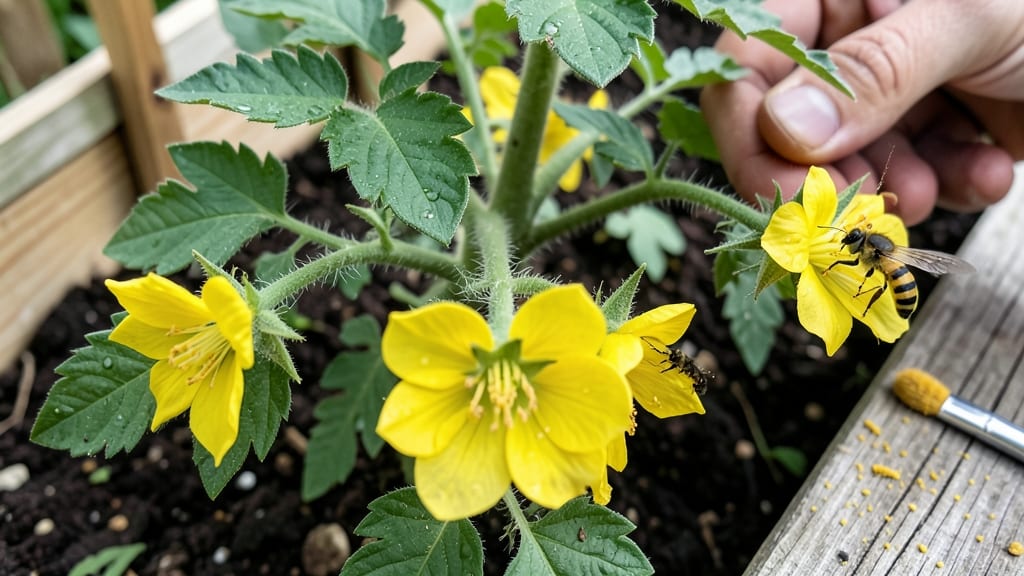
Mastering pollination for tomatoes guarantees fruit sets even when bees stay away. ✨ I've saved dozens of blossoms by mastering this simple trick—no fancy tools, just a soft touch and the right timing.
The difference between a handful of tomatoes and a bushel comes down to how you handle pollination, especially in greenhouses or rainy seasons.
You only need two things: a small paintbrush or cotton swab, and patience. On warm, still days, gently brush each flower's center to transfer pollen from anther to stigma. Do this for 3-5 days after blooms open, and you'll see those blossoms swell into fruit within 2 weeks.
Even indoor growers can get perfect sets with this method.
The payoff is worth it—plants with heavy fruit loads stay productive all season. You'll notice blossoms dropping less often, and each tomato grows plump and even. The key is consistency: check flowers daily during peak blooming, and avoid overdoing it (once per flower is enough).
This works for all tomato types—cherries, slicers, and heirlooms—whether you're growing in pots or the ground. The only real mistake? Waiting until flowers wilt before pollinating. Get in there early, and your harvest will thank you.
📚 In This Guide
- What you need
- Instructions
- Tips and common mistakes
- Wrapping up and next steps
What you need
- ● Tomato plants – Healthy, flowering varieties (determinate or indeterminate). Aim for at least 3-5 plants for a noticeable yield.
- ● Soft-bristle paintbrush – A small, fine-tipped brush (like a makeup brush or artist’s brush, size 0-2). Avoid stiff bristles to protect delicate flowers.
- ○ Fine mist spray bottle – 16 oz or larger, filled with room-temperature water (never cold!). Optional: Add a drop of mild dish soap to reduce water tension.
- ○ Magnifying glass (optional but helpful) – A 10x magnification helps spot tiny stamens and pistils in fuzzy flowers.
- ● Notebook & pen – To track pollination dates and observe fruit development.
- ● Warm, dry conditions – Pollinate early morning (6–9 AM) when flowers are open and dew has evaporated. Avoid humid or rainy days.
- ● Sunny location – Choose a spot with at least 6–8 hours of direct sunlight for optimal tomato growth.
- ● Bees or wind (backup plan!) – If you miss a day, nature might step in—just monitor flowers daily.
- ● Pollination log template – Download a free printable to track which flowers you’ve pollinated and their progress.
- ● Gloves (for sensitive skin) – Lightweight gardening gloves if tomato hairs irritate your hands.
- ● Lamp with UV light (for indoor growers) – Mimics sunlight to encourage flower opening in greenhouse setups.
Step-by-Step instructions for hand-pollinating tomatoes
Here's how to ensure every flower becomes a fruit—no bees required.
🌿 Step 1: Identify Ready-to-Pollinate Flowers
Pick flowers that are fully open with bright yellow stamens (the pollen-covered parts) but haven't started wilting. The petals should be fully unfurled, and you'll see the stamen cluster in the center. I check my plants every morning after the dew dries—this is when flowers are most receptive to pollination.
Gently squeeze the flower between your thumb and forefinger to test its readiness. If the stamens crumble slightly, it's ready. Avoid flowers that feel dry or have brown edges—they won't set fruit even with pollination. Focus on the first flush of flowers, as these will produce your largest tomatoes.
✂️ Step 2: Gather Pollen from a Donor Flower
Select a healthy flower from the same plant (or another tomato plant if you're working with multiple). Hold it firmly and gently rub the stamen cluster against the palm of your hand. You'll see a fine yellow dust—this is the pollen. I like to do this over a small piece of white paper to confirm I've collected enough before moving to the next step.
If the flower is particularly hairy, use a small paintbrush to transfer the pollen instead. This prevents accidentally damaging the flower's delicate structure. Collect pollen from at least 3-5 flowers per plant to ensure a strong genetic mix for your tomatoes. The more pollen you gather, the higher your success rate for fruit set.
💧 Step 3: Transfer Pollen to the Stigma
Locate the stigma—the sticky, cone-shaped part at the center of the flower you're pollinating. It should look slightly damp and shiny. Using your finger or the paintbrush, gently dab the collected pollen onto the stigma. You don't need much; a light coating is all it takes. I make sure to cover the entire surface evenly.
For stubborn flowers, I'll repeat the process the next day. Some varieties respond better to multiple applications, especially in hot or dry conditions. Avoid touching the petals too much—they're delicate and can drop prematurely if handled roughly. If the stigma looks dry after pollination, lightly mist it with water to help the pollen adhere.
☀️ Step 4: Support Post-Pollination Conditions
After pollination, move the plant to a location with full sun (6-8 hours daily) and consistent moisture. Water deeply at the base every 2-3 days until the soil feels damp 3 inches down. I avoid wetting the leaves to prevent disease. The fruit will start swelling within 7-10 days—this is your signal that pollination worked.
If temperatures exceed 90°F, provide afternoon shade to prevent flower drop. Some tomato varieties are more heat-sensitive than others. I'll also remove any suckers (side shoots) to direct the plant's energy toward fruit development. Watch for small green tomatoes forming at the flower sites—these will grow into your harvest.
⏰ Step 5: Monitor and Repeat Weekly
Check your plants for new open flowers every 3-4 days. Tomatoes produce flowers continuously throughout the season, so hand-pollination becomes an ongoing process. I keep a small notebook nearby to track which flowers I've pollinated and note any that drop off—this helps me adjust my approach for future batches.
If you notice flowers wilting without setting fruit, they may have been pollinated too late in their bloom cycle. Focus on younger flowers for better results. By the end of the season, you'll have a steady supply of tomatoes—no bees needed. The key is consistency, so set a reminder to pollinate every few days once the flowering begins in earnest.
Tips & tricks for perfect tomato pollination
Here's how to maximize your hand-pollination success for a bountiful tomato harvest.
Timing is Everything: The morning after dew dries is ideal for Step 1 because flowers are most receptive then. I've found that flowers pollinated before 10 AM set fruit more reliably, especially in hot climates where afternoon heat can cause flower drop. The 3-4 day monitoring schedule in Step 5 becomes critical during peak flowering—set a phone reminder to avoid missing new blooms.
Tool Selection Matters: While fingers work fine, a soft-bristled paintbrush (like those used for makeup) gives you more control in Step 2, especially with hairy varieties. I keep one dedicated to pollination to avoid cross-contamination with other plants. For stubborn flowers in Step 3, a damp cotton swab works better than fingers for precise pollen application without damaging delicate petals.
Environmental Support: The 7-10 day window in Step 4 for fruit swelling depends heavily on consistent conditions. I've noticed that providing afternoon shade when temperatures exceed 90°F (as mentioned) makes a huge difference—some varieties like 'Sweet 100' nearly double their fruit set when protected from heat stress. A simple row cover works wonders during peak heat periods.
Visual Cues for Success: In Step 3, look for the stigma to appear slightly darker after pollen application—this indicates successful adhesion. For the 6-8 hours of sun in Step 4, position plants where they get morning sun and afternoon shade if needed. I track fruit development by watching for the calyx (leafy part at the tomato's base) to swell within 3-5 days of pollination.
Pro Tips for Pollination For Tomatoes
- Here's how to maximize your hand-pollination success for a bountiful tomato harvest.
- Timing is Everything: The morning after dew dries is ideal for Step 1 because flowers are most receptive then. I've f...
- Tool Selection Matters: While fingers work fine, a soft-bristled paintbrush (like those used for makeup) gives you mo...
Frequently asked questions
Got questions about pollinating your tomatoes? You’re not alone—gardeners often wonder how to maximize fruit sets, especially when bees aren’t around. Here are some of the most common questions (and answers!) to help you grow juicier, heavier tomatoes.
How do I know if my tomato flowers need hand-pollination?
If your tomato plant has open flowers that stay unvisited by bees for a few days, it’s a good sign they need help. Also, check for sticky pollen on the anthers (the yellow tips). If it’s dry or missing, your flowers may not be self-pollinating effectively.
What’s the best time of day to hand-pollinate tomatoes?
Pollinate in the morning when flowers are fully open and humidity is lower. Avoid midday heat, which can stress the plants. Early morning also means bees are less likely to beat you to it!
Can I use a paintbrush or cotton swab instead of a small brush?
Yes! A soft paintbrush or cotton swab works great—just dip it in pollen from one flower and gently swipe the stigma (the center of another flower). Avoid harsh tools like toothpicks, which can damage delicate parts.
Why are my tomato flowers dropping off before fruiting?
This is often due to poor pollination, but also check for:
- Too much nitrogen (focus on phosphorus instead)
- Extreme heat or cold stress
- Overwatering (keep soil moist but not soggy)
Do I need to pollinate every single flower?
Nope! Focus on healthy, open flowers—especially on the lower branches. Over-pollinating can stress the plant. Prioritize flowers with visible pollen (yellow dust) for the best results.
Wrapping up and next steps
Mastering tomato pollination—whether through nature’s bees or your own two hands—opens the door to a bountiful harvest 🌱. By understanding the why and how behind pollination, you’re not just gardening; you’re crafting a thriving ecosystem for your plants.
Ready to put your new skills to work? Start with just one or two tomato plants this season, experiment with techniques, and watch your garden flourish!
Pro tip: Keep a pollination journal to track what works best for your climate and tomato varieties. Happy growing! 🌿