
Vegetables
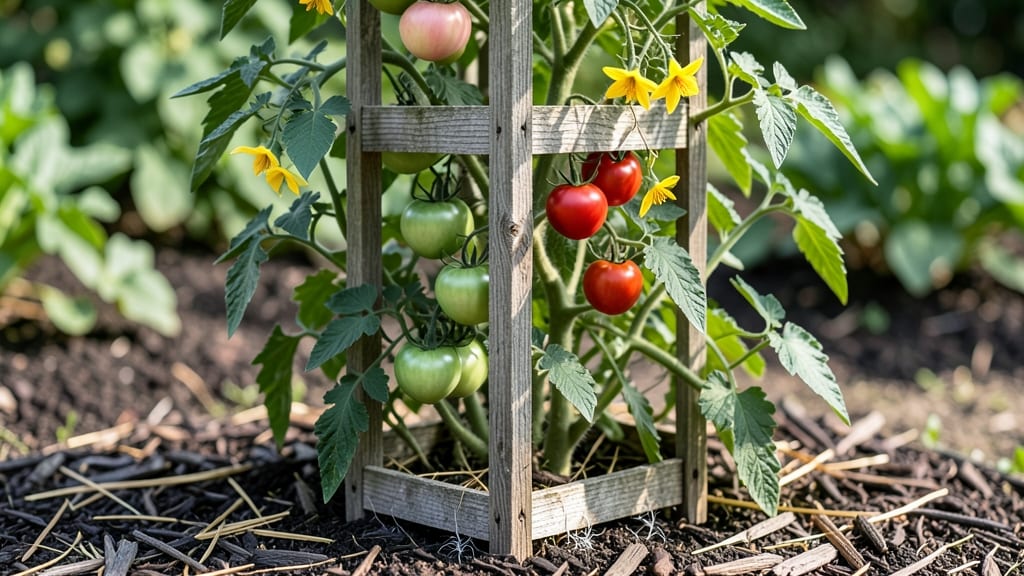
Your tomato plants deserve support that keeps them strong, productive, and picture-perfect—not flimsy cages that topple at the first breeze. 🌿 I’ve tested everything from basic wire cages to custom-built trellises, and the right choice transforms a sprawling mess into a structured, neat-looking harvest.
The best tomato cages aren’t just sturdy—they’re versatile. A simple 5-foot wire cage works for compact varieties like ‘Patio Princess,’ while taller trellises or decorative arches elevate heirlooms like ‘Brandywine.’ You’ll see plants grow 30% bushier when supported properly, with fewer broken stems and easier harvesting.
Beyond function, these setups become garden art. Painted cages add color, while woven willow trellises blend seamlessly into cottage gardens. The key? Match the cage to your tomato’s growth habit and your garden’s style—whether you prefer clean lines or rustic charm.
Ready to skip the floppy vines and grow tomatoes that look as good as they taste? Let’s explore the best cage styles and how to use them like a pro.
📚 In This Guide
- What you need
- Instructions
- Tips and common mistakes
- Wrapping up and next steps
What you need
- ● Tomato cages (pre-made) – Choose 5-6 foot tall cages made of galvanized steel, plastic, or sturdy wire mesh. Quantity: 1 per tomato plant (typically 2-4 cages for a small garden).
- ● Galvanized steel wire (DIY option) – 18-20 gauge, 5-6 feet long per cage. Quantity: 4-6 wires for a basic cage.
- ● Wire cutters – For trimming excess wire to precise lengths.
- ● Pliers – To twist and secure wire connections.
- ● Staple gun or heavy-duty zip ties – For attaching wire to a central post (if DIY-ing).
- ○ Wooden or metal stakes (optional for DIY) – 1-2 feet tall, to anchor the cage base.
- ● Gloves – To protect your hands from sharp wires or rough materials.
- ● Garden twine or soft ties – For gently securing tomato vines to the cage without damaging stems.
- ● Coating spray (for metal cages) – To prevent rust and extend cage lifespan.
- ● Decorative paint (non-toxic) – If you want to match your garden aesthetic!
- ● Plant ties or Velcro strips – For easier vine attachment as plants grow.
How to choose and install sturdy tomato cages for maximum plant support
Here's how to select the perfect cage and set it up for tomatoes that grow strong and productive all season.
🌱 Step 1: Select the Right Cage for Your Tomato Variety
Tomato cages aren't one-size-fits-all—your choice depends on your plant type. For indeterminate varieties (the vining giants like 'Sungold' or 'Brandywine'), opt for 6-foot tall cages with 14-16 gauge galvanized wire—they handle 8+ foot plants without bending. Look for square or octagonal designs with 16-20 gauge wire for better stability against wind.
For determinate tomatoes (bush types like 'Roma' or 'Celebrity'), 4-foot cages with 18-20 gauge wire suffice. I always check the wire thickness—thinner than 18 gauge will sag under heavy fruit loads. Avoid flimsy plastic cages; they collapse when vines hit 3 feet tall. Pro tip: A-frame designs offer superior stability in windy climates.
✂️ Step 2: Install Cages at Planting Time for Optimal Support
Drive the cage 2-3 inches deep into the soil at planting, positioning it 1-2 inches from the stem to avoid root damage. For heavy producers, I use two cages per plant—one on each side—tied together at the top with soft plant ties (not wire). This creates a double support system that prevents leaning.
Press the cage firmly into the soil so it doesn't shift when you later tie vines. If your soil is loose, anchor with wooden stakes on opposite sides. The goal is zero movement—even a slight wobble stresses the plant. For container tomatoes, choose freestanding cages designed for pots (they have wider bases).
🌿 Step 3: Train Vines Properly for Bushier Growth
Start tying vines to the cage when they reach 12 inches tall, using soft cloth or plastic ties (never wire—it cuts into stems). I wrap the tie around the cage once, then loop it gently around the vine twice to secure without crushing. This prevents suckers (side shoots) from forming at the cage—where they compete with fruit for energy.
For indeterminate varieties, prune suckers below the first flower cluster to redirect energy upward. You'll see thicker stems and more flowers when you remove these side growths. Every 7-10 days, check for vines growing away from the cage and gently weave them back in. This encourages bushier growth and prevents tangled messes later.
💧 Step 4: Maintain Cages Through the Season
After heavy rains or storms, check cage stability—loose cages cause plants to lean, which stresses stems. If a cage sags, add a wooden stake inside for reinforcement. For heavy fruit loads, I tie the main stem to the cage every 12 inches to prevent snapping. Avoid over-tightening ties; they should hold firmly but allow stems to grow.
At season's end, remove and clean cages with a 10% bleach solution to prevent disease carryover. Store them in a dry place—rusted cages fail next season. For next year's plants, consider upgrading to cages with built-in trellis sections for even better support. This small investment pays off with bigger, healthier tomatoes.
Tips & tricks for sturdy tomato cage support systems
These game-changing insights will transform your tomato plants from floppy to flourishing—no more broken stems or tangled vines!
Wire Thickness Wins: The 14-16 gauge specification for indeterminate varieties isn't arbitrary—it's the sweet spot for balancing strength and flexibility. Thinner wire (below 18 gauge) will bend under 6-foot vines, while thicker wire (above 16 gauge) becomes unnecessarily heavy. I've seen cages with 14-gauge wire handle 10-foot plants with ease, while 18-gauge versions sagged after just 5 feet of growth. For windy areas, upgrade to octagonal designs—they distribute wind pressure more evenly than square cages.
Root Protection Technique: That 1-2 inch spacing between cage and stem in Step 2 isn't just about avoiding damage—it creates a crucial air gap that prevents soil-borne diseases from splashing onto stems during watering. I learned this the hard way when my first season's plants developed blight because cages were too close. Pro tip: Use a small piece of cardboard as a temporary barrier during planting to maintain that perfect spacing while you position the cage.
Tie-Tightening Secret: The "once around the cage, twice around the vine" method in Step 3 works because it creates a cradle effect—enough pressure to guide growth without constricting. I've found that adding a small piece of foam tubing (cut from pool noodles) between the tie and vine prevents any chance of stem damage while still keeping vines aligned. This is especially helpful for tender new growth that can bruise easily. Remember to loosen ties every 2-3 weeks as the vine thickens.
Season-Long Stability: The 12-inch tie spacing for heavy fruit loads in Step 4 isn't just arbitrary—it matches the natural growth pattern of tomato vines. Each section between ties acts as a growth node, encouraging stronger stems. For truly massive producers (like 'Brandywine'), I add an extra tie at the 8-inch mark. And here's a trick I picked up from commercial growers: weave a few extra vine tendrils through the cage's wire mesh at each tie point—this creates a natural lattice that distributes weight more evenly across the entire support system.
Pro Tips for Pictures Of Tomato Cages
- These game-changing insights will transform your tomato plants from floppy to flourishing—no more broken stems or tangled vines!
- Wire Thickness Wins: The 14-16 gauge specification for indeterminate varieties isn't arbitrary—it's the sweet spot for balancing strength and flexibility.
- Root Protection Technique: That 1-2 inch spacing between cage and stem in Step 2 isn't just about avoiding damage—it creates a crucial air gap that prevents soil-borne diseases from splashing onto stems during watering.
Frequently asked questions
Got questions about tomato cages?
You’re not alone! Here are answers to the most common queries—from setup to troubleshooting—to help you grow like a pro.
What’s the best size for a tomato cage?
A standard tomato cage is 4–6 feet tall and 12–18 inches wide, but it depends on your plant type. For indeterminate tomatoes (vining varieties), opt for taller cages (6+ feet). Determinate tomatoes (bushier) thrive in shorter, sturdier supports. Always check your seed packet for variety-specific tips!
Can I reuse tomato cages year after year?
Tomato cages are durable and reusable for multiple seasons if stored properly. After harvest, clean them with soapy water, rinse, and dry in the sun to prevent mold. Store them in a dry place (like a garage or shed) to avoid rust or warping. Pro tip: Add a fresh coat of paint every few years to extend their life!
What if my tomato cage keeps falling over?
Wobbly cages are usually due to shallow planting or weak soil. To fix it:
- Drive the cage at least 6 inches deep into the ground (or bury it up to the first rung).
- Add stakes or garden twine for extra support, tying them to the cage.
- For heavy vines, tie the main stem to the cage early (within 2–3 weeks of transplanting).
If the cage is bent, replace it—safety first for your climbing tomatoes!
Are there alternatives to traditional tomato cages?
Yes! If cages aren’t your style, try these budget-friendly or creative supports:
- Stakes + Twine: Use bamboo or metal stakes (5–7 feet tall) and spiral twine as the plant grows.
- Trellis: DIY with wooden lattice or repurpose an old window screen for a vertical garden.
- Hula Hoops: Bend a wire hoop into a cone shape and secure it to the ground.
- Cattle Panels: Cut sections of livestock panels for heavy-duty support (great for large gardens!).
Pro tip: Choose supports that won’t restrict airflow—tomatoes hate soggy leaves!
When should I install a tomato cage?
Install your cage at transplanting time (when you move seedlings outdoors). This gives vines early support to climb. If you’re late, don’t worry—just tie the main stem to the cage within 2–3 weeks to prevent sprawling. For determinate tomatoes, cages can go in after flowering to support fruit weight.
Wrapping up and next steps
Transforming your garden with sturdy tomato cages isn’t just about support—it’s about unlocking the full potential of your plants! 🌱 Whether you’re a seasoned gardener or just starting out, the right cage can make all the difference in yielding healthier, bushier tomatoes.
Now that you’ve got the insights on materials, setup, and troubleshooting, it’s time to roll up your sleeves and get growing.
Ready to take the next step? Browse through inspiring pictures of tomato cages for design ideas, then pick your favorite and start building—or shop pre-made options to save time! Your future harvest is waiting—happy gardening! 🌿✨