
Vegetables
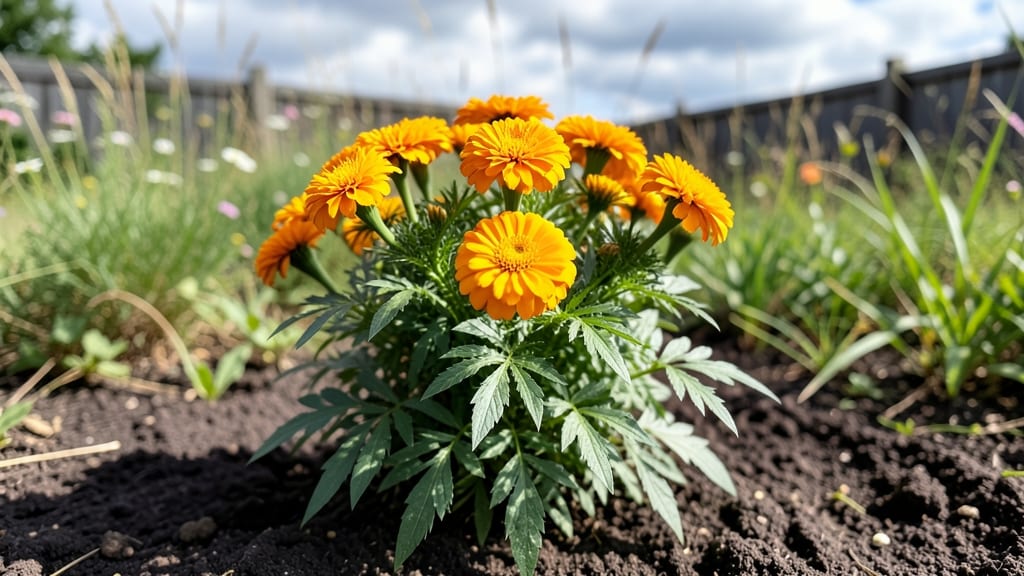
Marigolds in gardens don’t just stop pests—they turn your yard into a sun-drenched, golden-hued masterpiece. 🌼 I’ve used them to transform dull borders into vibrant focal points, and the best part?
They work just as hard repelling nematodes and aphids as they do brightening your space. These aren’t just pretty faces; they’re the unsung heroes of low-maintenance, high-impact garden design.
The secret to their magic lies in their versatility. Plant them in cottage-style gardens for a whimsical, old-world charm, or tuck them into modern edible gardens for a pop of color that contrasts beautifully with greens and purples.
Their fiery hues—from deep oranges to sunny yellows—create stunning visual layers, while their pest-repelling roots keep vegetables thriving. Even in winter, their dried blooms add texture to arrangements.
Imagine a garden where every season feels intentional: spring’s fresh greens paired with marigold blooms, summer’s bounty protected by their natural defenses, and autumn’s harvests framed by their golden glow. With just a few well-placed plants, you’ll create a space that’s both practical and breathtaking—no fancy landscaping required.
Whether you’re designing a fragrant herb garden, a bold flower bed, or a simple patio container, marigolds adapt effortlessly. They’re the perfect bridge between beauty and function, proving that the best gardens are the ones that work as hard as they look.
📚 In This Guide
- What you need
- Instructions
- Tips and common mistakes
- Wrapping up and next steps
What you need
- ● Marigold plants: Seeds: 50–100 seeds (depending on desired coverage; French marigolds need ~12" spacing, dwarf varieties ~6")
- ● OR Seedlings: 10–20 healthy, disease-free plants (check for strong stems and vibrant leaves)
- ● Soil: Well-draining, loamy garden soil (pH 6.0–7.5). Amend with compost (2–3 inches mixed into top 6" of soil).
- ● Sunlight: Full sun (6+ hours/day). Partial shade (4–6 hours) works for cooler climates.
- ● Water: Consistent moisture (1–1.5 inches per week); drought-tolerant once established.
- ● Fertilizer: Balanced organic fertilizer (10-10-10) or compost tea (apply at planting and monthly).
- ● Planting tools: Garden trowel or transplant spade
- ● Hand pruners (for trimming deadheads or shaping)
- ○ Optional (but helpful!): Mulch (straw or shredded leaves) to retain moisture and suppress weeds
- ● Row covers (for young seedlings if pests like aphids are a threat)
- ● Pest control spray (neem oil or insecticidal soap, only if needed)
- ● Garden gloves (to protect hands from thorns on some varieties)
- ● Planting time: Direct sow seeds after the last frost (when soil is at least 60°F).
- ● Transplant seedlings 2–3 weeks before the last frost (if starting indoors).
- ● Hardiness: Most marigolds thrive in USDA Zones 2–11. Tagetes erecta (African marigolds) are cold-hardy to Zone 2.
How to plant and maintain marigolds for year-round pest defense
These vibrant bloomers aren't just pretty—they're nature's pest control, working around the clock to protect your garden.
🌱 Step 1: Choose the Right Varieties and Planting Time
For true year-round pest suppression, mix annual marigolds (like 'French' or 'African' types) with hardy perennials such as 'Lemon Gem' or 'Bonanza Gold'. Plant annuals 2-4 weeks before your last frost date—they germinate quickly in 60-70°F soil—while perennials thrive when installed in early spring or fall for established root systems before winter.
I always dig a hole twice as wide as the root ball but only as deep as the container's base. This encourages outward root growth, which releases more pest-repelling compounds into the soil. Marigolds hate soggy feet, so if your soil drains poorly, amend with 1-2 inches of compost mixed into the bottom of the hole.
☀️ Step 2: Position for Maximum Pest-Repelling Power
Place marigolds where pests congregate—along vegetable rows, near roses, or around fruit trees. Their strong scent deters nematodes, aphids, and even rabbits. For best results, plant them in full sun (6+ hours daily) where they'll grow 12-36 inches tall depending on variety, releasing more volatile oils that pests can't tolerate.
I interplant them with susceptible crops like tomatoes and cucumbers, creating a protective barrier. Watch for first true leaves—that's when they start emitting the sulfur compounds that repel pests. If you notice nearby pests lingering, add a second row of marigolds to double the effect.
💧 Step 3: Water and Feed for Continuous Blooms
Water deeply once weekly (or daily in extreme heat) to encourage deep root growth—the more roots, the more pest-repelling compounds. Let the top 2 inches of soil dry between waterings to prevent fungal issues. I always water at the base to avoid wetting leaves, which can invite powdery mildew.
Feed with a balanced 10-10-10 fertilizer every 4-6 weeks during the growing season. The key is consistency—marigolds bloom nonstop when they're well-fed. If flowers slow down, a light side-dressing of compost revives them instantly. Deadhead spent blooms regularly to redirect energy into more flowers and stronger pest-repelling action.
✂️ Step 4: Overwinter Perennials for Year-Round Protection
After your first frost, cut back annual marigolds to 2 inches tall and compost them. For perennials, mulch heavily with 3-4 inches of straw or shredded leaves to insulate roots through winter. I always mark their locations with stakes so I don't accidentally dig them up in spring.
In early spring, remove mulch and trim back any dead growth. Perennials will resprout quickly in 50-60°F soil, and you'll have instant pest protection. If you notice any winter damage, prune it back to healthy growth—marigolds are tough and bounce back fast.
🌿 Step 5: Rotate Plantings for Continuous Pest Control
For true year-round defense, stagger new plantings every 6-8 weeks so there's always fresh foliage emitting those pest-repelling oils. Succession planting keeps the scent strong and pests confused. I also save seeds from my best performers—marigolds self-seed readily, and you'll have volunteers popping up everywhere next season.
Watch for aphids or whiteflies on marigolds themselves—they're not immune, just resistant. If you see pests on the marigolds, spray with neem oil or introduce ladybugs. A healthy marigold is your best defense, and they'll keep working for you even when you're not looking.
Tips & tricks for perfect marigold pest defense
Want to turn your garden into a pest-free fortress? These pro strategies will maximize marigold power and keep your plants thriving all season long.
Soil Temperature Secret: The 60-70°F soil temperature range in Step 1 isn't just about germination—it's when marigolds start producing those sulfur compounds that repel pests. Use a soil thermometer to verify conditions, especially if you're planting early spring perennials. If your soil runs cooler, consider using black plastic mulch a few weeks before planting to warm the soil naturally.
Root Growth Hack: When you dig that hole twice as wide as the root ball in Step 1, don't stop there! Loosen the surrounding soil with your fingers or a trowel for another 4-6 inches outward. This creates an oxygen-rich zone that encourages lateral root spread—more roots mean more pest-repelling compounds released into the soil. Think of it as building a root network that covers more ground.
Pest Detection System: In Step 2, when you notice pests lingering near your marigolds, don't just add another row—create a "pest trap zone." Plant a small cluster of marigolds away from your main garden (about 10 feet out) specifically to attract pests. This sacrificial group will draw pests away from your valuable crops while the main marigold barrier continues protecting your plants.
Fertilizer Timing: The 4-6 week feeding schedule in Step 3 works because it aligns with marigolds' natural growth cycles. For even better results, split your 10-10-10 fertilizer into two applications: half when you first notice new growth in spring, and the other half when you start seeing flower buds form. This two-phase approach ensures steady nutrient supply during both vegetative and flowering stages, maximizing pest-repelling power.
Pro Tips for Marigolds In Gardens
- Want to turn your garden into a pest-free fortress? These pro strategies will maximize marigold power and keep your p...
- Soil Temperature Secret: The 60-70°F soil temperature range in Step 1 isn't just about germination—it's when marigold...
- Root Growth Hack: When you dig that hole twice as wide as the root ball in Step 1, don't stop there! Loosen the surro...
Frequently asked questions
about marigolds in gardens—because every gardener deserves clarity! Here are answers to the most common questions to help you grow these vibrant pest-repelling powerhouses with confidence.When is the best time to plant marigolds?
For perennial marigolds (like French marigolds), plant in early spring after the last frost when soil temps reach 60°F (15°C). In warmer climates, you can also plant in fall for blooms next year. Annual marigolds (like African marigolds) can be sown directly 2–3 weeks after frost or started indoors 4–6 weeks before the last frost.
How long do marigolds take to grow and bloom?
Most marigolds sprout in 5–10 days and reach maturity in 60–75 days for annuals. Perennial varieties may take 2–3 months to establish and bloom. For continuous flowers, deadhead spent blooms regularly—this encourages nonstop blooming from early summer to frost!
Do marigolds really keep pests away? Which bugs do they repel?
Marigolds emit a natural pyrethrin compound that deters aphids, whiteflies, nematodes, and even rabbits. They’re especially effective near vegetables like tomatoes, peppers, and squash. For maximum pest control, plant them in clusters around the garden edges or interplant with vulnerable crops.
Can I grow marigolds in containers? What’s the ideal setup?
Yes! Marigolds thrive in containers with well-draining soil and at least 6–12 inches of depth (depending on variety). Use pots with drainage holes and place them in full sun (6+ hours/day). For perennials, choose larger containers (12+ inches wide) to accommodate root growth. Pro tip: Mix in compost for nutrient-rich soil!
Why aren’t my marigolds blooming? Troubleshooting tips.
Lack of blooms often stems from over-fertilizing (too much nitrogen), poor sunlight, or crowding. Fix it by:
- Pruning leggy stems to encourage bushier growth.
- Using a balanced fertilizer (5-10-5) lightly during blooming season.
- Ensuring 6+ hours of sunlight daily.
- Thinning seedlings to 12–18 inches apart for airflow.
What are some marigold alternatives for pest control?
If marigolds aren’t your style, try these pest-repelling plants:
- Basil – Deters mosquitoes and flies.
- Nasturtiums – Repel aphids and squash bugs.
- Garlic chives – Keep pests away with their strong scent.
- Lavender – Deters moths and fleas.
Wrapping up and next steps
Marigolds aren’t just pretty—they’re hardworking garden heroes that keep pests at bay, boost soil health, and add vibrant color year-round! Whether you’re a seasoned gardener or just starting, these sun-loving perennials are an easy, natural way to protect your plants and elevate your outdoor space. 🌼
Ready to transform your garden? Start small—plant a few marigolds near your veggies or flowers, then expand as you see their magic in action. Your garden (and your veggies) will thank you!