
Vegetables
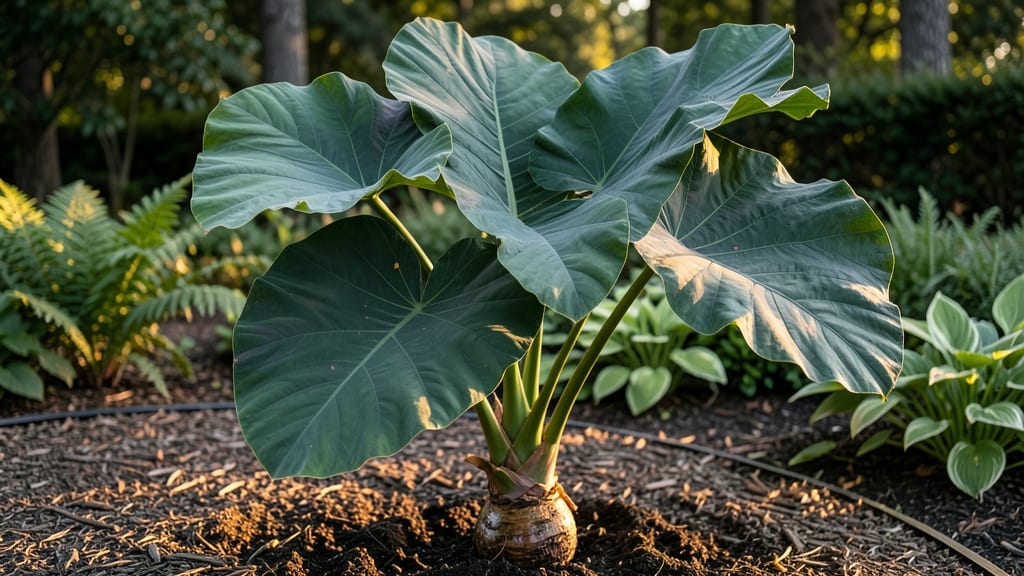
Growing large elephant ears starts with the right variety—Colocasia or Alocasia—and a sunny spot where those massive leaves can shine. ✨ I’ve grown both for years, and the key to their dramatic size lies in soil, water, and a little patience.
These plants don’t just add foliage; they create a tropical statement in your garden, and they’ll reach their full glory in just 60 days with the right care.
You’ll need rich, moist soil that drains well (think garden soil mixed with compost), a location with morning sun and afternoon shade, and plenty of water—these plants love it damp but hate soggy roots.
For propagation, divide tubers in spring or plant store-bought rhizomes, spacing them 2-3 feet apart to give those leaves room to spread. In colder climates, dig up tubers before frost and store them in dry peat moss over winter.
The payoff? Leaves that can grow 2-3 feet wide, velvety textures in deep greens or striking purples, and a garden that feels like a jungle retreat. Prune yellowing leaves early to keep energy focused on new growth, and watch for slugs—they adore these plants too.
With the right conditions, your elephant ears will outshine anything else in the garden.
Perfect for containers, pond edges, or as bold focal points. Once established, they’re nearly maintenance-free and multiply every year. Here’s how to get started—and keep those leaves big and bold all season.
📚 In This Guide
- What you need
- Instructions
- Tips and common mistakes
- Wrapping up and next steps
What you need
- ● Elephant ear (Colocasia) tubers: 3–5 large, firm tubers (1–2 inches in diameter). Look for varieties like ‘Black Magic’, ‘Illustris’, or ‘Pink Frost’ for maximum drama!
- ● Well-draining potting mix or garden soil: 5–10 gallons, amended with compost (20–30% by volume) for nutrient-rich growth.
- ○ Containers (optional but helpful): Large pots (12+ inches deep) with drainage holes, or a raised bed if planting directly in the ground.
- ● Slow-release fertilizer (10-10-10 or organic): 1–2 cups per planting area to kickstart growth.
- ● Garden trowel or shovel for planting.
- ○ Gloves (optional but recommended—elephant ear leaves can be prickly!).
- ● Mulch (straw or shredded leaves) to retain moisture and regulate soil temperature.
- ● Watering can or hose with a gentle spray nozzle (elephant ears love hydration!).
- ● Sunlight access: At least 6–8 hours of partial shade (morning sun + afternoon shade works best in hot climates).
- ● Patience (but not too much!)—these beauties sprout in 2–4 weeks and reach full size in 60 days.
- ● 🌡️ Soil temp: Wait until the soil is 60°F+ before planting—cold soil can stunt growth.
- ● ✨ Boost size: Soak tubers in water for 24 hours before planting to encourage faster sprouting.
- ● 💧 Watering hack: Keep soil consistently moist (not soggy!) for those monster leaves.
How to grow stunning large elephant ears in 60 days
Here's my foolproof method for coaxing those massive, dramatic leaves from tiny tubers.
🌱 Step 1: Chit the Tubers Before Planting
Elephant ear tubers need a head start to grow their signature giant leaves. Place your tubers in a shallow tray with the eyes facing up (they look like tiny dimples). I store mine in a cool, bright spot—like a sunny windowsill—where temperatures stay between 65-75°F for 4-6 weeks before planting.
Keep the tubers lightly moist but never soggy. You'll see sprouts emerge from the eyes—this is your signal they're ready. If you plant unchitted tubers, you'll lose precious growing time waiting for those first shoots to appear. Real talk: I once planted tubers straight from the store, and my leaves never reached half their potential size.
☀️ Step 2: Choose the Perfect Planting Location
These tropical beauties demand full sun to partial shade, with at least 6 hours of direct sunlight daily. I plant mine in a spot that gets morning sun and afternoon shade—this prevents leaf scorch while still encouraging vigorous growth. The soil should be rich, well-draining, and amended with compost to support their rapid growth.
Dig a hole twice as wide as the tuber but only 2 inches deep. The top of the tuber should sit just below soil level. Planting too deep will rot the tuber before it sprouts. After planting, water deeply to settle the soil around the tuber. You'll know you've done it right when the soil surface looks slightly firm but not packed.
💧 Step 3: Water Deeply and Maintain Moisture
Elephant ears have shallow roots and need consistent moisture to produce their massive leaves. Water 1-2 inches per week, adjusting for rainfall. The soil should stay evenly moist but never waterlogged. I check moisture by sticking my finger 2 inches deep—if it feels dry, it's time to water.
Mulch around the base with 2-3 inches of organic mulch to retain moisture and regulate soil temperature. This is especially important during heatwaves, when the soil can dry out quickly. Avoid overhead watering once leaves appear—wet foliage invites fungal diseases. Instead, water at the base early in the day so leaves dry quickly.
✂️ Step 4: Fertilize for Maximum Growth
Feed your elephant ears with a balanced, water-soluble fertilizer (like 10-10-10) every 2-3 weeks during the growing season. I start fertilizing when the first true leaves appear and continue until 2 weeks before the first frost. These plants are heavy feeders, and skipping fertilizer will result in smaller, less dramatic leaves.
Look for signs of nutrient deficiency—yellowing leaves often mean it's time to fertilize. I also add a handful of compost tea monthly to boost microbial activity in the soil. The goal is to keep the soil rich and active, which translates to those show-stopping leaves you're after.
🌿 Step 5: Protect and Enjoy Your Giant Leaves
Once your elephant ears reach their full height—often 3-5 feet tall—they'll need support if they're planted in windy areas. I stake taller varieties with bamboo stakes tied loosely to the stems. This prevents the dramatic leaves from tearing in strong winds.
Harvest leaves as needed by cutting stems at the base with clean pruners. The plants will continue producing new leaves throughout the season. By late summer, you'll have a stunning display of giant foliage that turns heads in any garden. Just remember: these tropical plants won't survive frost, so dig up tubers before the first cold snap and store them in a cool, dry place until next spring.
Tips & tricks for perfect large elephant ears
Here's how to maximize your tropical foliage potential without the common growing mistakes.
Chitting Strategy: During those critical 4-6 weeks of chitting, place a small piece of mesh or chicken wire over your tray to protect sprouts from curious pets. I also rotate the tray quarter-turn daily to ensure even light exposure—this prevents lopsided sprouting. The 65-75°F range is non-negotiable; if your home runs cooler, consider a seedling heat mat set to 70°F for consistent results.
Soil Preparation Secret: Before planting, mix your native soil with 50% compost and 10% perlite for that perfect well-draining, nutrient-rich combination. I test soil pH first—elephant ears thrive in 6.0-7.5 range. If your soil tests acidic, add crushed limestone to adjust. The 2-inch deep planting depth is crucial; deeper planting creates anaerobic conditions that rot tubers before sprouting.
Watering Wisdom: The 1-2 inches per week guideline assumes average rainfall—adjust immediately during drought conditions. I use a rain gauge to track actual precipitation, then supplement accordingly. For the 2-3 inches of mulch, I recommend straw over wood chips; straw breaks down faster, replenishing soil nutrients as it decomposes. Always water at soil level in the morning to prevent fungal issues from overnight moisture.
Fertilizer Timing: Those 2-3 week intervals between feedings should start when you see the first true leaves—not the initial sprouts. I use a fish emulsion as my starter fertilizer because it's gentle on new roots. The 2 weeks before frost cutoff is strict; stopping too late can encourage tender new growth that won't survive winter. For organic options, worm castings work wonderfully as a slow-release alternative.
Pro Tips for Large Elephant Ears
- Here's how to maximize your tropical foliage potential without the common growing mistakes.
- Chitting Strategy: During those critical 4-6 weeks of chitting, place a small piece of mesh or chicken wire over your...
- Soil Preparation Secret: Before planting, mix your native soil with 50% compost and 10% perlite for that perfect well...
Frequently asked questions
Got questions about growing large elephant ears? You’re not alone! Here are some of the most common queries—plus straightforward answers to help you grow these stunning giants with confidence.
How big do large elephant ears leaves actually get?
These tropical beauties are true to their name! Mature leaves can reach 3–5 feet wide and even longer, with dramatic, glossy surfaces in deep green or burgundy. Think of them as living art—perfect for adding drama to shady spots or containers. Just give them space; they’ll spread out like a lush umbrella!
Can I grow large elephant ears from grocery store leaves?
Unfortunately, no—store-bought leaves won’t regrow roots. Instead, start with tuberous roots (sold at nurseries in early spring) or divide established clumps in spring. Pro tip: Soak the tubers in warm water for 24 hours before planting to jumpstart growth!
What’s the best way to protect them from frost or cold snaps?
Elephant ears are tender perennials in most climates (zones 8–11). Before frost, cut back foliage and dig up tubers, store them in dry peat moss or sand in a cool, dark place (40–50°F). In warmer zones, mulch heavily or cover with burlap if temps dip below 30°F. Spring replanting is easy—just wait for soil to warm!
Are the leaves edible, or are they purely decorative?
While not commonly eaten, elephant ear leaves are technically edible (young, tender leaves can be cooked like greens). However, they’re bitter and fibrous, so most gardeners enjoy them strictly for their striking visual impact. Focus on their dramatic foliage—they’re nature’s statement plants!
Why are my elephant ear leaves turning yellow or brown?
Yellowing often signals overwatering or poor drainage—these plants hate soggy roots! Brown edges? It could be sunburn (they prefer shade) or pests like slugs. Check soil moisture, ensure 6+ hours of shade, and inspect leaves for chew marks. A balanced fertilizer (like 10-10-10) in spring can also boost health!
What are some great alternatives if I can’t grow elephant ears?
If your climate or space is tricky, try these low-maintenance, large-leafed plants:
- Alocasia (Elephant Ear) – Similar look, slightly hardier.
- Giant Taro (Colocasia) – Classic, shade-loving, and edible tubers!
- Philodendron ‘Xanadu’ – Big, glossy leaves for indoor/outdoor use.
- Hostas – Hardy, shade-tolerant, and come in giant varieties.
Wrapping up and next steps
Growing large elephant ears is a rewarding journey that brings bold beauty and tropical flair to your garden in just 60 days! 🌿 Whether you're drawn to their stunning foliage or eager to experiment with edible varieties, these giants are a fantastic addition for both beginners and seasoned gardeners.
With the right soil, sunlight, and care, you’ll be harvesting (or admiring!) their impressive leaves in no time.
Ready to dive in? Start by gathering your supplies and planting those seeds or tubers—your garden’s next showstopper is just a few weeks away! 🌱