
Vegetables
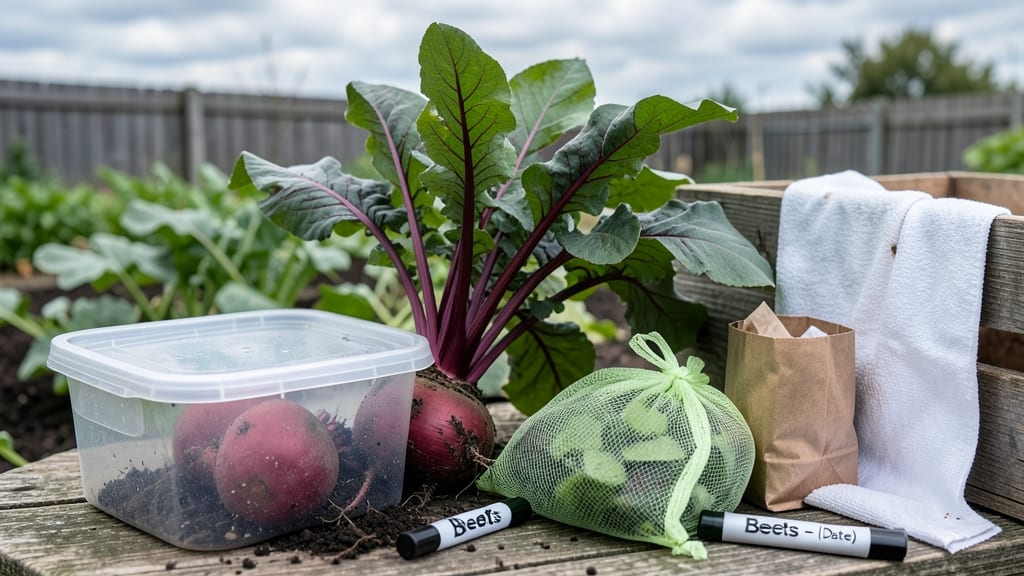
Storing beets and greens properly means no more sad, wilted scraps in your crisper drawer. 🌱 The secret to keeping them crisp for weeks—whether you're prepping for meals or saving harvests—lies in separating the roots from the leaves, controlling moisture, and choosing the right containers.
Beets thrive in cool, dark spaces with high humidity, while their greens need airflow to stay fresh. Most people ruin them by storing both together or letting them dry out.
I’ve tested everything from plastic bags to vacuum sealing, and the right method depends on how long you want to store them—short-term fridge tricks work for a few days, but long-term solutions like freezing or canning last months.
You’ll end up with beets that stay firm and sweet, and greens that hold their vibrant color for salads or cooking. The key is a little prep work upfront: trimming, proper washing, and the right containers make all the difference. No more tossing perfectly good produce!
Works for both garden harvests and store-bought veggies—just adjust based on whether you’re storing for a few days or stocking up for winter. Here’s how to do it right the first time.
📚 In This Guide
- What you need
- Instructions
- Tips and common mistakes
- Wrapping up and next steps
What you need
- ● Beets: Fresh, unwashed beets (1–2 lbs, depending on quantity)
- ● Sharp chef’s knife or vegetable peeler (for trimming)
- ● Cutting board (preferably food-safe plastic or wood)
- ● Greens (e.g., beet greens, spinach, Swiss chard): Fresh, untrimmed greens (1–3 bunches, depending on size)
- ● Paper towels or clean kitchen towel (for drying)
- ● Storage Solutions: Vacuum sealer machine (chamber or external) or reusable silicone bags with a vacuum sealer (if using alternative methods)
- ● Freezer-safe storage bags or containers (if freezing instead of vacuum-sealing)
- ○ Plastic wrap or beeswax wraps (optional, for short-term storage)
- ● Food-grade plastic wrap (for temporary sealing before vacuum-sealing)
- ● Labeling markers or sticky notes (to track storage dates)
- ● Glove (to protect hands while handling greens)
- ● Small bowl or colander (for rinsing greens, if needed)
- ● Ice cube tray (for portioning beet greens for freezing)
Step-by-Step guide to storing beets and greens with vacuum sealing
Preserve your harvest's peak flavor and crispness for weeks using this simple, foolproof method.
🪴 Step 1: Harvest and Prep Your Beets and Greens
Start by harvesting beets when they're fully mature but still firm—about 2-3 inches in diameter. Use a sharp knife to cut the greens off at the base, leaving about ½ inch of stem attached to the beet. This keeps the beet intact while allowing the greens to be stored separately.
For greens, harvest on a dry morning after the dew has evaporated. Shake off excess soil and rinse briefly under cool water, then pat dry thoroughly with a clean towel or salad spinner. Wet leaves will create condensation inside the bag and speed up spoilage. I always work in batches of 4-6 beets with matching greens to keep things manageable.
💧 Step 2: Clean and Dry Thoroughly
Give both beets and greens a final inspection for dirt or insects. Use a vegetable brush to gently scrub beets if needed, then rinse again with cool water. For greens, separate the leaves and inspect each one—discard any that are yellowed or damaged. This step is critical because vacuum sealing traps moisture, and any hidden dirt or moisture will cause mold.
Spread the beets and greens on a clean kitchen towel or paper towels in a single layer. Let them air-dry completely—this can take 10-15 minutes. You'll know they're dry enough when the towel beneath them is completely dry to the touch. Don't rush this; thorough drying prevents condensation buildup inside the bag.
✂️ Step 3: Package for Vacuum Sealing
Place the dried beets and greens into separate vacuum-seal bags. For beets, I use 1 quart-sized bags and place 2-3 beets per bag, depending on their size. For greens, use 1 gallon-sized bags and fill them loosely—greens compress more than beets, so don't overfill. Leave about 2 inches of space at the top of the bag for the vacuum sealer to work effectively.
Seal the bags according to your vacuum sealer's instructions. Most machines have a setting for produce—use that for the best results. You'll hear a hiss as the air is removed, and the bag will shrink slightly. Check that the seal is tight and no air is trapped. If you're storing greens, you can also add a paper towel to absorb any residual moisture that might develop during storage.
⏰ Step 4: Store in Optimal Conditions
Place the sealed bags in the coldest part of your refrigerator, ideally between 32-40°F. Avoid the crisper drawer if it's too humid—beets and greens prefer drier conditions. For long-term storage, you can also freeze the vacuum-sealed bags, though greens will lose some texture when thawed.
Check your stored beets and greens every 2-3 weeks. Beets should remain firm and bright in color, while greens should stay vibrant and crisp. If you notice any soft spots or wilting, remove those items immediately to prevent spoilage from spreading. With proper vacuum sealing, your beets should stay fresh for 4-6 weeks, and greens for 2-3 weeks.
🌱 Step 5: Use and Enjoy
When you're ready to use your stored beets, simply remove them from the bag and rinse under cool water if needed. For greens, you can use them straight from the bag—no need to thaw. Beets stored this way hold their sweetness and texture exceptionally well, making them perfect for roasting, boiling, or even pickling.
Greens stored in vacuum-sealed bags are ideal for soups, salads, or sautéing. If you notice the greens have lost some crispness, they're still safe to use in cooked dishes. The vacuum sealing preserves their nutrients and flavor, so you can enjoy homegrown goodness long after the harvest season ends.
Tips & tricks for perfect vacuum-sealed beets and greens
Here's what nobody tells you about keeping your garden harvest fresh for weeks—without the guesswork.
Harvest Timing: Always harvest beets and greens on a dry morning when dew has evaporated. This prevents excess moisture from sticking to the leaves, which creates condensation inside your vacuum-sealed bags and speeds up spoilage. I've learned this the hard way after finding moldy greens from damp harvests—trust me, it's worth the early start.
Drying is Non-Negotiable: That 10-15 minute drying time in Step 2 is absolutely critical. I know it's tempting to rush, but any moisture trapped in the bag will cause mold within days. Test for dryness by pressing a paper towel against the beets or greens—if it comes away dry, you're good to go. For greens, I even use a salad spinner for an extra-dry finish.
Bag Size Matters: Don't overfill those quart and gallon bags! Beets should have about 2 inches of space at the top, and greens should be packed loosely. I've seen people try to cram too many beets in a bag, which prevents proper sealing. Use the vacuum sealer's produce setting—it's designed to handle these delicate items without crushing them.
Storage Location: The coldest part of your fridge isn't always the crisper drawer—it's often the bottom shelf or a dedicated produce bin. Beets and greens prefer drier conditions, so avoid the crisper if it feels damp. I place my sealed bags on a wire rack to ensure proper airflow around them, which extends freshness by another week.
Pro Tips for Store Beets And Greens
- Here's what nobody tells you about keeping your garden harvest fresh for weeks—without the guesswork.
- Harvest Timing: Always harvest beets and greens on a dry morning when dew has evaporated. This prevents excess moistu...
- Drying is Non-Negotiable: That 10-15 minute drying time in Step 2 is absolutely critical. I know it's tempting to rus...
Frequently asked questions
How long can I store beets and greens in the fridge?
Beets last 1–2 weeks in the fridge when stored properly—wrap them in a damp towel or place in a sealed container. Greens (like Swiss chard or beet greens) stay fresh for 5–7 days when stored in a plastic bag with a paper towel to absorb moisture. For longer storage, vacuum-sealing extends their life to 4–6 weeks!
Can I freeze beets and greens instead of vacuum-sealing?
Yes! Beets freeze well—peel, slice, and blanch (dip in boiling water for 2 mins) before freezing. Greens (like beet tops) can be chopped, blanched, and frozen in airtight bags for 8–12 months. Thaw in the fridge overnight for best texture. Vacuum-sealing still wins for texture, but freezing works in a pinch!
What’s the best way to revive wilted greens?
If your greens look sad, trim the stems and soak them in ice water for 15–30 mins. Pat dry with a paper towel, then store in a paper towel-lined bag in the fridge. For extra crispness, sprinkle a pinch of salt in the water—it helps retain moisture. Avoid reviving beets this way; cook them fresh for best results!
Can I store cooked beets or greens the same way?
Cooked beets and greens don’t vacuum-seal well—they’ll get mushy. Instead, cool them completely, portion into airtight containers, and refrigerate for 3–5 days. For longer storage, freeze cooked beets (raw or roasted) in single-serving portions. Greens like sautéed kale freeze best when lightly oiled to prevent browning.
Why do my vacuum-sealed beets turn slimy?
Sliminess usually means excess moisture or old beets. Before sealing, pat beets dry and use a paper towel inside the bag to absorb extra dampness. If stored properly, vacuum-sealed beets should stay firm for weeks. If slimy, discard them—they’ve gone bad. Always check for off smells or mold before sealing!
Wrapping up and next steps
Storing beets and greens the right way doesn’t have to be complicated—with just a few simple steps, you can keep them fresh and flavorful for weeks! Whether you’re vacuum-sealing, refrigerating, or freezing, the key is minimizing air exposure and keeping them dry and cool.
Now that you’re armed with these tips, your veggies will stay crisp and ready for your next meal. 🌱
Ready to put your new skills to work? Start by prepping a fresh batch of beets or greens today—your future meals (and wallet) will thank you! 😊