
Vegetables
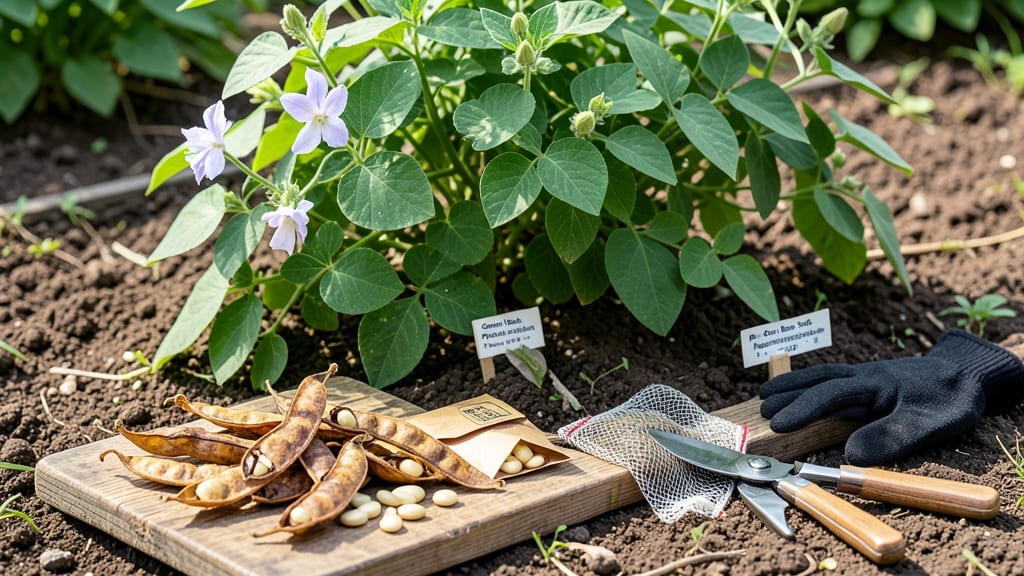
Saving green bean seeds from your own harvest is the ultimate gardener’s reward—imagine planting varieties you’ll never find in stores. 🌱 The secret lies in letting just a few pods mature fully on the vine before harvesting, then drying and storing them properly.
I’ve saved seeds from my heirloom beans for years, and the process is simpler than you’d think, especially when you focus on the right plants and timing.
You’ll need only a handful of things: mature pods from healthy plants, a dry paper bag for each variety, and a warm, dry spot for drying. The key is selecting beans that are fully ripe—no green left inside—and avoiding any that show signs of disease or pest damage.
Once you’ve picked the right pods, the drying process takes about 2-3 weeks, with seeds ready to store when they rattle inside the pod.
When done right, your saved seeds will stay viable for 3-5 years, giving you a head start on next season’s garden. The payoff? Fresh, homegrown beans that taste better than anything you can buy, plus the satisfaction of knowing exactly where they came from.
Plus, seed-saving cuts costs and keeps heirloom varieties alive for future generations.
This method works for bush and pole beans alike, whether you’re growing in a backyard plot, raised bed, or even containers. The only real challenge is patience—letting those pods stay on the vine until they’re truly ready. Ready to try it?
📚 In This Guide
- What you need
- Instructions
- Tips and common mistakes
- Wrapping up and next steps
What you need
- ● Mature green bean pods: 5–10 fully ripened, dry pods (harvest when pods turn brown and seeds rattle inside).
- ● Paper towels or newspaper: 2–3 sheets for drying seeds.
- ● Small envelope or seed-saving packet: 1–2 (label with the bean variety and date).
- ● Scissors or pruning shears: 1 pair (for trimming pods).
- ● Pencil or permanent marker: 1 (for labeling).
- ○ Air-tight container (optional but recommended): A small jar or ziplock bag (2–4 inches wide) for long-term storage.
- ● Desiccant packets: 1–2 (to absorb moisture in storage containers).
- ● Seed catalog or notebook: For tracking varieties, germination rates, and notes on performance.
- ● Fine mesh sieve: 1 (to separate seeds from pod debris quickly).
- ● Humidity-controlled storage box: If you live in a damp climate (e.g., a dehumidifier or sealed container with silica gel).
- ● Hand lens or magnifying glass: 1 (to inspect seeds for pests or damage before storing).
Step-by-Step instructions for saving green bean seeds
Here’s how I guarantee high-quality seeds from your best pods—no fancy tools needed.
🌱 Step 1: Select and Harvest Mature Pods
Pick pods that are fully mature but not overripe—look for dry, papery skin and seeds that rattle inside when shaken. Avoid pods that split open naturally or show signs of disease. I harvest in the late afternoon when the plants have had all day to photosynthesize, which makes the pods easier to process later.
Use clean, sharp scissors or pruners to snip the pods from the vine. Leave the stems attached—they’ll help you remember which varieties you saved. Store harvested pods in a paper bag (not plastic) in a cool, dry place for 2-3 days to let them dry further before cracking them open.
🌿 Step 2: Dry and Extract the Seeds
Spread the pods on a clean, dry towel or mesh screen in a warm, well-ventilated area. I place mine near a sunny window but out of direct sunlight to prevent overheating. The seeds are ready when the pods crumble easily between your fingers—this usually takes 1-2 weeks depending on humidity.
Once dry, crack each pod open and remove the seeds. Discard any seeds that are shriveled, discolored, or damaged. I use a small bowl to catch the seeds and a butter knife to gently pry them out. Save only the plump, firm seeds—they’ll produce the strongest plants next season.
💧 Step 3: Clean and Store the Seeds
Spread the extracted seeds on the towel again and let them dry for another 24-48 hours to ensure all moisture is gone. This prevents mold during storage. I use a fine-mesh strainer to sift out any remaining pod fragments or debris, leaving only the clean seeds.
Store the seeds in a labeled envelope or small glass jar with a desiccant packet (like silica gel) to absorb any lingering moisture. Keep them in a cool, dark place—like a sealed container in your fridge or a seed vault. Properly stored, green bean seeds stay viable for 3-5 years, though germination rates drop after the first year.
⏰ Step 4: Test Germination Before Next Season
Before planting, test a few seeds to confirm viability. Place 10 seeds between damp paper towels in a sealed plastic bag. Keep them in a warm spot (70-75°F) and check daily. If 80% or more sprout within 7-10 days, your seeds are ready to plant. If fewer sprout, store the remaining seeds for another year or start fresh.
This simple test saves you from planting dozens of seeds only to find they won’t grow. I always label my seed envelopes with the variety and year—next year’s garden will thank you for the effort!
Tips & tricks for perfect green bean seed saving
Took me years of trial and error to perfect these seed-saving secrets—here’s what nobody tells you about getting the best green bean seeds for next season.
Pod Selection Insight: The 2-3 days drying period before cracking pods is non-negotiable. I’ve learned the hard way that rushing this step leads to moldy seeds. Place pods in a single layer in the paper bag—overcrowding traps moisture and encourages rot. If your kitchen is humid, extend the drying time to 4-5 days instead of the standard 2-3 days.
Drying Strategy: The 1-2 weeks drying time in Step 2 can feel agonizing, but patience pays off. I place a small fan nearby to create gentle airflow without direct drafts. If pods aren’t crumbling after 10 days, move them to a warmer spot (like near a sunny window) for the final few days. Just avoid direct sunlight—it can overheat and dry the seeds too quickly, reducing viability.
Storage Wisdom: That 24-48 hours final drying on the towel is where most people fail. I use a fine-mesh strainer to remove every last bit of pod debris—even tiny fragments can harbor mold. For extra protection, add a small packet of rice to your seed storage container alongside the silica gel. The rice absorbs moisture more effectively than desiccant packets alone, especially in humid climates.
Pro Tips for Save Green Bean Seeds
- Took me years of trial and error to perfect these seed-saving secrets—here’s what nobody tells you about getting the ...
- Pod Selection Insight: The 2-3 days drying period before cracking pods is non-negotiable. I’ve learned the hard way t...
- Drying Strategy: The 1-2 weeks drying time in Step 2 can feel agonizing, but patience pays off. I place a small fan n...
Frequently asked questions
Got questions about saving green bean seeds? You’re not alone! Here are some of the most common concerns—and their answers—to help you master seed-saving like a pro.
Can I save seeds from any green bean variety?
Not all green beans are created equal! Only heirloom or open-pollinated varieties (like 'Blue Lake' or 'Kentucky Wonder') produce reliable seeds for next year. Hybrids (marked with "F1" or "Hybrid") won’t grow true to type—so skip those! Check seed packets for "OP" or "heirloom" labels to stay safe.
How long does it take for green bean pods to fully mature for seed saving?
Patience is key! After flowering, wait until the pods turn completely dry and papery (not just yellow or brown) before harvesting. This usually takes 8–12 weeks after pollination, depending on your climate. If pods shatter too soon, try harvesting in the morning when humidity is low.
What’s the best way to dry green bean seeds at home?
Spread seeds in a single layer on a paper towel or mesh screen in a warm, well-ventilated spot (like a sunny windowsill or dehydrator at 95°F). Avoid plastic bags—they trap moisture and cause mold. Stir seeds daily for 1–2 weeks until they’re hard and rattly inside the pod.
Do I need to worry about cross-pollination between green bean plants?
Most green beans are self-pollinating, so cross-pollination is rare—but not impossible! To minimize risks, space varieties by at least 100 feet or grow them in separate years. If you’re saving seeds from multiple types, use row covers or hand-pollinate with a paintbrush for extra control.
How should I store saved green bean seeds for long-term use?
Once fully dry, remove seeds from pods and store them in a cool (32–40°F), dark place (like a fridge or seed vault) in an airtight container with a desiccant packet. Label with the variety and date—properly stored seeds stay viable for 3–5 years!
Wrapping up and next steps
Saving green bean seeds is a rewarding way to ensure a bountiful harvest next season—plus, it’s budget-friendly and eco-conscious! 🌱 By following these simple steps, you’ll be well on your way to growing heirloom-quality beans from your own saved seeds.
Now that you’re equipped with the know-how, why not start planning your next planting season? Grab a notebook, jot down your favorite varieties, and get ready to watch your garden thrive with homegrown goodness.
Pro tip: Share your newfound skills with fellow gardeners—you might inspire someone else to start saving seeds too! 🌟