
Vegetables
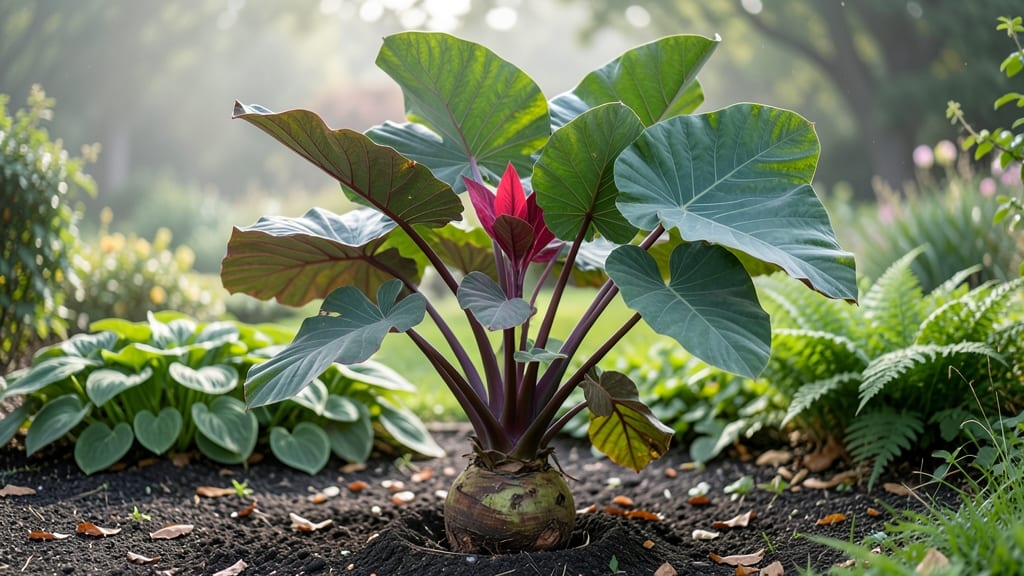
Growing hardy elephant ears means waking up to leaves so big they look like they belong in a rainforest. 🌿 These tropical-looking perennials thrive in zones 7-11, returning each year with even more dramatic foliage if you give them the right conditions—and I’ve learned the hard way what works (and what doesn’t).
The secret is treating them like they’re from a jungle, not a desert: rich, moist soil, partial shade, and consistent watering. Most people overlook winter prep, but protecting the tubers in colder zones means you’ll get that same jaw-dropping display next spring.
I’ve grown ‘Black Stem’ and ‘Elephant Ear’ for years, and once you see how they transform a shady corner into a bold statement, you’ll never want to plant anything else there. By summer, you’ll have leaves reaching 3-5 feet wide, with colors ranging from deep purple-black to vibrant green.
The best part? They’re low-maintenance once established, and deer and rabbits leave them alone. Even in small spaces, one plant creates a focal point that outshines anything else in the garden. Here’s how to set them up for success—from planting tubers in spring to overwintering them like a pro.
Let’s get those giant leaves growing!
📚 In This Guide
- What you need
- Instructions
- Tips and common mistakes
- Wrapping up and next steps
What you need
- ● Elephant Ear Tubers: 3–5 healthy tubers (choose varieties like Colocasia 'Black Magic' or 'Elephant Ear Giant' for bold foliage). Pro tip: 💡 Buy organic or disease-free tubers from a trusted nursery.
- ● Well-Draining Soil: 1–2 cubic yards of rich, moist (but not soggy) soil with a pH of 6.0–7.5. Mix in compost (1 part compost to 3 parts soil) for nutrients.
- ● Sunlight: A partially shaded spot (4–6 hours of morning sun; avoid harsh afternoon rays).
- ● Water: Consistent moisture (1–2 inches per week). A drip irrigation system or hose helps prevent fungal issues.
- ● Mulch: 2–3 inches of straw or shredded leaves to retain moisture and regulate soil temperature.
- ● Garden Fork or Trowel: For planting tubers (6–8 inches deep, 18–24 inches apart).
- ● Fertilizer: Balanced 10-10-10 or orgainc fertilizer (apply every 4–6 weeks during growing season).
- ○ Support Stakes (Optional): For tall varieties (e.g., 'Illustris'), use 3–4 ft bamboo stakes to prevent flopping.
- ○ Row Covers (Optional): Lightweight fabric to protect from late frosts or pests.
- ● Gloves & Pruners: For handling tubers and trimming dead leaves in fall.
How to plant and care for hardy elephant ears
These dramatic perennials thrive with minimal fuss—here's how to get them established for years of bold foliage.
🌱 Step 1: Choose the Perfect Planting Spot
Elephant ears need space to spread and grow upward—aim for a location with full sun to partial shade (at least 4-6 hours of direct sun daily). The more sun, the larger and more vibrant their leaves will become. I always pick a spot near the back of the border or against a fence; their massive leaves can reach 3-5 feet tall and 2-3 feet wide at maturity.
Check the soil drainage first—these plants hate soggy roots. Dig a hole twice as wide as the root ball but only slightly deeper. Amend heavy clay with 2-3 inches of compost mixed into the bottom of the hole. The goal is loose, well-draining soil that lets roots establish quickly. If your soil is sandy, add a handful of organic matter to help retain moisture.
🪴 Step 2: Plant at the Right Depth and Spacing
Remove the plant from its container and loosen any circling roots gently with your fingers. Place it in the hole so the top of the root ball sits 1 inch below soil level—this prevents stem rot while encouraging new growth. The spacing matters: plant 3-4 feet apart for single plants or 4-5 feet apart if you're creating a dramatic backdrop.
Fill the hole with soil, pressing lightly around the edges to remove air pockets. Water deeply right after planting to settle the soil and eliminate gaps. You'll know it's right when water drains through the hole within 10-15 minutes. Mulch with 2-3 inches of shredded bark or leaves to protect roots and keep moisture even.
☀️ Step 3: Water Consistently Until Established
Newly planted elephant ears need 1-1.5 inches of water weekly during their first growing season. Water deeply at the base—avoid overhead watering, which can cause fungal issues on those massive leaves. Check soil moisture by sticking your finger 2 inches down; if it feels dry, it's time to water. Overwatering is the biggest mistake—these plants are tough but won't tolerate soggy conditions.
Once established (after 6-8 weeks), they become drought-tolerant. You'll see this when the leaves stay upright and vibrant even during dry spells. If leaves start wilting or drooping, that's your cue to water—but only if the soil is bone-dry. Real talk: I've seen these plants bounce back from neglect, but they'll reward consistent care with bigger, bolder foliage.
✂️ Step 4: Divide and Maintain for Yearly Growth
Every 3-4 years, dig up clumps in early spring or fall and divide them. Look for natural separations where roots meet—each division should have 3-5 healthy shoots. Replant the divisions immediately in fresh spots. This keeps your plants vigorous and prevents overcrowding, which leads to smaller leaves. I always mark new planting spots with stakes so I don't forget where they are.
Cut back dead or damaged leaves in late fall or early spring. Healthy leaves will regrow quickly in spring, often even larger than the previous year. Fertilize lightly in early spring with a balanced 10-10-10 fertilizer—too much nitrogen makes leaves soft and floppy instead of sturdy and dramatic. The key is patience; these perennials get better with age, returning bigger and bolder each season.
Tips & tricks for perfect hardy elephant ears
Here's what nobody tells you about growing these showstopper perennials—details that make all the difference.
Sunlight Strategy: While 4-6 hours of sun is the minimum, I've found that elephant ears actually reward more light—up to 8 hours daily—with deeper colors and thicker stems. If your garden has afternoon shade, position them to catch morning sun instead. The key is avoiding harsh midday sun in hot climates, which can scorch those massive leaves. I always test spots by observing how other plants handle the light before committing.
Soil Prep Secret: The 2-3 inches of compost recommendation is perfect, but here's the pro move: mix in a handful of perlite or coarse sand for clay soils. This creates tiny air pockets that prevent waterlogging while still retaining moisture. For sandy soils, add a bit of peat moss to help hold onto that precious 1-1.5 inches of weekly water. Think of it as giving your roots a spa treatment—they'll thank you with bigger leaves next season.
Watering Wisdom: That 10-15 minute drainage test after planting is crucial, but don't stop there. I always do a second check 24 hours later by pressing my finger 2 inches down—if it's still damp, cut back on watering. These plants are surprisingly drought-tolerant once established, but their first 6-8 weeks are when they're most vulnerable. The goal is consistently moist but never soggy soil—like a well-wrung sponge.
Pro Tips for Hardy Elephant Ears
- Here's what nobody tells you about growing these showstopper perennials—details that make all the difference.
- Sunlight Strategy: While 4-6 hours of sun is the minimum, I've found that elephant ears actually reward more light—up...
- Soil Prep Secret: The 2-3 inches of compost recommendation is perfect, but here's the pro move: mix in a handful of p...
Frequently asked questions
Got questions about growing hardy elephant ears? You’re not alone!
These dramatic perennials are stunning, but they do come with a few quirks. Here are answers to the most common questions to help you grow them with confidence.
How cold can hardy elephant ears tolerate?
Hardy elephant ears (like Colocasia varieties) thrive in USDA zones 7-11. In colder regions (zones 6 and below), they’ll die back in winter but regrow from rhizomes in spring. For extra protection, mulch heavily or dig up and store tubers indoors in pots with damp peat moss.
How long does it take for hardy elephant ears to establish?
These plants are fast—expect new shoots to emerge in 2-4 weeks after planting rhizomes in spring. Full-size foliage (those iconic giant leaves!) typically appears within 6-8 weeks, though they’ll grow even larger in subsequent years. Patience pays off—they’re perennials that reward loyalty!
Can I grow hardy elephant ears in containers?
Choose a container at least 18-24 inches wide and deep with drainage holes. Use a rich, well-draining potting mix and place them in a spot with morning sun and afternoon shade. Containers dry out faster, so water consistently. Just be prepared to move them indoors or protect them in winter if you’re in a colder zone.
What should I do if my elephant ears get chewed by pests?
Slugs, snails, and deer love these plants! Handpick pests at night (they’re most active then) or use organic barriers like copper tape or diatomaceous earth. For deer, try repellent sprays with garlic or hot pepper. If damage is minor, new leaves will replace the chewed ones—these plants are tough!
How do I divide and propagate hardy elephant ears?
Divide them every 3-4 years in early spring or fall. Dig up the rhizomes, separate the sections (each should have at least one "eye" or growth node), and replant immediately. You can also propagate by water rooting: place a healthy leaf cutting in water until roots form, then transplant to soil.
Wrapping up and next steps
Growing hardy elephant ears is a rewarding journey that brings bold, tropical beauty to your garden year after year—with minimal effort! These perennials thrive in the right conditions, offering dramatic foliage that grows bigger and bolder with each season.
Whether you’re a seasoned gardener or just starting out, their resilience and striking presence make them a must-have for any outdoor space.
Ready to transform your garden? Start by selecting the perfect spot, gathering your supplies, and planting with confidence. Check out our step-by-step guide to get growing today—your future jungle of giant leaves awaits! 🌿✨