
Vegetables
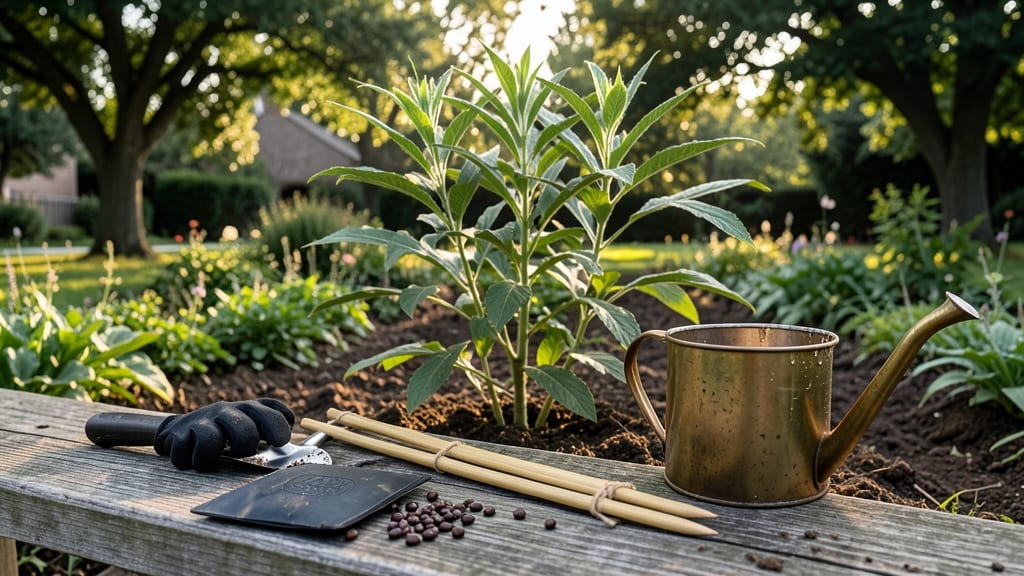
Growing amaranth from seed unlocks a garden superstar that doubles as both a striking ornamental and a nutrient-packed food source. 🌱 The first time I planted these seeds, I was amazed at how quickly they grew—tall, vibrant stalks that turn into edible greens or even grain!
Amaranth thrives where many vegetables struggle, making it perfect for beginners or anyone looking to add resilience to their garden.
You’ll need well-draining soil, full sun, and patience for germination (which can take 7-14 days). Start seeds indoors 4-6 weeks before your last frost or sow directly after soil warms to at least 60°F.
Thin seedlings to 12-18 inches apart—they grow fast and need space to avoid crowding. Water consistently but avoid soggy soil, which can lead to rot.
The payoff is worth it: lush, deep green leaves perfect for salads or sautéing, and striking red or gold foliage that adds drama to any garden.
Amaranth also produces edible seeds that can be harvested like grain. With minimal effort, you’ll have a plant that feeds both your table and your landscape.
Even in challenging conditions, amaranth delivers. Whether you’re growing in containers, raised beds, or open soil, this hardy plant adapts well. Just remember: thin early, water wisely, and watch those seedlings transform into towering, productive plants by midsummer.
📚 In This Guide
- What you need
- Instructions
- Tips and common mistakes
- Wrapping up and next steps
What you need
- ● Amaranth seeds – Choose organic, non-GMO seeds (e.g., Red Garnet, Joseph’s Coat, or Green Dragon). Buy 1–2 oz (30–60g) per planting.
- ● Growing containers or garden bed – For container gardening: 5–7 gallon pots (minimum 12" deep) with drainage holes.
- ● For in-ground planting: Well-draining soil in a sunny spot (6+ hours of light/day).
- ● High-quality potting mix or garden soil – 1–2 bags (sterilized to prevent disease). Amaranth thrives in loamy, slightly acidic (pH 6.0–7.0) soil.
- ○ Compost or organic fertilizer – 1 cup per plant (optional but recommended for grain varieties). Use a balanced 10-10-10 or high-nitrogen fertilizer.
- ● Watering can or hose with a gentle spray nozzle – Amaranth hates soggy roots!
- ● Plant labels – To track varieties (especially if growing multiple types).
- ● Seedling heat mat – Speeds up germination if starting indoors in cool climates.
- ● Row covers or shade cloth – Protects young seedlings from pests or intense midday sun.
- ● Trellis or stakes – Supports tall varieties (like Joseph’s Coat) to prevent flopping.
- ● pH testing kit – Ensures soil is in the ideal range for amaranth.
- ● Gloves – Saves hands from prickly stems (especially Red Garnet).
Step-by-step instructions for growing amaranth from seed
Here's how I grow vibrant amaranth—both leafy greens and grain varieties—in my garden every year.
🌱 Step 1: Start Seeds Indoors 8-10 Weeks Before Last Frost
Fill small seedling trays with moistened seed-starting mix and press it down lightly. Amaranth seeds germinate quickly, so I plant them ¼ inch deep, just enough to cover them. Space seeds 1 inch apart—they grow fast and need room to avoid crowding. Place the tray in a warm spot (70-75°F) since amaranth thrives in heat.
Keep the soil consistently moist but not soggy. You'll see sprouts in 5-7 days—that's one of the fastest germination rates I've worked with. Once seedlings have 2-3 true leaves, thin them to the strongest plant per cell. This prevents competition and gives your amaranth room to develop broad, healthy leaves.
☀️ Step 2: Harden Off and Transplant After Warm Soil Returns
When nighttime temperatures stay above 55°F, it's time to move seedlings outdoors. Start by placing them in a shaded spot for 2-3 hours the first day, gradually increasing exposure over 5-7 days. Amaranth loves warmth, so I never rush this step—cold soil shocks their roots.
Transplant seedlings 12-18 inches apart in full sun. Amaranth thrives in hot, sunny conditions, so choose a location that gets at least 6-8 hours of direct sunlight daily. The soil should be well-draining but rich in organic matter. If your soil is heavy clay, mix in compost to improve aeration.
💧 Step 3: Maintain Consistent Moisture and Fertility
Water amaranth deeply 1-2 times per week, ensuring the top 2 inches of soil stay moist. This plant loves water but hates soggy roots, so always let the soil dry slightly between waterings. Mulch around the base with straw or grass clippings to retain moisture and suppress weeds—amaranth grows so fast it outcompetes most invaders naturally.
Feed plants every 3-4 weeks with a balanced liquid fertilizer (like 10-10-10) diluted to half-strength. You'll notice the leaves grow broader and more vibrant with consistent feeding. If growing grain varieties, reduce nitrogen slightly after flowering to encourage seed development instead of leafy growth.
✂️ Step 4: Harvest Greens and Monitor Grain Varieties
For leafy varieties, start harvesting when plants reach 12 inches tall. Snip outer leaves just above a set of smaller leaves to encourage continuous growth. Regular harvesting keeps plants bushy and productive. If you let them grow too tall, the leaves become tough and less tender.
Grain varieties take longer—wait until the seed heads turn tan or brown before harvest. Cut the entire stalk and hang it upside down in a dry, well-ventilated area to dry completely. Once dry, rub the seed heads to release the grains. Store them in an airtight container for later use.
🌿 Step 5: Extend the Season with Successive Plantings
Amaranth grows quickly, so I make 2-3 successive plantings spaced 2 weeks apart to ensure a steady harvest. In warm climates, you can even plant a fall crop after summer heat subsides. Amaranth tolerates heat better than most greens, making it a reliable late-season option.
If frost threatens before harvest, cover plants with a lightweight row cover to extend the season. The leaves stay tender longer than many other greens, giving you extra time to enjoy them in salads or cooked dishes. With proper care, one planting can provide harvests for 6-8 weeks.
Tips & tricks for perfect amaranth growth
Between us, amaranth's rapid growth makes it one of the most rewarding plants to cultivate—but only if you nail these key details.
Seed Starting Precision: That ¼-inch depth for planting seeds is critical—any deeper and they won't sprout, any shallower and they'll dry out before germinating. I like to use a toothpick to make tiny divots in the moist seed-starting mix, then drop one seed per divot and cover with a fine layer of mix. The 70-75°F warm spot works best near a sunny window or under grow lights. Pro tip: Place a humidity dome over the tray until sprouts appear to lock in moisture.
Harden Off Gradually: The 2-3 hour initial outdoor exposure in Step 2 is non-negotiable—amaranth's tropical roots are sensitive to temperature swings. I start with morning shade and gradually move plants to afternoon sun over those 5-7 days. Watch for wilting as your signal to move them back indoors for another hour. This toughening process prevents transplant shock that can stunt growth for weeks.
Sunlight Strategy: Amaranth's 6-8 hours of direct sunlight requirement isn't flexible—it's what transforms those broad leaves from mediocre to spectacular. If your garden gets less than 6 hours, consider using reflective surfaces like white walls or mulch to bounce extra light onto the plants. For container growers, place pots on wheels so you can rotate them daily for even exposure—this prevents lopsided growth that weakens the stalks.
Harvest Timing: For leafy varieties, those 12-inch plants should be harvested when the leaves are still tender but large enough to use. I find the sweet spot is when the leaves are about 6-8 inches long—this gives you maximum yield without sacrificing tenderness. For grain varieties, wait until the seed heads turn completely tan or brown—this ensures full maturity and better storage life. The drying process can take 1-2 weeks depending on humidity levels.
Pro Tips for Grow Amaranth From Seed
- Between us, amaranth's rapid growth makes it one of the most rewarding plants to cultivate—but only if you nail these...
- Seed Starting Precision: That ¼-inch depth for planting seeds is critical—any deeper and they won't sprout, any shall...
- Harden Off Gradually: The 2-3 hour initial outdoor exposure in Step 2 is non-negotiable—amaranth's tropical roots are...
Frequently asked questions
Got questions about growing amaranth from seed?
You’re not alone—this ancient supercrop can be tricky for beginners! Here are answers to the most common concerns to help you grow bold, thriving plants with confidence.
How long does it take for amaranth seeds to germinate?
Amaranth seeds typically sprout in 7–14 days after planting, depending on soil warmth and moisture. For faster germination, soak seeds overnight or use a heat mat (70–80°F is ideal). Patience is key—don’t overwater, or seeds may rot!
When is the best time to plant amaranth seeds?
Amaranth thrives in warm weather, so wait until after the last frost when soil is at least 60°F (15°C). For most climates, plant seeds directly in the garden in late spring or early summer. If your season is short, opt for faster-maturing varieties like ‘Red Garnet’ or ‘Joseph’s Coat.’
What are the most common pests or diseases affecting amaranth?
Amaranth is generally pest-resistant, but watch for aphids, spider mites, or leaf miners. Use neem oil or insecticidal soap for mild infestations. Powdery mildew can occur in humid conditions—improve airflow and avoid overhead watering. Healthy soil and proper spacing (12–18 inches apart) prevent most issues.
Can I grow amaranth in containers, or does it need a big garden?
Yes! Amaranth adapts well to containers 12+ inches deep, making it perfect for balconies or small spaces. Dwarf varieties like ‘Love Lies Bleeding’ thrive in pots. Just ensure the container has drainage holes and use a high-quality potting mix. For grain amaranth, opt for bushier types like ‘Amaranthus hypochondriacus.’
What if my amaranth plants look leggy or weak?
Leggy growth usually means too little light or overcrowding. Thin seedlings to 12–18 inches apart and move pots to a sunnier spot (6+ hours of direct sunlight daily). If using indoor grow lights, ensure they’re 12–16 inches above plants. Fertilize lightly with a balanced organic fertilizer (10-10-10) every 3–4 weeks for stronger stems.
Wrapping up and next steps
Growing amaranth from seed is a rewarding journey that brings nutrient-packed greens and protein-rich grains right to your kitchen—without breaking the bank! With the right soil, sunlight, and patience, you’ll soon enjoy a thriving harvest that’s as versatile as it is delicious. 🌱
Ready to take the next step? Plant your seeds today and watch your garden transform into a hub of flavor and sustainability. Once your amaranth is growing, experiment with recipes—whether it’s sautéed greens or homemade amaranth flour. Happy gardening! 🌟