
Vegetables
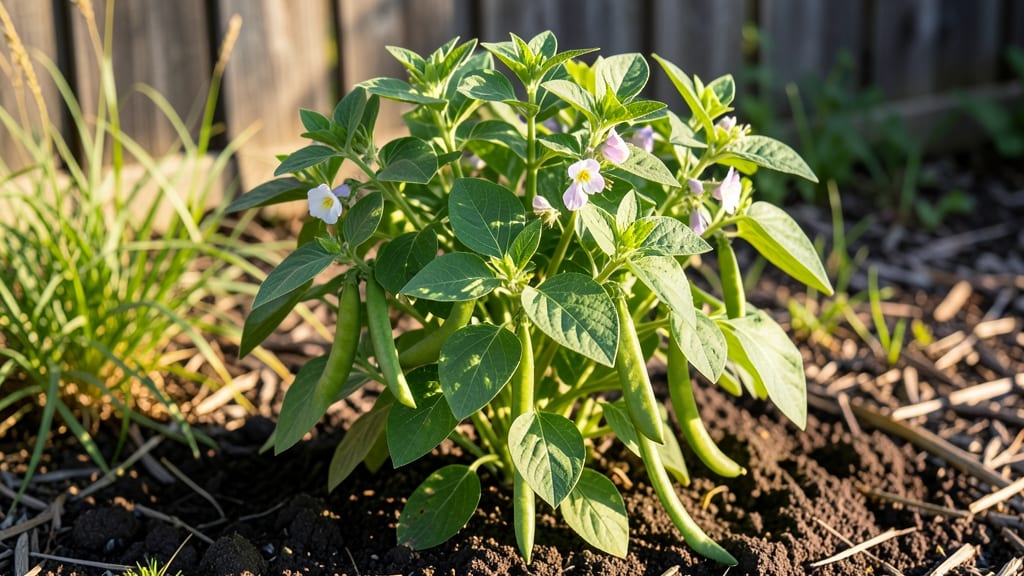
Growing green small beans that keep producing all season is the secret to a never-ending snack stash. 🌱 I’ve learned that these beans aren’t just annuals—they can behave like perennials if you give them the right conditions, and that means richer soil, consistent moisture, and a little patience.
Most gardeners treat them as one-and-done crops, but with the right approach, you’ll harvest fresh pods for months.
The key starts with soil that’s loose and nutrient-packed—think compost mixed in deeply, not just a top layer. Plant them in full sun where they’ll get at least 6-8 hours of light daily, and space them 4-6 inches apart in rows 18-24 inches apart.
Water them deeply once a week, keeping the soil evenly moist but never soggy. This isn’t just about survival; it’s about setting them up to thrive so they keep producing.
By mid-summer, you’ll be picking tender pods every 2-3 days, and the flavor? Unmatched—sweet, crisp, and bursting with freshness straight from the vine.
The trick is to harvest young pods before they toughen up, and if you keep the plants well-fed with nitrogen-rich fertilizer, they’ll reward you with a steady supply all season long.
Works for both garden beds and containers, and even in cooler climates if you plant them early. The best part? No need for fancy setups—just good soil, sunlight, and a little regular attention. Let’s get those beans growing!
📚 In This Guide
- What you need
- Instructions
- Tips and common mistakes
- Wrapping up and next steps
What you need
- ● Green small bean seeds: Choose heirloom or hybrid varieties like ‘Blue Lake,’ ‘Kentucky Wonder,’ or ‘Provider.’ Aim for 1–2 pounds of seeds (about 1,000–2,000 seeds) for a standard garden plot.
- ● Well-draining soil: A mix of 60% topsoil, 30% compost, and 10% perlite or vermiculite (pH 6.0–7.0). Test soil pH with a kit if unsure!
- ● Fertilizer: Balanced organic fertilizer (10-10-10) or composted manure (apply 2–3 weeks before planting).
- ● Watering can or hose with a gentle spray nozzle: Beans need 1–1.5 inches of water per week (avoid overhead watering to prevent disease).
- ○ Garden twine or stakes (optional but helpful): For trellising varieties like pole beans (use 5–6 ft tall stakes).
- ● Row covers or frost cloth: Protect seedlings from late frosts (use if planting early in the season).
- ● Seedling trays or biodegradable pots: For starting seeds indoors 4–6 weeks before the last frost.
- ● Mulch (straw or grass clippings): Retains moisture and suppresses weeds—apply 2–3 inches after planting.
- ● Bean-specific fungicide (e.g., copper spray): Prevents rust or powdery mildew in humid climates.
- ● Soil thermometer: Beans germinate best in soil temps of 60–85°F.
Step-by-step instructions for growing perennial green small beans
Here's how I keep my green small beans thriving year after year—no annual replanting needed.
🌱 Step 1: Choose the Right Location and Soil
Select a spot that gets full sun (6-8 hours daily) with well-draining soil. I test my soil first—green small beans prefer a slightly acidic to neutral pH (6.0-7.0). If your soil is heavy clay, mix in 2-3 inches of compost to improve drainage and fertility.
Dig a trench about 12 inches wide and 6 inches deep—this gives roots plenty of room to spread. Loosen the soil at the bottom with a fork to prevent compaction. I always work in dry soil first, then water it in deeply before planting. This prevents soil from sticking to the roots when you plant.
🌿 Step 2: Plant Seeds or Transplants at the Right Time
For perennial varieties, plant seeds in early spring (after last frost) or transplants in late spring (when soil warms to 60°F+). I start seeds indoors 4-6 weeks before the last frost date—this gives them a head start. If using transplants, space them 12-18 inches apart in rows 24 inches apart.
Plant seeds 1 inch deep—any deeper and they’ll struggle to emerge. Water gently after planting to settle the soil. You’ll see sprouts in 7-14 days if conditions are right. Thin seedlings to 6 inches apart once they’re 2-3 inches tall. This prevents overcrowding and gives plants room to grow strong.
☀️ Step 3: Water and Fertilize for Continuous Growth
Keep soil consistently moist but not soggy—1 inch of water weekly is ideal. I water in the morning so leaves dry quickly, reducing disease risk. Mulch with 2-3 inches of straw or shredded leaves to retain moisture and suppress weeds. Avoid wetting the foliage when watering to prevent fungal issues.
Fertilize lightly every 4-6 weeks with a balanced organic fertilizer (10-10-10). Too much nitrogen makes plants leafy but reduces pod production. I also side-dress with compost in early summer to boost nutrients. Watch for yellowing leaves—they’re your signal to adjust fertilizer or water.
✂️ Step 4: Prune and Harvest for Year-Round Yields
Harvest pods when they’re 4-6 inches long and tender—this encourages more production. I pick every 2-3 days during peak season to keep plants productive. Use sharp scissors to cut stems just above the next set of pods. Never pull pods off; this damages the plant.
Prune back leggy growth in early summer to promote bushier plants. Cut back 1/3 of the plant height to stimulate new growth. In late fall, trim back any dead or diseased stems. I also remove old pods that won’t produce—this redirects energy to new growth. With proper care, your plants will keep producing for years.
⏰ Step 5: Protect and Prepare for Winter
Before the first frost, cut back plants to 6 inches tall and mulch heavily with 4-6 inches of straw. This insulates roots and protects them from freezing. In colder climates, I add a layer of burlap over the mulch for extra protection. Perennial beans are hardy, but extreme cold can damage them.
In early spring, remove old mulch and add fresh compost. Water lightly to wake up the roots. You’ll see new shoots in 2-3 weeks. If your plants are established, they’ll bounce back quickly. This method keeps my green small beans producing for 5+ years with minimal effort.
Tips & tricks for perfect perennial green small beans
A few simple tricks that'll help your green small beans thrive for years without the annual replanting hassle.
Sunlight Secret: Those 6-8 hours of daily sun are non-negotiable for perennial varieties. I've learned the hard way that partial shade leads to weak stems and fewer pods. If your garden only gets 4-5 hours of sun, consider growing them in containers that you can move to sunnier spots during peak daylight hours. Morning sun is especially valuable as it helps dry dew quickly, reducing fungal risks.
Soil Prep Strategy: Before planting, I always spread a thin layer of compost across the trench bottom and mix it into the top 2 inches of soil. This isn't just about nutrients—it creates tiny air pockets that prevent soil compaction, which is crucial for perennial roots that need to spread deeply. The 2-3 inches of compost mentioned in Step 1 should be worked in at least 2 weeks before planting to let beneficial microbes establish.
Watering Wisdom: The 1 inch of water weekly guideline assumes average rainfall. In my experience, it's better to water deeply 2-3 times per week than give daily shallow drinks. I use a rain gauge to track moisture—when it hasn't rained for 5 days, I give my beans a good soaking until water runs out the bottom of the trench. This encourages deep root growth that perennial varieties rely on for winter survival.
Harvest Hack: When harvesting those 4-6 inch pods every 2-3 days, I've found that using clean kitchen scissors instead of fingers prevents accidentally damaging the plant's growth points. I also harvest in the morning after dew has dried but before the sun gets too hot—this gives pods time to firm up before storage. The key is to harvest consistently; if you let pods get too mature, the plant will focus energy on seed production instead of new pods.
Pro Tips for Green Small Beans
- A few simple tricks that'll help your green small beans thrive for years without the annual replanting hassle.
- Sunlight Secret: Those 6-8 hours of daily sun are non-negotiable for perennial varieties. I've learned the hard way t...
- Soil Prep Strategy: Before planting, I always spread a thin layer of compost across the trench bottom and mix it into...
Frequently asked questions
How long does it take for green small beans to mature?
Green small beans typically mature in 50–60 days after planting, depending on the variety and growing conditions. Bush beans usually mature faster (around 45–50 days), while pole beans may take slightly longer. Check seed packets for specific timelines—patience pays off with sweet, tender pods!
What’s the best temperature for growing green small beans?
Green small beans thrive in warm soil (60–70°F) and air temperatures between 70–85°F. They’re sensitive to frost—plant after the last frost date in spring or wait until late summer for fall harvests. If nights dip below 50°F, use row covers to protect tender plants.
Can I grow green small beans in containers or small spaces?
Bush bean varieties are perfect for containers (at least 6–8 inches deep) or small gardens. Pole beans need taller supports (5–6 feet) but work well in vertical gardens. Just ensure pots have drainage holes and use well-draining soil—container beans may need daily watering in hot weather.
What’s the difference between green small beans and other bean varieties?
Green small beans (like haricot verts or filé beans) are slender, flat, and harvested young for tender texture. Unlike larger beans (e.g., kidney or pinto), they’re eaten whole, pod and all. Their mild flavor and crispness make them ideal for salads, stir-fries, or steamed sides—no peeling required!
How do I prevent pests like aphids or bean beetles from damaging my plants?
Start with healthy soil and crop rotation to deter pests. Handpick beetles early, and spray plants with neem oil or insecticidal soap for aphids. Companion planting with marigolds or nasturtiums can also repel pests naturally. Avoid overwatering—stressed plants attract more bugs!
Are green small beans truly perennial, or do they need replanting yearly?
Most green small beans are annuals, but some varieties (like runners or scarlet runners) can self-seed or regrow from roots in mild climates. For year-round harvests, succession plant every 2–3 weeks in warm seasons. In colder areas, treat them as annuals and start new seeds each spring.
Wrapping up and next steps
Growing green small beans as a perennial crop is a rewarding journey that brings fresh, homegrown goodness to your table year after year! 🌱 With the right care—like proper soil prep, consistent watering, and smart pruning—you’ll enjoy a bountiful harvest that’s both nutritious and sustainable.
Whether you’re a seasoned gardener or just starting out, these tips will help you cultivate thriving plants and savor the joy of homegrown beans.
Ready to take the next step? Start small—plant a few seeds or seedlings this season and watch your garden flourish! With patience and passion, you’ll soon be enjoying crisp, fresh green beans straight from your own backyard. Happy gardening! 🌿