
Vegetables
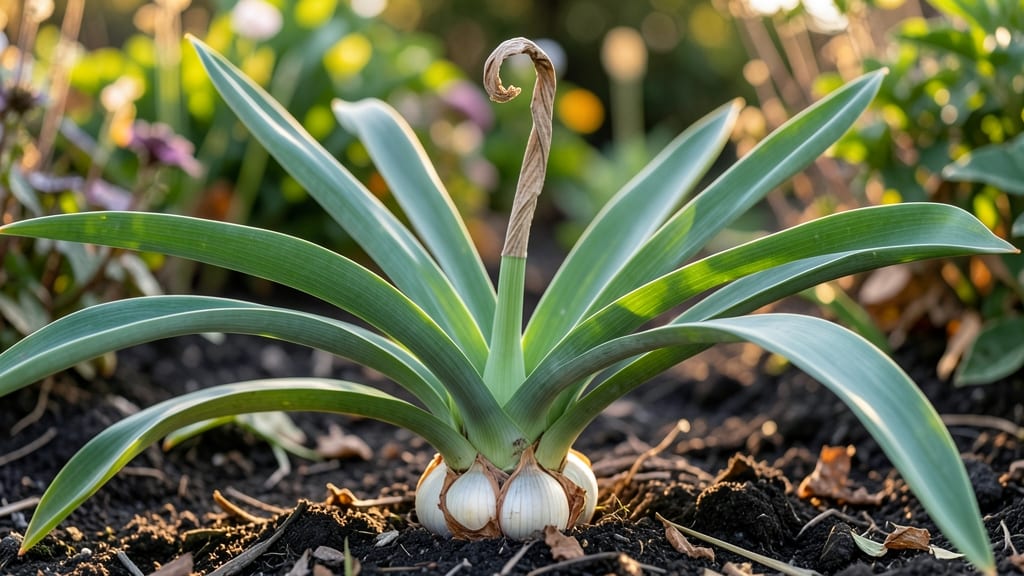
Great Lakes hardneck garlic thrives where winters freeze the ground solid—perfect for our region’s harsh climate. 🌱 I’ve grown it for five years now, and every October harvest proves this variety’s worth: bold flavor, reliable yields, and the ability to overwinter without fuss. The secret lies in timing and soil.
Plant cloves in late October when soil temps drop below 40°F, mimicking the cold stratification they need to establish strong roots. Amend heavy clay soil with compost to improve drainage—this prevents rot during our wet springs.
By mid-July, you’ll harvest scapes (those curly green shoots) for pesto or let them grow for full bulbs by late August. The bulbs store well until spring, giving you homegrown garlic even in winter. This isn’t just another vegetable—it’s a low-maintenance perennial that pays off year after year.
Let’s get those cloves in the ground!
📚 In This Guide
- What you need
- Instructions
- Tips and common mistakes
- Wrapping up and next steps
What you need
- ● Hardneck garlic cloves: 12–20 cloves (from certified organic or disease-free sources like Great Lakes Hardneck Garlic varieties).
- ● Well-draining soil: Loamy or sandy soil with a pH of 6.0–7.0. Amend with compost (2–3 inches mixed into the top 6–8 inches of soil).
- ● Fertilizer: Balanced organic fertilizer (e.g., 5-5-5 or 10-10-10) at planting (1 lb per 100 sq ft).
- ● High-nitrogen fertilizer (e.g., blood meal or fish emulsion) in early spring (½ lb per 100 sq ft).
- ● Mulch: Straw (4–6 inches) to insulate bulbs and suppress weeds.
- ● Watering tools: Drip irrigation or a soaker hose (avoid overhead watering).
- ● Garden tools: Trowel or garlic planter (for precise spacing).
- ● Garden fork or broadfork (for soil aeration).
- ● Pruners (to remove flower scapes in early summer).
- ● Curing setup: Well-ventilated area (e.g., garage or porch) with mesh bags or open boxes for drying bulbs.
- ● Storage containers: Mesh bags or wooden crates (for long-term storage in a cool, dry place).
- ○ Soil test kit (optional): To check pH and nutrient levels before planting.
Step-by-step instructions for planting Great Lakes hardneck garlic
Here’s how to grow cold-hardy garlic that thrives in the Great Lakes region’s tough winters.
🌱 Step 1: Choose and Prepare Garlic Cloves
Select hardneck garlic varieties suited for your zone (like ‘German White’, ‘Music’, or ‘Chesnok Red’). Break apart the bulb into individual cloves, ensuring each has a full root base. I avoid the largest cloves—they produce bigger bulbs but fewer scapes, and I prefer a balance of both. Save the best cloves for planting, discarding any soft or sprouted ones.
Soak the cloves in lukewarm water for 12 hours before planting. This jumpstarts root growth and helps them establish faster in cold soil. Drain well afterward—waterlogged cloves rot before they sprout. I like to soak them in a colander, then pat them dry with a paper towel to remove excess moisture.
🪴 Step 2: Plant in Well-Draining Soil with Full Sun
Choose a sunny, raised bed or well-draining soil spot—garlic hates soggy roots. Work in 2-3 inches of compost or aged manure to enrich the soil before planting. Plant cloves 4 inches deep, 6 inches apart, and 8 inches between rows. Point the root end downward (it’s naturally tapered), and space them evenly for uniform growth.
Mulch heavily with 4-6 inches of straw or leaves right after planting. This insulates the cloves from winter temperature swings and prevents heaving. I use straw because it breaks down slowly, adding organic matter without smothering the plants. In the Great Lakes, mulch keeps soil temps consistent around 35-40°F even in deep freezes.
☀️ Step 3: Winter Care and Early Spring Maintenance
Leave the mulch undisturbed all winter—it’s your garlic’s blanket. In late winter (February), add another 2 inches of mulch if you notice soil gaps. Garlic needs full sun (6+ hours daily) once shoots emerge in early spring (March-April). Thin seedlings if they crowd, leaving the strongest ones 6 inches apart. Weak stems won’t produce big bulbs.
When green shoots reach 6 inches tall, side-dress with compost or balanced fertilizer (10-10-10). This boosts bulb development without encouraging excessive leaf growth. Water deeply once a week if rain is scarce—garlic roots dive 12+ inches deep by harvest time. Too little water = small bulbs; too much = rot.
✂️ Step 4: Harvest and Cure for Storage
Harvest when lower leaves turn brown and dry (usually late June to early July in the Great Lakes). Use a fork to loosen soil around bulbs, then gently lift them—don’t pull! Brush off dirt but leave roots attached. Cure bulbs in a shady, dry, well-ventilated spot (like a garage or porch) for 2-3 weeks. This hardens skins and prevents rot.
Braid or hang bulbs to dry completely. Store in a cool (40-50°F), dark place with good airflow. Properly cured garlic keeps for months, and you’ll have fresh cloves year-round. I save the biggest bulbs for replanting next fall—this ensures a steady supply without buying new stock.
Tips & tricks for perfect Great Lakes hardneck garlic
These practical tips will help you grow hardy garlic that thrives in the Great Lakes' challenging climate.
Selection Tip: When choosing hardneck varieties, look for plump cloves with firm, papery skins—these are your best bet for strong plants. The medium-sized cloves (not the largest) tend to produce the best balance of bulb size and scape production. I've learned the hard way that soft or sprouted cloves rarely establish well, so always inspect your stock carefully before planting.
Soaking Strategy: The 12-hour lukewarm water soak is your secret weapon for faster establishment. I use a colander for easy draining and always pat the cloves dry afterward—waterlogged cloves simply won't root properly. For extra insurance in cold climates, add a pinch of seaweed fertilizer to the soak water to boost early growth.
Mulching Mastery: That 4-6 inch layer of straw mulch isn't just for winter protection—it's your garlic's thermal blanket year-round. In the Great Lakes, I add an extra 2 inches in February to shield against late winter thaws that can cause heaving. Straw breaks down slowly, adding organic matter while maintaining consistent soil temperatures around 35-40°F.
Harvest Timing: The key to perfect curing is knowing when to harvest—wait until the lower leaves turn completely brown and dry, usually late June to early July in our region. I check by gently pulling up a test bulb: if the skins are dry and papery, it's harvest time. Rushing harvest means soft, poorly cured bulbs that won't store well.
Pro Tips for Great Lakes Hardneck Garlic
- These practical tips will help you grow hardy garlic that thrives in the Great Lakes' challenging climate.
- Selection Tip: When choosing hardneck varieties, look for plump cloves with firm, papery skins—these are your best be...
- Soaking Strategy: The 12-hour lukewarm water soak is your secret weapon for faster establishment. I use a colander fo...
Frequently asked questions
Got questions about growing Great Lakes Hardneck Garlic? You’re not alone! This cold-hardy variety is a favorite, but it’s smart to know the ins and outs before planting. Here are answers to the most common queries—so you can grow like a pro.
How cold can Great Lakes Hardneck Garlic tolerate?
This variety thrives in USDA Zones 3-8, making it perfect for the Great Lakes region and beyond. It handles winter temps down to -20°F (-29°C) and even performs better with cold stratification. Just ensure it’s planted in fall (6-8 weeks before frost) for optimal hardiness.
When should I harvest Great Lakes Hardneck Garlic?
Harvest scapes first (late spring) when they curl into a loop—cut them to encourage bulb growth! For bulbs, wait until late June to early July when lower leaves turn brown. Cure them in a shady, dry spot for 2-3 weeks before storing.
Can I grow Great Lakes Hardneck Garlic in containers?
Yes! Use a deep pot (12+ inches) with well-draining soil. Plant cloves 6 inches apart and ensure the pot gets full sun (6+ hours/day). Containers work well for small spaces, but bulbs may be slightly smaller than in-ground harvests.
What pests should I watch for with Great Lakes Hardneck Garlic?
Keep an eye out for garlic moths (larvae burrow into bulbs) and thrips (cause streaking). Use row covers early in the season or apply neem oil as a preventive. Healthy soil and proper spacing reduce risks!
How do I store Great Lakes Hardneck Garlic long-term?
After curing, store bulbs in a cool (40-50°F), dark, and dry place (like a mesh bag in the fridge). They’ll keep for 6-8 months. Avoid humidity—moisture speeds up spoilage. Pro tip: Braiding isn’t necessary but makes a great kitchen decoration!
Wrapping up and next steps
Growing Great Lakes hardneck garlic is a rewarding journey—this cold-hardy perennial thrives in your garden, offering flavorful harvests year after year with minimal effort! Whether you're a seasoned gardener or just starting, its resilience and adaptability make it a must-have for any plot.
Now that you’re armed with the how-tos and answers to common questions, it’s time to roll up your sleeves and plant!
🌱 Next steps:
- Mark your calendar for fall planting (October–November) to give bulbs time to establish roots.
- Start small—try a few cloves to test your soil and climate before scaling up.
- Share your progress (or harvest!) with fellow gardeners for tips and inspiration.