
Vegetables
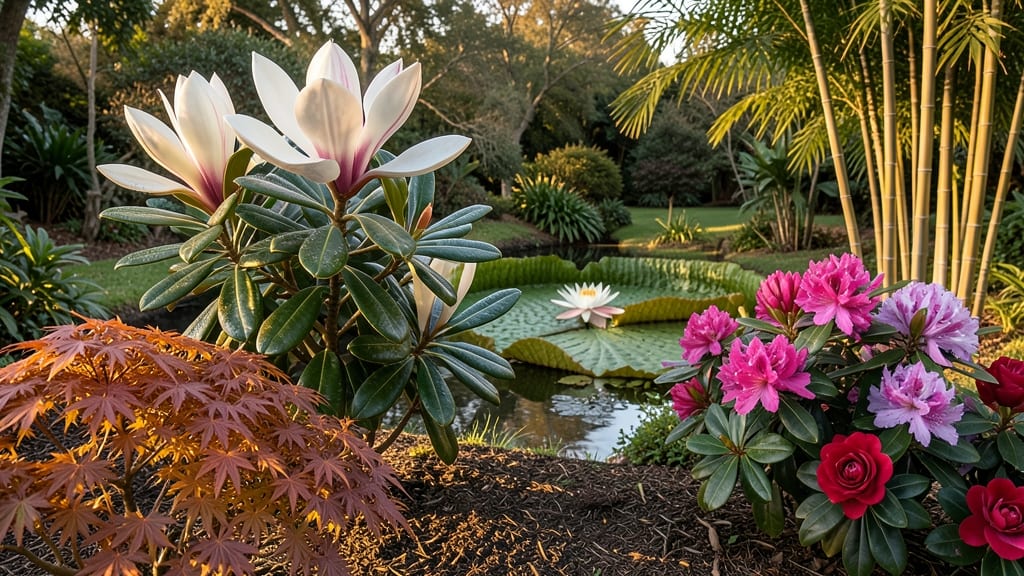
Stepping into the world’s most famous botanical gardens feels like walking through a living history book. 🌿 These spaces—like Kew Gardens’ glasshouses or New York Botanical Garden’s orchid collections—prove that vegetables and ornamental plants can coexist in breathtaking harmony, even in colder months.
The secret? Layered planting, climate-smart structures, and a focus on plants that thrive year-round without constant fuss.
What makes them special isn’t just the rare specimens—it’s how they blend practicality with beauty. Take the Edible Gardens at Kew or the Vegetable Garden at Monticello: they use raised beds, cold frames, and seasonal rotations to keep harvests flowing while creating visual drama.
You don’t need a 200-year-old estate to borrow these ideas—just a few key techniques and the right plant choices for your climate.
Imagine a garden where your tomatoes ripen in summer, kale stays crisp through winter, and strawberries produce twice a year—all while looking like a curated masterpiece. The magic happens with succession planting, microclimate zones, and low-maintenance perennials that do most of the work.
Even a small yard can channel that botanical-garden elegance with minimal effort.
Whether you’re dreaming of a grand public garden or a backyard that feels like one, the principles are the same: plan for all seasons, prioritize structure, and let plants do the heavy lifting.
The best part? These gardens prove that beauty and bounty aren’t mutually exclusive—they’re partners. Let’s bring that philosophy home.
📚 In This Guide
- What you need
- Instructions
- Tips and common mistakes
- Wrapping up and next steps
What you need
- ● Seeds or Seedlings: 5–10 packets of botanical garden-inspired veggies (e.g., heirloom tomatoes, Swiss chard, nasturtiums, or purple basil). Opt for varieties known for their ornamental and edible appeal.
- ● 1–2 packets of perennial herbs (like rosemary, thyme, or oregano) for low-maintenance greenery.
- ● Containers or Garden Beds: 3–5 large pots (12–18 inches deep) for root veggies (e.g., carrots, beets). Use terracotta or fabric grow bags for drainage.
- ● 1 raised bed (4’x8’) or window-box planters for leafy greens and herbs.
- ● Soil: 2–3 cubic feet of high-quality potting mix (look for "organic" or "botanical blend" labels). Avoid garden soil—it’s too dense!
- ● 1 bag of compost (for nutrient boost).
- ● Essential Tools: 1 hand trowel (for planting/seeding).
- ● 1 pair of pruning shears (for shaping and harvesting).
- ● 1 watering can (with a rose nozzle for gentle watering).
- ● 1 set of gardening gloves (to protect your hands from thorns or soil).
- ● Decorative Touches: 1–2 ornamental mulch (e.g., cedar chips or colored gravel) to mimic botanical garden aesthetics.
- ● Small garden markers (chalkboard or wooden) to label plants like a pro.
- ● Growth Boosters: 1 bottle of fish emulsion or seaweed fertilizer (for lush, garden-center-worthy foliage).
- ● 1–2 self-watering spikes (to reduce effort—perfect for busy gardeners!).
- ● Climate Control: 1–2 frost blankets (for extending the growing season in cooler months).
- ● 1 small greenhouse kit or cold frame (if you’re ambitious!).
How to create a year-round vegetable garden inspired by famous botanical gardens
Botanical gardens blend artistry with horticulture—here's how to borrow their strategies for a low-maintenance, visually stunning edible garden.
🌱 Step 1: Design Zones Based on Plant Families and Light Needs
Start by grouping vegetables by their light requirements and botanical families. Place sun-loving plants like tomatoes and peppers where they'll receive 6-8 hours of direct sunlight, mimicking the sunny meadows of Kew Gardens. Shade-tolerant greens like lettuce and spinach belong in areas with 3-4 hours of filtered light, similar to the woodland garden sections of the Missouri Botanical Garden.
I sketch a simple layout on graph paper, dividing the space into "sun", "partial shade", and "full shade" zones. This prevents overcrowding and makes maintenance effortless. You'll notice healthier plants and fewer pests when vegetables thrive in their ideal conditions.
☀️ Step 2: Layer Plants for Seasonal Interest and Pest Control
Botanical gardens use layering to create visual depth and extend the growing season. Plant tall vegetables like corn or sunflowers in the back row, followed by mid-height plants such as bush beans or zucchini, and finish with low-growing herbs or leafy greens in the front. This creates a natural progression that's both beautiful and functional.
I always include a row of flowering plants like nasturtiums or marigolds at the edges. These act as natural pest deterrents while adding vibrant color, much like the ornamental flowers in the Royal Botanic Gardens, Kew. You'll see fewer pests and a garden that looks intentionally designed.
💧 Step 3: Implement a Drip Irrigation System for Consistent Moisture
Botanical gardens maintain lush displays with precise watering techniques. Install a drip irrigation system that delivers water directly to the root zone, reducing waste and preventing fungal diseases. Set the system to run for 15-20 minutes daily during dry periods, adjusting for rainfall.
I bury the emitters just below the soil surface to prevent evaporation and direct water exactly where it's needed. This mimics the controlled irrigation systems used in large botanical gardens, ensuring your vegetables receive consistent moisture without the risk of overwatering.
✂️ Step 4: Prune and Harvest Strategically for Continued Growth
Regular pruning keeps plants healthy and encourages continuous production. Remove yellow or damaged leaves promptly, just as gardeners do in the meticulously maintained sections of the New York Botanical Garden. Harvest vegetables regularly to stimulate new growth—pick tomatoes when they're firm and fully colored, and harvest leafy greens when they reach 4-6 inches tall.
I always prune in the morning when plants are hydrated and temperatures are cooler. This reduces stress on the plants and helps them recover quickly. You'll see stronger stems and more abundant harvests when you follow this routine.
🌿 Step 5: Add Mulch and Seasonal Accents for Year-Round Appeal
Mulch keeps soil moist, suppresses weeds, and adds to the garden's aesthetic appeal. Apply a 2-3 inch layer of organic mulch around plants, similar to the rich, dark mulch seen in the herbaceous borders of botanical gardens. Use shredded bark or straw for a natural look that blends seamlessly with the garden.
Incorporate seasonal accents like pumpkins in fall or spring bulbs in early spring to keep the garden visually dynamic. This approach ensures your vegetable garden remains as beautiful as the famous botanical gardens it's inspired by, while still being highly productive.
Tips & tricks for year-round botanical garden vegetables
These practical strategies will help you transform your vegetable garden into a low-maintenance masterpiece inspired by the world's most famous botanical displays.
Light Mapping Precision: When designing your sun/partial shade/full shade zones in Step 1, use a simple sunlight tracker app to map your garden's light patterns throughout the day. I've found that even small variations in sunlight exposure can dramatically affect plant health—especially for sun-loving crops like tomatoes that need those 6-8 hours of direct sunlight. Consider installing a small solar-powered light meter for just a few dollars to get exact readings in each zone.
Pest Prevention Layers: In Step 2, go beyond just nasturtiums and marigolds for pest control. I've had the most success with a three-layer approach: plant sacrificial crops like radishes at the garden's perimeter to attract pests away from your main vegetables, interplant with herbs like basil and dill that repel common garden pests, and add a row of flowering alyssum which attracts beneficial insects. This layered defense mimics the comprehensive pest management strategies used in large botanical gardens.
Irrigation Timing Strategy: For the 15-20 minute daily drip irrigation schedule in Step 3, I recommend running the system in the early morning hours (between 4-6 AM). This timing allows water to soak into the soil before evaporation becomes an issue, and gives plants a full day to utilize the moisture. During extreme heat waves, I'll split the watering into two 10-minute sessions—once in the morning and once in the late afternoon—to prevent water stress on plants.
Seasonal Accent Planning: When adding those seasonal accents in Step 5, think about creating "theme weeks" in your garden. For example, dedicate one week to pumpkins and gourds for fall color, another to spring bulbs like tulips that bloom early, and include evergreen shrubs like rosemary or thyme for winter interest. This rotating display keeps your garden looking intentionally designed year-round, just like the curated exhibits in famous botanical gardens.
Pro Tips for Famous Botanical Gardens
- These practical strategies will help you transform your vegetable garden into a low-maintenance masterpiece inspired ...
- Light Mapping Precision: When designing your sun/partial shade/full shade zones in Step 1, use a simple sunlight trac...
- Pest Prevention Layers: In Step 2, go beyond just nasturtiums and marigolds for pest control. I've had the most succe...
Frequently asked questions
Exploring famous botanical gardens can be both inspiring and practical—especially when growing your own vegetable garden! Here are answers to some of the most common questions to help you plan like a pro:
Can I grow vegetables in a botanical garden-style layout year-round?
Many famous botanical gardens use layered planting techniques, like perennials, annuals, and edible flowers, to ensure year-round beauty and harvests. In warmer climates, focus on heat-tolerant veggies (e.g., tomatoes, peppers) in summer, while cooler months work for leafy greens (kale, spinach) and root veggies (carrots, beets). Check seasonal guides for your region!
What’s the best time of year to visit botanical gardens for planting inspiration?
Spring (March–May) and early fall (September–October) are ideal! Gardens burst with color and activity during these transitions, making it easy to spot successful companion planting, trellis designs, and drought-resistant layouts. Pro tip: Visit in morning light—shadows reveal garden elevations and water drainage patterns best.
Are there budget-friendly alternatives to visiting famous botanical gardens?
Yes! Many public gardens offer free or low-cost entry days (e.g., first Sundays, student discounts). Alternatively, local community gardens or university botanical gardens often host free workshops. For DIYers, Pinterest and YouTube are goldmines for replicating famous layouts—just search “[Garden Name] vegetable beds.”
How do I troubleshoot common issues like pests or poor soil in my garden?
Start with a soil test kit (available at garden centers) to check pH and nutrients. For pests, mimic botanical gardens’ natural deterrents: plant marigolds near tomatoes to repel nematodes, or use row covers for cabbage moths. Compost tea boosts soil health without chemicals—try it on wilting plants for a quick fix!
Which famous botanical gardens are best for vegetable gardening inspiration?
Top picks include:
- Keukenhof Gardens (Netherlands): Famous for tulips + edible flowers (try planting borage or nasturtiums!).
- Missouri Botanical Garden (USA): Features heirloom veggie trials and raised-bed designs.
- Singapore Botanic Gardens (Singapore): A masterclass in urban vertical gardening with tropical veggies.
- Kew Gardens (UK): Offers free online courses on sustainable vegetable gardening.
Many offer virtual tours—perfect for planning before your next visit!
Wrapping up and next steps
From the lush Missouri Botanical Garden to the serene Royal Botanic Gardens, Kew, these world-famous botanical gardens prove that growing stunning vegetables doesn’t require a green thumb—or endless hours of labor. 🌱 With the right low-maintenance varieties and smart techniques, you can enjoy year-round beauty while keeping your garden thriving with minimal fuss.
Ready to transform your space? Start small—pick one or two easy-to-grow veggies from this list, gather your supplies, and dive in! Whether you’re a beginner or a seasoned gardener, the key is consistency over perfection. Happy planting! 🌿