
Vegetables
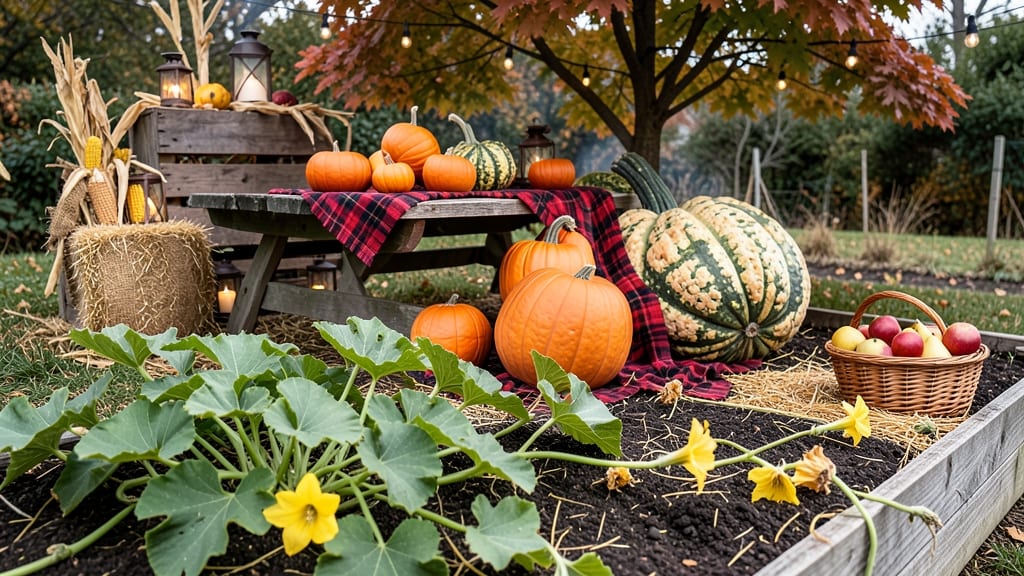
Transforming your garden into a rustic autumn haven starts with fall decorations with pumpkins. 🌻 These versatile gourds aren't just for carving—they're the backbone of seasonal charm that makes your outdoor space feel like a cozy harvest retreat.
Whether you're harvesting your own from the garden or picking up a few at the farmers' market, pumpkins bring texture, color, and that unmistakable fall aroma to any setting.
The key to stunning pumpkin displays is mixing sizes and varieties—small sugar pumpkins nestled among large carving pumpkins create natural layers that look effortlessly collected. Pair them with dried grasses, wheat stalks, or deep red mums for a color palette that feels warm and inviting.
My favorite trick? Using pumpkins as natural planters by hollowing out smaller ones and filling them with trailing ivy or ornamental kale.
You'll create focal points that last all season, from porch stairs lined with pumpkins and candles to garden beds framed by pumpkin clusters. The best part? These decorations stay fresh until frost, and the pumpkins themselves can later be composted—closing the seasonal loop right back to your garden.
Even better, they're completely customizable to your space, whether you have a sprawling yard or just a small balcony.
Start with what you already have: a few pumpkins, some greenery, and a little creativity. The goal is to make your outdoor space feel like an extension of autumn's warmth, where every corner tells a story of the season.
And the best part? You can do it all while keeping your garden's natural beauty at the heart of the design.
📚 In This Guide
- What you need
- Instructions
- Tips and common mistakes
- Wrapping up and next steps
What you need
- ● Pumpkins: 3–5 medium-sized (8–12 inches) for carving, painting, or displaying. Choose smooth-skinned varieties for easier detailing.
- ● Carving tools: 1–2 serrated knives (for precision cuts)
- ● 1 pumpkin carving kit (includes scoop, saw, and gouge)
- ● 1 spoon or ice cream scoop (for removing seeds)
- ● Decorative supplies: Acrylic paint (fall colors: orange, burnt sienna, cream, or black)
- ● Paintbrushes (varied sizes, including fine-tip for details)
- ○ Stencils (optional, for patterns like leaves or lace)
- ● Glitter or metallic paint (for extra sparkle)
- ● Hot glue gun + glue sticks (for attaching embellishments)
- ● Embellishments: Fake flowers, ribbons, or twine (for rustic touches)
- ● Small LED tea lights or battery-operated candles (for glow-up pumpkins!)
- ● Fake spiderwebs or dried corn husks (for eerie-chic vibes)
- ● Wooden slices or planks (to create a pumpkin centerpiece)
- ● Chalkboard paint (to turn pumpkins into message boards)
- ● Dried leaves or pinecones (for natural textures)
- ● Stickers or vinyl decals (for no-carve designs)
- ● Spray sealant (to protect painted pumpkins from rain)
Step-by-Step instructions for crafting rustic pumpkin fall decorations
Here’s how to transform ordinary pumpkins into cozy, inviting autumn centerpieces that feel like a warm hug from fall.
🎃 Step 1: Select and Prep Your Pumpkins
Choose pumpkins with smooth, unblemished skin for a polished look. Smaller varieties like sugar pumpkins or pie pumpkins work best for detailed designs, while larger carving pumpkins suit bold, rustic statements. Rinse them gently with water and a mild soap to remove dirt, then pat dry with a clean towel. Let them air-dry completely—this prevents mold and ensures paint or markers glide on smoothly.
If your pumpkins have stubborn spots, rub them lightly with a damp cloth and a bit of baking soda. For a natural, rustic finish, skip cleaning entirely and embrace the patina. The goal here is to highlight the pumpkin’s organic texture, so don’t stress perfection.
🎨 Step 2: Sketch or Paint Your Design
Lightly sketch your design with a pencil or chalk before committing to paint or markers. Simple geometric shapes, leaf patterns, or even just a single bold stripe create instant rustic charm. For a no-fuss look, try a single color like burnt orange, deep red, or sage green—these evoke autumn’s earthy palette. Use a fine-tip paintbrush or permanent markers for clean lines, and take your time to avoid smudging.
Pro tip: Place a piece of parchment paper under your pumpkin to catch drips and make cleanup easier. If you’re working with small pumpkins, use a toothpick to trace designs before filling them in. This keeps your lines crisp and controlled, even if your hand isn’t steady.
✨ Step 3: Add Texture and Dimension
Elevate your pumpkins with natural elements like pinecones, dried leaves, or twine. Tie twine around the stem for a farmhouse touch, or tuck a few pinecones into crevices for a woodland vibe. For extra texture, sprinkle gold or copper leaf flakes over painted sections while the paint is still wet. These details add depth and make your decorations feel intentional, not just decorative.
If you’re using spray paint, hold the can 12-18 inches away and apply in light, even coats to avoid drips. Let each layer dry completely before adding more—patience here keeps your finish smooth. For a distressed look, lightly sand the edges with fine-grit sandpaper after painting.
🪴 Step 4: Arrange for Maximum Impact
Group pumpkins in odd-numbered clusters (3, 5, or 7) for a balanced, natural feel. Place larger pumpkins at the base and smaller ones on top, like a mini autumnal tower. Add candles (battery-operated for safety) or fairy lights to create a warm glow—this transforms your decorations into an inviting focal point. For outdoor displays, use weather-resistant paint and position pumpkins on elevated surfaces like stumps or wooden crates to protect them from moisture.
Don’t forget to mix materials! Pair painted pumpkins with unadorned ones, gourds, or dried corn stalks for a layered, organic look. The contrast between natural and crafted elements is what makes rustic decor feel so lived-in and cozy.
🌿 Step 5: Maintain and Store for Next Year
To keep your pumpkins fresh, store them in a cool, dry place (like a garage or shed) and avoid direct sunlight. If you painted them, a light coat of clear sealant spray will help preserve the finish. Before storing, gently wipe them down with a damp cloth to remove dust. Next year, you can reuse the same pumpkins with a fresh coat of paint or new designs—sustainable and stylish!
For a seasonal update, swap out paint colors or add new textures like lace doilies or mini mason jars filled with dried flowers. Small changes keep your decor feeling fresh year after year without starting from scratch.
Tips & tricks for perfect fall pumpkin decorations
Here's what I learned after decorating pumpkins for years—these little tricks make all the difference between charming and forgettable autumn displays.
Surface Prep Matters: In Step 1, don't skip the drying time! I learned this the hard way after my first batch of paint streaking because of damp pumpkins. Let them air-dry completely (at least 1-2 hours) before painting—this prevents paint from sliding off and creates a smooth canvas. For extra insurance, lightly sand rough spots with fine-grit sandpaper before painting.
Design Prep Secret: When sketching designs in Step 2, use a toothpick to trace your pencil lines before filling them in. This creates crisp, professional-looking edges that look like they came from a craft store. I've tried freehanding with markers, and while it works, the toothpick method gives me more control—especially when working with small pumpkins.
Texture Timing: For Step 3, sprinkle those gold or copper leaf flakes while the paint is still slightly wet—this helps them adhere better and creates a more dimensional look. If you wait too long, they'll just slide off. I also recommend using a soft paintbrush to gently press them into place for extra staying power.
Storage Wisdom: In Step 5, if you're storing painted pumpkins for next year, wrap them individually in soft cloth or bubble wrap before placing them in storage boxes. This prevents scratches and keeps their painted surfaces protected. I've found that adding a silica gel packet to the storage container helps absorb any moisture that could cause mold.
Pro Tips for Fall Decorations With Pumpkins
- Here's what I learned after decorating pumpkins for years—these little tricks make all the difference between charmin...
- Surface Prep Matters: In Step 1, don't skip the drying time! I learned this the hard way after my first batch of pain...
- Design Prep Secret: When sketching designs in Step 2, use a toothpick to trace your pencil lines before filling them ...
Frequently asked questions
How do I store pumpkins for fall decorations without them rotting?
Store pumpkins in a cool, dry place—like a garage or basement—with good airflow. Avoid direct sunlight or damp areas. For longer storage, lightly spray them with a diluted bleach solution (1 part bleach to 9 parts water) to prevent mold. Check them weekly for soft spots and remove any damaged ones immediately.
When is the best time to start decorating with pumpkins?
The ideal time to begin is mid-to-late September, once pumpkins are widely available and temperatures start dropping. If you’re using real pumpkins, wait until after the first frost for a shorter shelf life. Artificial pumpkins can go up anytime—just time them with your seasonal theme for maximum impact!
What are some easy alternatives if I don’t have real pumpkins?
No problem! Fake pumpkins (foam, fabric, or plastic) are budget-friendly and reusable. You can also use gourds, painted cardboard cutouts, or even DIY pumpkin shapes from wood or paper. For a budget hack, spray-paint small plastic containers in orange and add stems for a pumpkin-like look.
Why did my carved pumpkin turn slimy inside after a few days?
This happens when moisture builds up inside the pumpkin, creating the perfect environment for bacteria. To prevent it, scoop out seeds and some flesh (leave a ¼-inch layer), then sprinkle cinnamon or salt inside before carving. Store carved pumpkins in a cool, dry place and avoid placing them in direct sunlight.
How can I make my pumpkin decorations last longer outdoors?
For outdoor displays, opt for weather-resistant materials like plastic pumpkins or treated wood. If using real pumpkins, choose smaller varieties (like sugar pumpkins) and seal cuts with a thin layer of petroleum jelly. Elevate them on trays or stands to prevent water pooling. Swap them out every 1–2 weeks for freshness.
Wrapping up and next steps
Transforming your space with fall decorations with pumpkins is more than just a seasonal trend—it’s a celebration of rustic charm and cozy autumn vibes! 🎃 Whether you’re carving, painting, or arranging pumpkins, these ideas bring warmth and creativity to your home.
The best part? You don’t need fancy tools or skills to make them shine.
Now that you’re inspired, grab a pumpkin (or two!) and start crafting. Share your creations on social media with #PumpkinCharm—we’d love to see your autumnal masterpieces! Ready to dive in? Refresh your materials list and let your imagination run wild.