
Vegetables
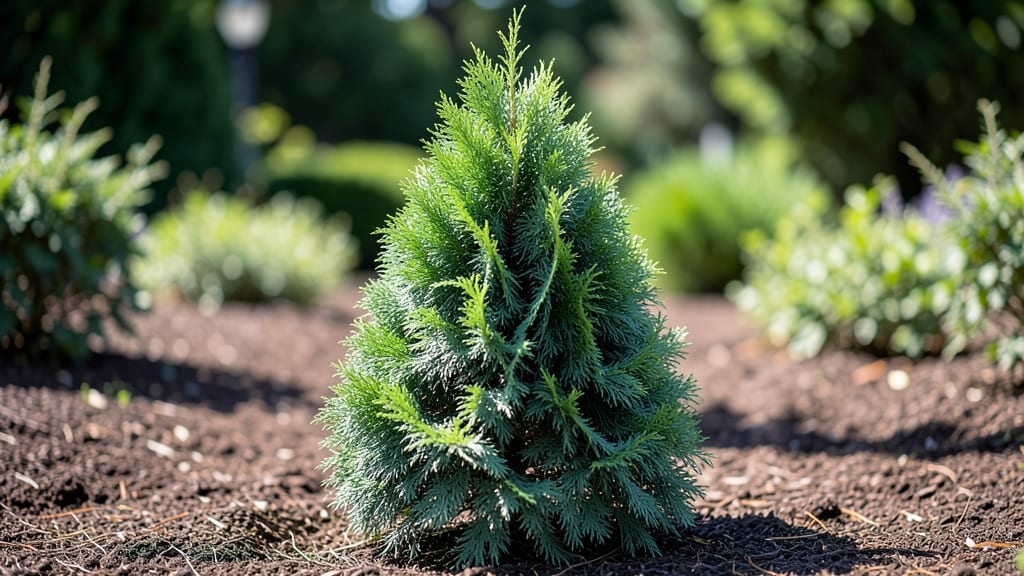
"Emerald Green Arborvitae turns good privacy into great curb appeal—year-round. 🌿 These evergreens grow into dense, lush walls that block noise and prying eyes while keeping your yard looking polished, even in winter.
The secret lies in their natural shape and low-maintenance nature, which means less work for you and more green for your view.
They reach 12-15 feet tall and spread 3-4 feet wide, making them perfect for tight spaces or long hedges. Plant them 3-5 feet apart for a seamless, unbroken screen, and watch as they fill in over just a few seasons.
Unlike fussy shrubs, they handle drought, salt spray, and urban pollution—ideal for city lots or coastal homes.
Pair them with dwarf conifers like 'Blue Rug' juniper for texture contrast, or add spring bulbs at their base for seasonal pops of color. The result? A low-maintenance, evergreen focal point that stays vibrant from January to December with almost no upkeep.
For best results, plant in full sun to partial shade and water deeply the first year. After that, they thrive on neglect—no pruning required unless you want to shape them. The only rule? Plant them where they can shine (or block) for decades.
📚 In This Guide
- What you need
- Instructions
- Tips and common mistakes
- Wrapping up and next steps
What you need
- ● Emerald Green Arborvitae Plants: 10–20 plants (depending on desired height and spacing—aim for 3–4 feet apart for a dense screen).
- ● Choose 1–3 ft tall nursery-grown saplings for faster establishment.
- ● Soil Amendments: 5 lbs peat moss or compost (for drainage and nutrients).
- ● 1 lb slow-release fertilizer (10-10-10 ratio).
- ● Planting Tools: 1 shovel or spade (for digging holes).
- ● 1 garden trowel (for delicate root handling).
- ● 1 measuring tape (to ensure proper spacing).
- ● Mulch: 2–3 inches of pine straw or wood chips (to retain moisture and suppress weeds).
- ● Watering Supplies: 1 hose with adjustable nozzle or watering can.
- ○ Optional: drip irrigation kit (for consistent moisture in dry climates).
- ● Sunlight: Full sun to partial shade (6+ hours of sunlight daily for best growth).
- ● Soil Type: Well-draining, slightly acidic to neutral pH (6.0–7.5).
- ● Spacing: Plan for 3–6 ft mature width (thinner spacing = faster privacy!).
- ● Local Regulations: Check HOA or city guidelines for height restrictions (some areas limit evergreens to <5 ft).
- ○ Optional Extras: Stakes and twine (for young plants in windy areas).
- ● Deer repellent (if local wildlife is a concern!).
Instructions for planting Emerald Green arborvitae for a low-maintenance privacy screen
Here’s my go-to method for planting these evergreen trees—fast, foolproof, and designed for long-term beauty.
🌱 Step 1: Choose the Perfect Planting Location
Emerald Green arborvitae thrive in full sun to partial shade, so scout your site first. Look for areas with at least 4-6 hours of direct sunlight daily—they’ll grow faster and stay denser. Avoid spots where water pools after rain, as soggy roots lead to root rot.
Measure your desired spacing: plant them 3-5 feet apart for a dense hedge, or 6-8 feet apart if you want more airflow between trees. I like to sketch a quick layout first—it saves time when digging holes later. Check utility lines before digging; arborvitae roots can clash with buried pipes.
☀️ Step 2: Dig Holes and Amend the Soil
Dig holes twice as wide as the root ball (about 12-18 inches across) and just as deep. Loosen the soil at the bottom with a shovel or your hands—this helps roots spread out instead of circling. If your soil is heavy clay, mix in 2-3 inches of compost at the hole’s base to improve drainage.
Gently remove the arborvitae from its container and tease the roots apart if they’re tightly bound. Place the tree in the hole so the top of the root ball sits 1-2 inches above ground level—this prevents water from pooling around the stem. Backfill with native soil, tamping lightly as you go to eliminate air pockets.
💧 Step 3: Water Deeply and Mulch for Retention
Water the newly planted arborvitae slowly until the soil is evenly moist to a depth of 12 inches. You’ll know it’s right when water drains out the bottom of the hole. Mulch around the base with 2-3 inches of shredded bark or pine needles, keeping mulch 6 inches away from the trunk to avoid rot.
This mulch layer locks in moisture and keeps roots cool in summer. I always water again after 7-10 days to encourage root growth into the surrounding soil. Avoid overwatering—arborvitae hate “wet feet” but also won’t tolerate drought once established.
✂️ Step 4: Prune for Shape and Encourage Fullness
Skip heavy pruning the first year—let the tree focus on root growth. In early spring of the second year, trim any broken branches or those growing inward. Use clean, sharp shears to make cuts just above a healthy bud. For a hedge, shape with light annual pruning in late winter to encourage dense, bushy growth.
Here’s the trick: prune just outside the new growth’s natural shape. You’ll see where the tree wants to fill in—follow that instead of forcing symmetry. Over-pruning stresses arborvitae, so never remove more than 25% of the foliage in one season.
🪴 Step 5: Monitor and Maintain for Long-Term Health
Check soil moisture weekly during the first growing season—water when the top 2 inches of soil feel dry. Fertilize lightly in early spring with a balanced, slow-release fertilizer (10-10-10), but skip it after the first year unless your soil is poor. Arborvitae grow slowly but steadily, so patience pays off.
Watch for brown tips in winter—they’re normal and harmless. If you see yellowing or wilting, it’s usually overwatering or poor drainage. These trees are tough once established, but the first two years are critical. With proper spacing and care, you’ll have a lush, evergreen privacy screen in 5-7 years.
Tips & tricks for perfect Emerald Green arborvitae planting
These simple tricks will help you create a lush, low-maintenance privacy screen that thrives year after year.
Sunlight Secret: While 4-6 hours of sunlight is ideal, these trees can handle partial shade—just know they'll grow slower and may become less dense. I've planted them under large oak trees where they still thrive, though the growth rate slows noticeably. If you're planting in shadier spots, consider spacing them slightly closer (2-3 feet apart) to maintain that thick hedge look.
Root Ball Rescue: When removing arborvitae from containers, you might find roots circling tightly. This is called "pot-bound" and can stunt growth. Gently tease these roots apart with your fingers or a fork—this helps them spread out properly in their new home. If roots are extremely tight, you can even make 2-3 vertical cuts around the root ball to encourage outward growth. Just be gentle to avoid damaging the main roots.
Mulch Magic: The 2-3 inches of mulch around your arborvitae isn't just for looks—it's a moisture and temperature regulator. I like to use pine needles in my climate because they naturally acidify the soil slightly, which these trees prefer. Just remember to keep that mulch 6 inches away from the trunk to prevent rot. You can also add a layer of compost to your mulch mix for extra nutrients during the first growing season.
Pruning Precision: When you're ready to prune in that second spring, here's my visual trick: Look for where the new growth naturally wants to fill in. Make your cuts just outside that area—this encourages the tree to fill in naturally rather than forcing an unnatural shape. And remember, those clean cuts just above a healthy bud are crucial for proper regrowth. I always sanitize my shears with rubbing alcohol between cuts to prevent spreading disease.
Pro Tips for Emeral Green Arborvitae
- These simple tricks will help you create a lush, low-maintenance privacy screen that thrives year after year.
- Sunlight Secret: While 4-6 hours of sunlight is ideal, these trees can handle partial shade—just know they'll grow slower and may become less dense.
- Root Ball Rescue: When removing arborvitae from containers, you might find roots circling tightly.
Frequently asked questions
How fast does an Emerald Green Arborvitae grow?
These evergreens grow at a moderate pace, adding about 12 to 24 inches per year. With proper spacing (6–8 feet apart), they’ll fill in a privacy screen in 5–7 years. Patience pays off—once established, they’re drought-tolerant and thrive with minimal fuss!
When is the best time to plant Emerald Green Arborvitae?
The ideal planting window is early spring or fall (4–6 weeks before the first frost). Avoid extreme heat or cold—root systems need time to settle. Pro tip: Water deeply after planting and mulch to retain moisture while roots establish!
Why are the tips of my Arborvitae turning brown?
Brown tips are usually a sign of overwatering, underwatering, or winter burn. Check soil moisture (it should be evenly damp, not soggy). If it’s winter, windburn might be the culprit—try wrapping young trees in burlap for protection. Prune dead tips in early spring.
Can I trim my Emerald Green Arborvitae anytime?
Light shaping is best done in late winter or early spring (before new growth starts). Avoid heavy pruning—these trees have a natural, columnar shape. If you must trim, never cut into old wood (the brown center), as it won’t regrow. Use clean, sharp shears for a crisp finish!
What’s a good alternative if I need faster privacy?
If speed is key, consider Leyland Cypress (faster growth, 3–4 feet/year) or Green Giant Arborvitae (broader, 3–5 feet/year). However, Emerald Green wins for low-maintenance elegance—its neat, compact form and disease resistance make it a top pick for long-term privacy!
Wrapping up and next steps
The Emerald Green Arborvitae is your ultimate low-maintenance solution for year-round privacy and beauty—no fuss, just lush greenery! 🌿 With its disease-resistant nature and fast growth, it’s perfect for busy homeowners who still crave a polished, natural look.
Whether you’re lining a fence, defining property borders, or adding curb appeal, this evergreen delivers effortlessly.
Ready to transform your outdoor space? Plant yours today and enjoy the rewards of a vibrant, hassle-free landscape for years to come! For extra tips, check out our FAQs or consult a local nursery to pick the perfect spot.