
Vegetables
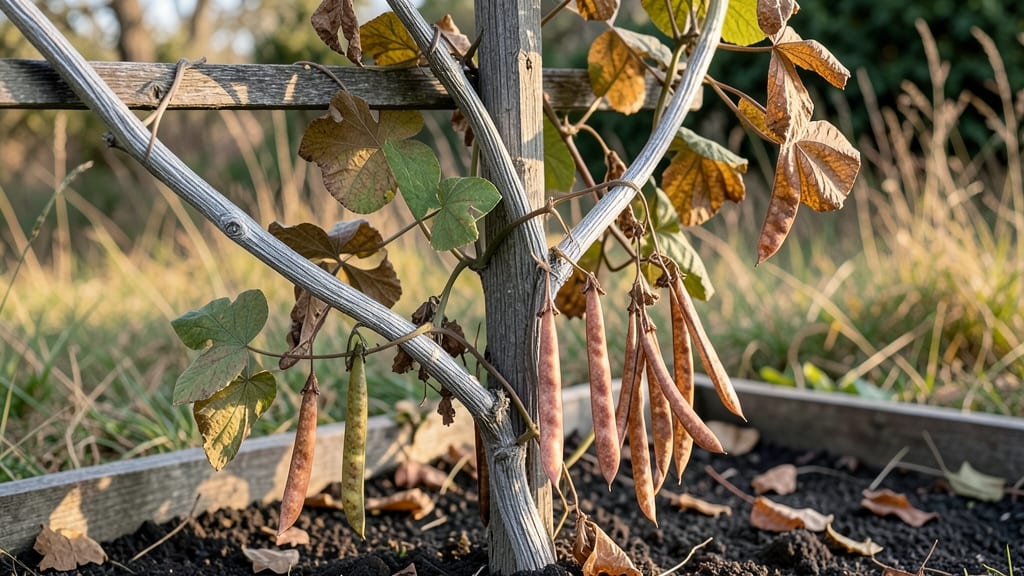
Growing dried scarlet runner beans in containers turns your patio into a vibrant edible trellis that keeps producing for years. 🌿 These striking vines—with their bold red flowers and edible beans—are surprisingly easy to grow, even in small spaces, and they reward you with both beauty and harvests that last through winter.
The secret lies in mimicking their natural climbing habits: sturdy containers with 5-gallon capacity, well-draining soil, and a trellis or strong fence to support their 10-15 foot reach. Plant seeds after your last frost when soil warms to 60°F, and watch them scramble upward within weeks.
The flowers alone make them a showstopper, but the beans? They’re a gourmet treasure when dried. You’ll harvest 2-3 crops per season, with beans that mature in 80-90 days. The key is consistent moisture (never soggy soil) and regular pruning to keep vines focused on production.
Even in containers, these perennials thrive—just give them winter protection in colder zones. Perfect for urban gardeners, small yards, or anyone who wants both beauty and bounty. Here’s how to make it work without the common pitfalls that trip up beginners.
📚 In This Guide
- What you need
- Instructions
- Tips and common mistakes
- Wrapping up and next steps
What you need
- ● Dried Scarlet Runner Bean Seeds: 5–10 seeds (or 1–2 seed pods if saving from a previous harvest). Choose certified organic or heirloom varieties for best results.
- ● Containers: 2–3 large pots (12–18 inches deep) with drainage holes or a raised bed with at least 18-inch depth. Ensure they’re wide enough to support the vine’s sprawling growth.
- ● Potting Mix: 5–10 gallons of high-quality, well-draining potting soil (amend with compost for nutrient-rich growth). Avoid garden soil—it compacts easily in containers.
- ● Support Structure: A trellis, stakes, or sturdy cage (4–6 feet tall) to guide the vine upward and maximize space.
- ● Watering Can or Hose: With a gentle spray nozzle to avoid displacing soil.
- ● Fertilizer: Balanced organic fertilizer (e.g., 10-10-10) or compost tea for a slow-release nutrient boost.
- ● Garden Gloves: To protect hands while handling soil and seeds.
- ● Trowel or Small Shovel: For planting and soil amendments.
- ● Pruning Shears: To trim excess growth and encourage flowering.
- ● Sunlight Access: A spot receiving 6–8 hours of full sun daily (scarlet runners are sun-worshippers!).
- ○ Optional: Mulch (straw or shredded leaves) to retain moisture and suppress weeds.
- ● Peat moss or perlite for improved drainage in heavy soils.
- ● A moisture meter to monitor soil hydration (especially for container gardening).
Step-by-step revival of dried scarlet runner beans in containers
Here's how I bring these stunning, perennial vines back to life—container-friendly and ready to climb.
🌱 Step 1: Soak Seeds Overnight to Break Dormancy
Scarlet runner beans often have tough seed coats that slow germination. Place your dried seeds in a bowl of lukewarm water for 12 hours. You'll see the seed coats soften noticeably—this ensures even sprouting. Drain and pat dry before planting.
I like to soak them in a mesh bag so I can easily transfer them later without losing any. If you're impatient, you can nick the seed coat with sandpaper, but soaking is gentler and works just as well. This step prevents the "waiting game" that frustrates many gardeners.
🪴 Step 2: Prepare Containers and Planting Medium
Use 5-gallon containers with drainage holes—these vines need room to establish roots before climbing. Fill with a mix of 60% potting soil and 40% compost for nutrient-rich growth. Scarlet runners thrive in well-draining but moisture-retentive soil.
Plant two seeds per container, 1 inch deep and 3 inches apart. The extra seed gives you a backup if one fails to germinate. Water gently until the soil is damp but not soggy—you want moisture to penetrate without displacing the seeds.
☀️ Step 3: Provide Warmth and Light for Germination
Keep containers in a location with 70-80°F soil temperature—a sunny windowsill or under a heat mat speeds up germination. Scarlet runners may take 10-21 days to sprout, so patience is key. Watch for the first tiny leaves (cotyledons) breaking through the soil.
Once sprouts appear, move containers to a spot with 6+ hours of direct sunlight daily. If growing indoors, supplement with a grow light 4-6 inches above the plants. Leggy seedlings mean your light isn’t strong enough—adjust immediately to prevent weak stems.
💧 Step 4: Train Vines and Maintain Consistent Care
As vines grow, guide them along a trellis or sturdy stakes. Scarlet runners need support to climb, and this prevents tangled growth. Water at the base when the top inch of soil feels dry, avoiding wetting the leaves to reduce disease risk.
Fertilize lightly with a balanced organic fertilizer every 4-6 weeks once flowers appear. These vines are nitrogen-fixers but still benefit from occasional feeding. Prune spent flowers to encourage more blooms—this keeps the plant focused on producing vibrant red blossoms.
⏰ Step 5: Overwintering for Perennial Growth
Before the first frost, cut back vines to 6 inches tall and move containers to a sheltered spot. Mulch the soil surface with 2 inches of straw to insulate roots. Scarlet runners are hardy in zones 8-11 but can be overwintered indoors in cooler climates.
Reduce watering in winter, keeping soil barely moist. In spring, resume care and watch for new growth within 4-6 weeks. Your revived vines will reward you with stunning flowers and edible pods for years to come.
Tips & tricks for reviving dried scarlet runner beans
Transforming dried scarlet runner bean seeds into thriving vines takes patience and precision—but these insights will help you avoid common pitfalls and maximize success.
Soaking Strategy: The 12-hour soak in lukewarm water is your secret weapon against stubborn seed coats. For even better results, add a pinch of honey or molasses to the water—this natural sugar boosts microbial activity that helps break down the tough outer layer. Just don't exceed 12 hours, or you risk softening the seed too much. After soaking, I always give the seeds a quick rinse to remove any residual sugar that could attract pests.
Container Selection: While 5-gallon containers work perfectly, don't overlook the importance of drainage holes. If your containers lack them, drill holes yourself—scarlet runners hate soggy roots. For extra insurance against waterlogging, add a layer of gravel or perlite at the bottom before adding your soil mix. This creates a natural barrier that prevents root rot while still allowing excess water to escape.
Germination Environment: That 70-80°F soil temperature range isn't just arbitrary—it mimics the tropical origins of scarlet runner beans. If your home runs cooler, place containers on a seedling heat mat or near a sunny window with a clear plastic cover to trap warmth. Watch for condensation on the plastic as your sign that humidity levels are perfect. Once sprouts appear, maintain that 6+ hours of direct sunlight—even artificial grow lights should be positioned just 4-6 inches above the seedlings to prevent leggy growth.
Overwintering Insight: When cutting back vines to 6 inches before winter, leave the main stem intact—this acts as a natural marker for where new growth will emerge in spring. For containers in zones below 8, move them to a garage or unheated basement where temperatures stay above freezing. The key is maintaining just enough moisture to keep roots alive without encouraging mold growth. In spring, you'll notice new shoots appearing within 4-6 weeks, proving your overwintering strategy worked.
Pro Tips for Dried Scarlet Runner Beans
- Transforming dried scarlet runner bean seeds into thriving vines takes patience and precision—but these insights will...
- Soaking Strategy: The 12-hour soak in lukewarm water is your secret weapon against stubborn seed coats. For even bett...
- Container Selection: While 5-gallon containers work perfectly, don't overlook the importance of drainage holes. If yo...
Frequently asked questions
Got questions about growing and using dried scarlet runner beans?
You’re not alone! Here are answers to the most common queries to help you master this vibrant, edible vine.
How long do dried scarlet runner beans take to mature?
Scarlet runner beans are patient but rewarding! From planting seeds, expect 90–120 days until pods are fully dried and ready for harvest. Start seeds indoors 4–6 weeks before the last frost, or sow directly in warm soil (after frost risk passes). Pods ripen unevenly, so check plants weekly for the best harvest window.
Can I eat fresh scarlet runner beans, or must they be dried?
Yes! While dried beans are prized for their long shelf life and unique flavor, fresh pods are edible too—but they’re bitter when raw. Blanch or boil them for 5–10 minutes to soften. For the best taste, harvest pods when small (like green beans) or let them fully dry for the classic dried bean experience.
What can I substitute if I can’t find dried scarlet runner beans?
If you’re craving that earthy, slightly sweet flavor, try these swaps:
- Dried kidney beans (similar texture, milder taste)
- Dried black beans (softer when cooked)
- Fresh runner beans (if available, but prep carefully—see above!)
- Lima beans (for a buttery alternative)
Why are my scarlet runner bean pods shriveled or not drying properly?
Shriveled pods often signal underwatering or high humidity during drying. To fix this:
- Harvest pods when they’re fully mature but still green (they’ll dry on the vine).
- Bundle stems in small groups and hang them in a well-ventilated, dry spot (e.g., a garage or shed).
- Avoid drying in direct sunlight—it can cause cracking.
- If mold appears, spread pods on a tray in a cool, dry place to finish drying.
How do I cook dried scarlet runner beans for the best texture?
Unlike some beans, scarlet runners don’t need soaking—just a quick rinse. For ideal results:
- Cover dried beans in 3x their volume of water and simmer for 1.5–2 hours until tender.
- Add 1 tsp baking soda per pound to soften skins (optional).
- For soups or stews, use half the cooking time to retain shape.
Wrapping up and next steps
Dried scarlet runner beans are a vibrant, low-maintenance way to bring beauty and productivity to your container garden—even in small spaces! 🌱 Whether you’re drawn to their stunning blooms, edible pods, or eco-friendly benefits, these perennials prove that growing your own food can be simple, rewarding, and visually stunning.
Ready to transform your balcony or patio?
Start small: grab a few seeds, a sturdy container, and let nature do the rest. Your first harvest could be just a few months away! Happy growing—your future self (and pollinators!) will thank you. 🌿