
Vegetables
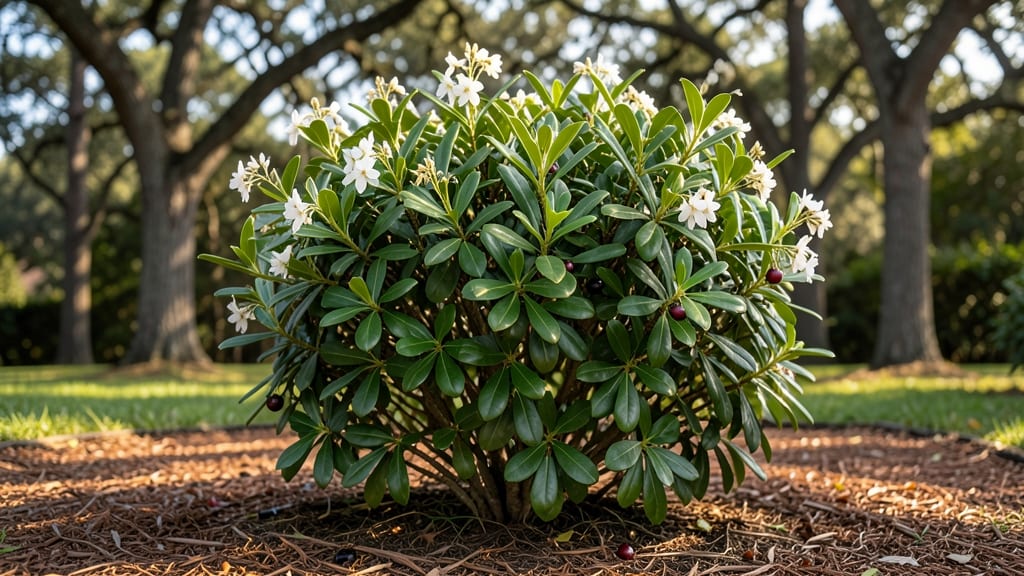
Growing compact Carolina cherry laurel means adding a fragrant, evergreen hedge that thrives with almost no effort. 🌿 I’ve watched mine grow into a dense, glossy wall that stays green year-round—no matter how harsh the winter gets.
The secret lies in its adaptability: it handles shade, poor soil, and even urban air pollution better than most shrubs.
This shrub loves partial sun to full shade, making it perfect for tight spaces where sunlight is limited. Plant it in well-draining soil—even rocky or sandy ground—and water it deeply once a week after the first year.
Unlike fussy plants, it won’t complain if you forget to water occasionally, but it rewards consistent care with vibrant, dark green foliage that smells amazing when brushed against.
Pruning is optional but keeps it tidy: trim back leggy branches in late winter or early spring to encourage bushier growth. Few pests or diseases bother it, so you’ll spend less time spraying and more time admiring its neat, rounded shape—ideal for borders, privacy screens, or even container gardening.
Once established, it’s nearly indestructible. Use it to define property lines, soften fences, or create a low-maintenance hedge that stays lush without constant attention. The best part? It grows slowly, so you won’t need to prune it often—just enjoy its effortless beauty.
📚 In This Guide
- What you need
- Instructions
- Tips and common mistakes
- Wrapping up and next steps
What you need
- ● Compact Carolina cherry laurel plants: 1-3 nursery-grown saplings (3–5 ft tall, depending on desired spacing). Pro tip: Choose healthy plants with vibrant green leaves and no signs of pests! 🌿
- ● Well-draining potting mix: 10–20 lbs of a blend designed for acid-loving plants (pH 5.0–6.0). Look for mixes labeled for azaleas, rhododendrons, or camellias.
- ● Garden soil amendment: 5–10 lbs of peat moss or pine bark fines to improve drainage and acidity.
- ● Organic mulch: 2–3 cubic feet of pine straw, wood chips, or shredded leaves to retain moisture and regulate soil temperature.
- ● Basic gardening tools: 1 trowel or hand shovel
- ● 1 pruning shears (sterilized)
- ● 1 garden fork (for loosening soil)
- ● 1 watering can or hose with a gentle spray nozzle
- ○ Fertilizer: 1 lb of slow-release acidic fertilizer (e.g., 8-3-9 or 10-10-10 with sulfur). Optional: Use fish emulsion or compost tea for organic options! 🐟
- ● Container gardening: 1–2 15–20 gallon pots with drainage holes (if planting in containers). Use a mix of potting soil and perlite.
- ● Soil pH tester: To double-check acidity levels (aim for 5.0–6.0).
- ● Pest control: Neem oil or insecticidal soap (for rare aphid or spider mite issues).
- ● Staking: 2–3 bamboo stakes (if planting in windy areas to support young plants).
Step-by-step guide to planting and maintaining compact Carolina cherry laurel
This easygoing shrub thrives with minimal fuss—here's how to get it established for decades of lush, fragrant foliage.
🌱 Step 1: Choose the Perfect Planting Location
Carolina cherry laurels love full sun to partial shade, with at least 6 hours of direct light daily for best growth. I always check the site's morning sun patterns—east-facing spots work well because afternoon shade prevents leaf scorch in hotter climates. The soil should drain well but retain moisture; if your yard has heavy clay, amend with 2-3 inches of compost mixed into the top 12 inches of soil.
This shrub tolerates a range of soil types but performs best in slightly acidic to neutral pH (6.0-7.0). A simple soil test kit confirms the pH before planting. Avoid low-lying areas where water pools after rain—root rot is the only real threat, and it happens when roots sit in soggy soil for more than 24 hours.
🪴 Step 2: Dig and Plant with Proper Spacing
Dig a hole twice as wide as the root ball but only as deep as the container's root level. The top of the root ball should sit 1 inch above ground level—this prevents water from pooling against the stem. Gently loosen the roots if they're circling the container (I use my fingers to tease them apart).
For 4 plants, space them 6-8 feet apart in a row or 8-10 feet apart for a more open, airy look. The wider spacing encourages stronger growth and better air circulation, which reduces fungal diseases. Backfill with the native soil, tamping lightly every 4 inches to eliminate air pockets. Water deeply immediately after planting to settle the soil around the roots.
☀️ Step 3: Water Deeply and Establish a Routine
Water once weekly during the first 6-8 weeks after planting, providing 1-2 gallons per plant each time. You'll know you've watered enough when the soil 6 inches down feels uniformly moist—stick your finger in to check. Overwatering is the biggest mistake here; these shrubs are drought-tolerant once established.
After the initial establishment period, water only when the top 2 inches of soil feel dry. Mulch with 2-3 inches of shredded bark around the base (but keep it 6 inches away from the trunk) to retain moisture and suppress weeds. The mulch also moderates soil temperature, which is especially helpful in hot summers.
✂️ Step 4: Prune for Shape and Health
Prune late winter or early spring before new growth begins. Remove any dead, diseased, or crossing branches first—this improves airflow and prevents fungal issues. For shaping, I cut back overgrown branches by one-third to encourage bushier growth. Always use clean, sharp pruners to make cuts just above a leaf node or bud.
You can also lightly trim throughout the growing season to maintain your desired shape, but avoid heavy pruning after mid-summer. This shrub blooms on old wood, so late-season cuts may reduce next year's flowers. Wear gloves—cherry laurels have small, sharp leaves that can irritate skin.
🌿 Step 5: Fertilize Lightly for Long-Term Growth
Apply a balanced, slow-release fertilizer (10-10-10) in early spring when new growth appears. Use 1 tablespoon per foot of plant height, spread evenly around the root zone. Water deeply after applying to help nutrients penetrate the soil. Too much fertilizer causes weak, leggy growth and attracts pests, so resist the urge to overdo it.
After the first year, fertilize only if the plant shows signs of stress—yellowing leaves or stunted growth. Mature Carolina cherry laurels rarely need extra feeding. Instead, focus on annual mulching and proper watering to keep them thriving with minimal effort.
Tips & tricks for perfect compact Carolina cherry laurel planting
These simple strategies will help you establish your compact cherry laurels with confidence and avoid the most common pitfalls that derail even the best-intentioned gardeners.
Soil Prep Secret: Before amending your heavy clay soil with compost, consider adding a handful of perlite or coarse sand to the mix. This creates tiny air pockets that improve drainage while still allowing moisture retention—critical for preventing root rot when roots sit in soggy conditions for more than 24 hours. I like to mix in about 10% by volume for the best results. The goal is to mimic the natural sandy loam these shrubs prefer in their native southeastern habitats.
Planting Depth Cue: That 1-inch elevation above ground level isn't just about aesthetics—it's a biological necessity. The stem where roots meet the trunk (called the crown) needs to stay dry to prevent fungal infections. Here's my foolproof way to check: After planting, gently press your finger into the soil at the base. If it feels damp below the crown, add a little more soil. The top of the root ball should always remain slightly visible above the finished soil line.
Watering Wisdom: Those 1-2 gallons per plant during the first 6-8 weeks might seem like a lot, but here's the thing: Carolina cherry laurels have surprisingly shallow root systems when young. The water needs to penetrate down to 6 inches—not just the top 2 inches. I use a long screwdriver to poke holes around the plant after watering to verify proper penetration. This deep watering encourages roots to grow downward where they'll find stability later.
Mulch Placement Pro: While 2-3 inches of shredded bark is perfect for moisture retention, the 6-inch clearance from the trunk serves another crucial purpose: preventing vole damage. These small rodents love to gnaw on young stems when mulch touches the base. I've lost count of how many plants I've saved by keeping that gap—it's worth the extra inch of space. Plus, the mulch will naturally settle over time, so don't worry about maintaining that exact distance forever.
Pro Tips for Compact Carolina Cherry Laurel
- These simple strategies will help you establish your compact cherry laurels with confidence and avoid the most common pitfalls that derail even the best-intentioned gardeners.
- Soil Prep Secret: Before amending your heavy clay soil with compost, consider adding a handful of perlite or coarse sand to the mix.
- Planting Depth Cue: That 1-inch elevation above ground level isn't just about aesthetics—it's a biological necessity.
Frequently asked questions
Got questions about growing compact Carolina cherry laurels? You’re not alone—this fast-growing, low-maintenance shrub is a favorite, but new gardeners often wonder about spacing, pruning, and more. Below, we tackle the most common queries to help you grow a thriving, fragrant hedge with confidence!
How much space should I leave between compact Carolina cherry laurels when planting?
For a dense, uniform hedge, space plants 3–4 feet apart. If you prefer a more open, airy look, stretch it to 4–5 feet. Remember, these shrubs stay compact (typically 4–6 feet tall and wide), so tight spacing works—but avoid overcrowding to prevent disease.
How long does it take for compact Carolina cherry laurels to mature and produce berries?
With proper care, these shrubs mature in 2–3 years, reaching full size and producing abundant red berries in late summer to fall. Young plants may take 1–2 seasons to establish before flowering, but they’re fast growers—expect noticeable growth each year!
When and how should I prune compact Carolina cherry laurels for the best shape?
Prune late winter or early spring (before new growth starts) to shape your shrub. Use clean, sharp shears to trim back 1/3 of the previous year’s growth and remove any dead or crossing branches. Never prune in fall, as it can stimulate tender new growth vulnerable to frost.
Are compact Carolina cherry laurels toxic to pets or wildlife?
While the berries are non-toxic to humans, all parts of the plant—leaves, stems, and berries—contain cyanogenic glycosides, which can be harmful if ingested in large quantities by pets (especially dogs). Keep an eye on curious pups and consider placing shrubs where pets can’t nibble!
Can I grow compact Carolina cherry laurels in containers or small gardens?
These shrubs thrive in 5-gallon containers or larger, making them perfect for patios, balconies, or small yards. Use well-draining soil and a pot with drainage holes. Just know they’ll need regular watering and may grow slightly slower in containers than in the ground.
What do I do if my compact Carolina cherry laurel leaves turn yellow or brown?
Yellowing leaves often signal overwatering or poor drainage, while brown edges can mean underwatering or heat stress. Check soil moisture (it should stay slightly moist but not soggy) and ensure your shrub gets morning sun and afternoon shade in hot climates. Adjust care and monitor for pests like spider mites.
Wrapping up and next steps
The Compact Carolina Cherry Laurel is your perfect low-maintenance perennial—ideal for adding year-round greenery with minimal effort! With its adaptable nature, drought tolerance, and compact size, it’s a dream for busy gardeners or small spaces.
Whether you’re a beginner or a seasoned plant parent, this shrub delivers beauty and resilience without the fuss.
Ready to transform your landscape? Plant one today and enjoy its lush foliage and fragrant blooms for seasons to come! 🌿✨