
Vegetables
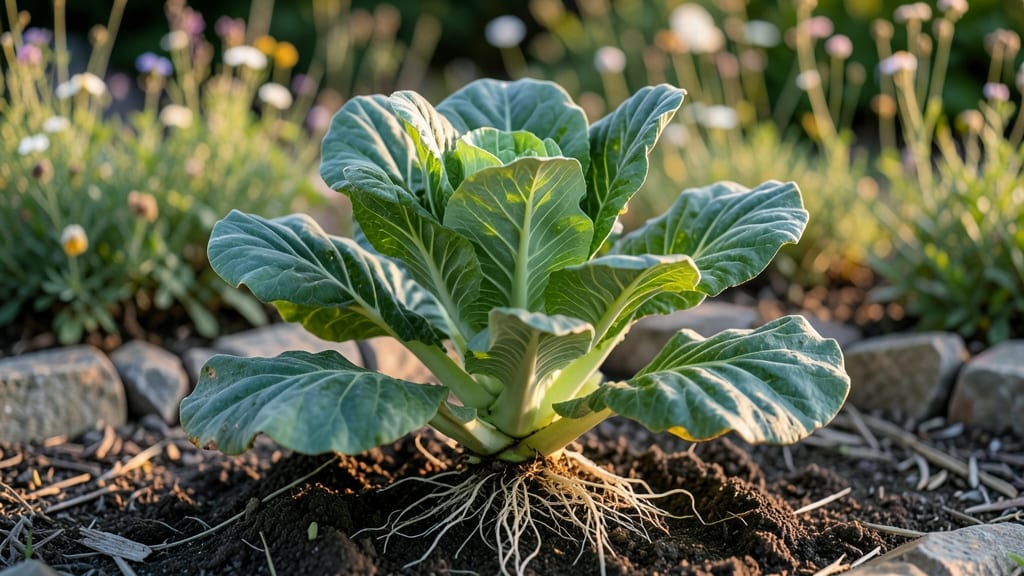
Your collard greens roots could be the secret to winter harvests—if you know how to protect them. 🌱 I’ve revived struggling plants every December by fixing the soil and shielding roots from cold snaps, and the results are bold, frost-tender leaves that keep producing until spring.
The real problem isn’t the greens themselves—it’s what’s happening below ground. Root rot from soggy soil, cutworms chewing at stems, or poor drainage can turn your hardy collards into limp shadows.
But with the right soil mix (sandy loam with compost) and a thick mulch layer, you’ll keep roots healthy even when temps dip below freezing.
Think of it like winterizing a car: you wouldn’t leave it exposed to ice without antifreeze or insulation. For collards, that means raised beds in cold zones, cloche protection for late frosts, and regular checks for pests hiding in the soil.
The payoff? Harvests that last 6+ months—something store-bought greens can’t match.
Whether you’re in Zone 5 or 8, the same principles apply: drainage first, pest barriers second, and mulch as your best friend. Let’s get those roots thriving so you can keep harvesting through the coldest months.
📚 In This Guide
- What you need
- Instructions
- Tips and common mistakes
- Wrapping up and next steps
What you need
- ● Collard green seeds: Choose heirloom or hybrid varieties like 'Georgia Southern', 'Blue Max', or 'Vates' (0.5–1 oz packet covers ~100 plants). Opt for organic, non-GMO if possible.
- ● Growing space: In-ground garden: Full sun (6+ hours/day) with well-draining, slightly acidic soil (pH 6.0–6.8). Space plants 12–18 inches apart in rows 2–3 feet apart.
- ● Containers: At least 12-inch-deep pots (5-gallon minimum) with drainage holes. Use 2–3 plants per container.
- ● Soil amendments: 2–3 cups compost or aged manure per planting hole.
- ● 1 tbsp balanced fertilizer (10-10-10) or organic options like fish emulsion or worm castings.
- ● Mulch: Straw or shredded leaves (2–3 inches thick) to insulate roots in winter.
- ● Hand trowel or small garden shovel for transplanting.
- ● Garden fork to loosen soil before planting.
- ● Watering can or hose with gentle spray nozzle (collard roots hate soggy soil!).
- ● Pruners (sterilized) for harvesting outer leaves.
- ○ Row cover or frost cloth (optional but highly recommended for early/late seasons).
- ● Climate zone: Collards thrive in USDA Zones 3–10. They’re frost-tolerant but prefer 50–75°F for optimal growth.
- ● Timing: Direct sow: 4–6 weeks before last frost (spring) or 60 days before first frost (fall).
- ● Transplant: Start seeds indoors 4–6 weeks before outdoor planting.
- ● Patience: Roots establish slowly—give them 6–8 weeks before heavy harvesting!
How to revive collard greens roots for cold-hardy regrowth
Here's how I nurse back collards that look done for the season—just a few steps to bring them back stronger than ever.
🌱 Step 1: Assess Root Damage and Prepare the Soil
Gently lift the plant to examine the roots. Healthy roots should be white or light tan, while black or mushy roots are beyond saving. If you see mostly firm roots with some browning, your collards can recover. Work in 2 inches of compost around the base to improve drainage and add nutrients—this jumpstarts root regrowth.
Loosen the soil within 6 inches of the plant with a fork to aerate compacted areas. Collards hate soggy roots, so if your soil feels heavy, mix in 1 inch of coarse sand or perlite to break up clay. The goal is to create an environment where roots can breathe and access moisture without drowning.
💧 Step 2: Water Deeply and Protect from Frost
Water the plant until moisture reaches 12 inches deep—this encourages roots to grow downward where temperatures stay more stable. Use a moisture meter to check; the soil should feel damp but not saturated. After watering, cover the plant with a 2-inch layer of straw mulch to insulate roots from freezing temperatures.
For extra protection during hard freezes (below 20°F), drape a frost cloth over the plant and secure it with stakes. The cloth traps heat while allowing sunlight to penetrate. Remove it during the day if temperatures rise above 35°F to prevent overheating. You'll see new growth within 2-3 weeks if roots are still viable.
☀️ Step 3: Fertilize and Monitor for New Growth
Once you spot new leaves emerging, feed the plant with a balanced liquid fertilizer (10-10-10) diluted to half-strength. Apply it directly to the soil, not the leaves, to avoid burning tender regrowth. Collards are heavy feeders, so repeat this every 4-6 weeks during the growing season to maintain vigor.
Watch for yellowing leaves—this usually means nitrogen deficiency. If you see it, switch to a fertilizer higher in nitrogen (like 20-5-5) for a week. Avoid overwatering now; roots need time to establish before handling excess moisture. You'll know revival is working when the plant produces new, deep green leaves at the base within 6-8 weeks.
✂️ Step 4: Prune and Harden Off for Winter Survival
When the plant shows 4-6 inches of new growth, trim back any damaged outer leaves to redirect energy to the center. Use clean, sharp shears to make cuts at a 45-degree angle just above a leaf node. This encourages bushier regrowth and prevents disease from entering through ragged cuts.
To prepare for winter, gradually reduce watering as temperatures drop below 40°F. Let the top inch of soil dry out between waterings to toughen the plant. By late fall, your revived collards should be fully hardened off—able to withstand light frosts down to 15°F without protection. The key is patience; rushed hardening leads to leaf burn and setbacks.
Tips & tricks for reviving collard greens roots
Between us, these little details make all the difference when nursing collards back from winter's edge.
Root Assessment Accuracy: In Step 1, when examining roots, look for firmness as your primary indicator—not just color. Healthy roots should spring back slightly when pressed, while damaged ones will feel mushy or crumble. I've seen roots that looked browned externally but were actually salvageable because the core was still firm. This visual test saves you from throwing away potentially recoverable plants.
Soil Preparation Strategy: The 6-inch loosening in Step 1 isn't just about aeration—it's about creating oxygen pathways for new root development. Use a fork to gently break up soil clods rather than turning it, which can damage any remaining fine roots. For heavy clay soils, mix in that 1 inch of perlite right where the roots are most concentrated, not just around the perimeter. This targeted approach maximizes root contact with improved soil.
Frost Protection Timing: The 20°F threshold in Step 2 is critical, but don't wait until the last minute to cover plants. I've learned this the hard way—once roots hit 28°F for more than 30 minutes, even with frost cloth, they can suffer irreversible damage. Set up your frost cloth protection the night before any forecasted hard freeze, not after the damage occurs. The 35°F daytime removal rule prevents overheating while still providing nighttime insulation.
Fertilizer Application Technique: When applying that half-strength 10-10-10 fertilizer in Step 3, water the soil first until it's moist to 2 inches deep. This prevents fertilizer burn on tender new roots. I've found that applying fertilizer to dry soil can create concentrated salt pockets that actually inhibit root growth. The key is to water, wait 10 minutes, then apply fertilizer to damp soil—this ensures even distribution.
Pro Tips for Collard Green Roots
- Between us, these little details make all the difference when nursing collards back from winter's edge.
- Root Assessment Accuracy: In Step 1, when examining roots, look for firmness as your primary indicator—not just color...
- Soil Preparation Strategy: The 6-inch loosening in Step 1 isn't just about aeration—it's about creating oxygen pathwa...
Frequently asked questions
Got questions about growing collard greens roots or maximizing your harvest?
You’re not alone! Here are answers to the most common queries—from timing to troubleshooting—so you can enjoy cold-hardy collards all year long.
Can you eat collard greens roots?
Yes! While the roots aren’t as tender as the leaves, they’re edible and packed with nutrients. Some gardeners harvest them like radishes for a peppery bite. Just avoid any woody or overly thick roots—focus on the smaller, younger ones for the best texture.
How cold can collard greens roots survive?
Collard greens roots are remarkably resilient! They thrive in temperatures down to 15–20°F (-9 to -6°C), making them perfect for winter harvests. For extra protection, mulch heavily with straw or leaves to shield roots from freezing. Young plants may need row covers in extreme cold snaps.
When should I harvest collard greens roots?
Harvest roots when they’re 1–2 inches long (about 4–6 weeks after planting). For leaves, pick outer leaves as needed—this encourages regrowth. If you’re growing for roots, thin seedlings early to avoid competition. Pro tip: Harvest roots in late fall or early spring for the sweetest flavor!
What can I plant with collard greens roots to improve growth?
Collards love companions like bush beans, carrots, or onions, which deter pests. Avoid planting near tomatoes or peppers, as they compete for nutrients. Interplanting with radishes or turnips also maximizes space—radishes can be harvested early, leaving room for collards to mature.
Why are my collard greens roots turning yellow or rotting?
Yellowing or rotting roots often signal overwatering, poor drainage, or disease. Ensure soil is well-draining (sandy loam works best) and water only when the top inch is dry. If fungal issues arise, remove affected plants and treat soil with compost or copper spray. Rotate crops next season to prevent reinfection.
Bonus Tip:
For a double harvest, try succession planting! Sow seeds every 2–3 weeks in early spring or late summer. This ensures a steady supply of both leaves and roots without overcrowding.
Wrapping up and next steps
Growing collard greens from roots is a rewarding way to enjoy year-round harvests with minimal effort—especially in cold climates! 🌱 Whether you’re reviving an existing plant or propagating from cuttings, you now have the tools to succeed. The key is patience, consistency, and a little creativity with your growing setup.
Ready to take the next step? Start small—grab a few cuttings or a single plant, and experiment with the techniques shared here. Before you know it, you’ll be feasting on homegrown collards straight from your garden (or even a sunny windowsill!).
Happy growing, and may your harvests be bountiful! 🌿✨