
Vegetables
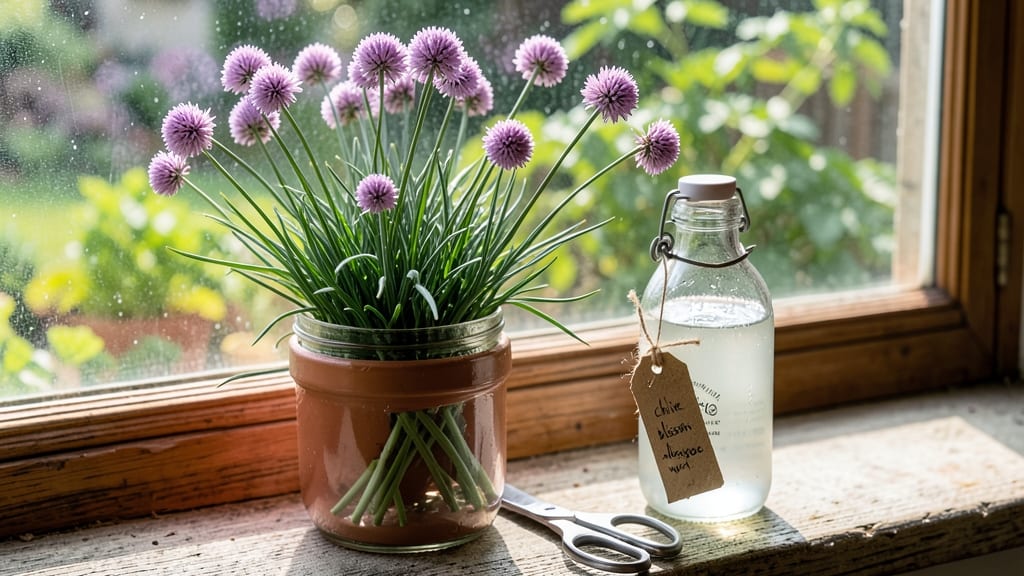
Growing chives for their delicate blossoms transforms your garden into a fragrant edible landscape. 🌿 The secret to chive blossom vinegar starts with healthy plants—tall, bushy clumps that produce abundant purple flowers every spring and summer.
I’ve learned that the key isn’t just planting chives, but nurturing them so they thrive long enough to bloom reliably.
Plant chives in well-draining soil with full sun to partial shade, and you’ll get those signature purple flower stalks in about 60 days. Harvest blossoms in the morning when they’re freshest, then snip them just above the leafy stems to encourage more growth.
The flowers add a mild onion-garlic flavor to dishes, but their real magic happens when infused in vinegar.
Once you’ve harvested those blossoms, the process is simple: pack a clean jar with fresh flowers, cover with white or apple cider vinegar, and let it sit for 2-4 weeks in a cool, dark place.
The result is a bright floral infusion perfect for drizzling over salads, brightening dips, or adding a delicate garnish to cocktails.
This method works for gardeners with small spaces—chives grow well in containers—and the vinegar keeps for months, making it a foolproof way to preserve your garden’s bounty. The only mistake I’ve made?
Waiting too long to harvest the flowers, which can turn bitter. Start early, and you’ll have jars of homemade vinegar ready by summer’s end.
📚 In This Guide
- What you need
- Instructions
- Tips and common mistakes
- Wrapping up and next steps
What you need
- ● Chive blossoms: 1 cup (tightly packed), freshly picked (ensure they’re fully bloomed for maximum flavor). Pro tip: Use organic blossoms if possible to avoid pesticides.
- ● White vinegar: 1 cup (5% acidity), distilled or apple cider for a milder taste.
- ○ Granulated sugar (optional but recommended): 1 tablespoon, to balance acidity.
- ● Glass jar: 1 pint-sized, sterilized (mason jars work best).
- ● Clean kitchen knife or scissors: For trimming chive stems (if needed).
- ● Fine-mesh strainer or cheesecloth: To filter the vinegar after infusion.
- ○ Small saucepan (optional): For gently heating the vinegar to speed up infusion.
- ● Clean spoon or chopstick: For pressing down blossoms in the jar.
- ● Food-safe lid: Airtight to seal the jar during infusion.
- ● Dark cupboard or pantry: For storing the vinegar away from light (1–2 weeks).
- ● 1 clove garlic, smashed (adds depth).
- ● 1 teaspoon dried lavender (for a floral twist).
- ● 1/2 teaspoon black peppercorns (for a subtle kick).
- ● 1/4 teaspoon sea salt (enhances umami).
Step-by-step guide to infusing chive blossom vinegar
Here's how to make a fragrant, edible vinegar that'll elevate any dish with its delicate floral notes.
🌱 Step 1: Harvest and Prepare Chive Blossoms
Pick chive blossoms when fully open but before they start to brown—this ensures peak flavor and color. I snip the entire flower cluster with a clean pair of scissors, leaving at least 2 inches of stem attached. This helps the blossoms stay fresh longer during infusion.
Gently rinse the blossoms under cool water to remove any dirt or insects, then pat them completely dry with a clean kitchen towel. Any moisture left on the flowers will dilute your vinegar and encourage mold growth. Spread them out on a paper towel for 5-10 minutes to ensure they're bone-dry before proceeding.
💧 Step 2: Choose and Prepare Your Vinegar Base
For this recipe, I always use white vinegar or apple cider vinegar—both provide a clean, mild acidity that lets the chive blossoms shine. Avoid balsamic or red wine vinegar, as their stronger flavors will overpower the delicate floral notes. Fill a clean, sterilized glass jar with 1 cup of vinegar per ¼ cup of blossoms.
Add the dried blossoms to the jar, packing them gently but firmly to maximize surface area. I use a wooden spoon to press them down slightly, ensuring the flowers are fully submerged in the vinegar. Leave about 1 inch of headspace at the top of the jar—this prevents spillage during infusion and allows for proper sealing.
☀️ Step 3: Infuse Under Light and Warmth
Place the jar in a spot that gets indirect sunlight for 2-4 weeks. The warmth and light will gently extract the floral oils from the blossoms, giving your vinegar its signature aroma. I like to set mine on a sunny windowsill, but avoid direct midday sun—it can make the vinegar too hot and degrade the delicate flavors.
Shake the jar gently every 2-3 days to redistribute the blossoms and ensure even infusion. You'll notice the color shifting from pale to a soft lavender hue—this is your cue that the infusion is working. If you see any mold developing (fuzzy spots or discoloration), discard the batch immediately and start fresh with sterilized equipment.
🌿 Step 4: Strain and Store for Use
After 2-4 weeks, strain the blossoms out using a fine-mesh sieve or cheesecloth. I press the blossoms gently with a clean spoon to extract every last drop of infused vinegar—don't worry, the texture won't affect the final product. Discard the spent blossoms or compost them (they're still edible but lack the potent flavor).
Transfer the strained vinegar to a clean, airtight bottle and store it in a cool, dark place. Your chive blossom vinegar will keep for up to 1 year, though the flavor peaks after 3-6 months. Use it sparingly—just 1 teaspoon per dish—to add a bright, floral touch to salads, dressings, or marinades.
Tips & tricks for perfect chive blossom vinegar
Here's what nobody tells you about getting that perfect floral infusion every time.
The Harvesting Secret: Timing is everything with chive blossoms. Pick them in the morning after the dew has dried but before the sun gets too strong—this preserves their delicate oils. I've found that blossoms harvested just as they open (not fully bloomed) give the most intense flavor. If you can't harvest fresh, dried chive blossoms work too, but they'll have a more muted aroma—about 2 tablespoons of dried blossoms equals ¼ cup of fresh.
Jar Selection Matters: Use a clean, sterilized glass jar with a tight-fitting lid—no plastic or metal containers. I prefer wide-mouth mason jars because they make it easier to pack the blossoms tightly and extract every last drop during straining. If you don't have a jar with a lid, you can use a clean glass bottle with a tight-fitting cap, but make sure it's completely sealed to prevent contamination.
Infusion Timing: The 2-4 week range is flexible, but I've noticed the flavor peaks around week 3. If you're short on time, you can reduce the infusion to 2 weeks, but the aroma will be subtler. For maximum flavor, let it go the full 4 weeks, but don't exceed that—after 4 weeks, the blossoms can start to degrade and impart bitter notes. Shake the jar every 2-3 days as instructed, but don't over-shake—gentle agitation is all you need.
Mold Prevention: Sterilize your jar and tools before starting. I run my jars and utensils through the dishwasher on the sanitize cycle or boil them for 5 minutes. If you see any mold (even a tiny spot), discard the entire batch immediately—vinegar mold can produce toxins. To prevent mold, make sure your blossoms are completely dry before adding them to the vinegar and leave that 1-inch headspace to reduce moisture buildup.
Pro Tips for Chive Blossom Vinegar
- Here's what nobody tells you about getting that perfect floral infusion every time.
- The Harvesting Secret: Timing is everything with chive blossoms. Pick them in the morning after the dew has dried but...
- Jar Selection Matters: Use a clean, sterilized glass jar with a tight-fitting lid—no plastic or metal containers. I p...
Frequently asked questions
Got questions about chive blossom vinegar? You’re not alone!
Here are answers to the most common queries—from prep tips to flavor troubleshooting—so you can nail this bright, floral infusion every time.
How long does it take for chive blossoms to infuse flavor into the vinegar?
For the best floral notes, let your chive blossom vinegar steep for at least 2–3 weeks in a cool, dark place. Shake the jar gently every few days to distribute the petals. If you’re impatient, you’ll still get some flavor in 1 week, but it’ll be milder. Patience pays off—think of it as a slow dance with flavor!
Can I use white vinegar instead of apple cider vinegar?
While apple cider vinegar adds a subtle sweetness and depth, white vinegar works perfectly for a crisp, tangy chive blossom vinegar. Just know the flavor profile will lean sharper. For a hybrid twist, mix both—try 75% white and 25% apple cider for balance. Experiment and taste as you go!
Do I need to refrigerate chive blossom vinegar after opening?
Yes! Once opened, store your vinegar in the fridge to preserve its freshness and prevent mold (thanks, moisture!). Unopened, it’ll keep in a pantry for 3–6 months, but refrigeration extends its life indefinitely. Pro tip: Use an airtight bottle or funnel to avoid contamination.
What if my vinegar turns cloudy or smells off?
Cloudiness is normal due to the blossoms, but if it smells sour, funky, or like alcohol, it’s time to toss it. To minimize spoilage, ensure your jar is sterilized and blossoms are completely dry before adding vinegar. When in doubt, trust your nose—it’s the best flavor detective!
Can I reuse the blossoms for another batch?
Not recommended! After the first infusion, chive blossoms lose their potency and may harbor bacteria. For a second batch, use fresh blossoms—your taste buds (and gut) will thank you. Think of it like a one-and-done floral party!
What’s the best way to use chive blossom vinegar in cooking?
Drizzle it over salads, grain bowls, or roasted veggies for a bright pop. It’s also fantastic in homemade dressings, marinades, or even as a finishing touch for seafood or grilled meats. Start with ½–1 tsp and adjust to taste—this stuff packs a punch!
Wrapping up and next steps
Transforming simple chive blossoms into fragrant chive blossom vinegar is easier—and more rewarding—than you think! This bright floral infusion adds a delicate, aromatic touch to salads, dips, and marinades, elevating everyday dishes with minimal effort.
Whether you’re a seasoned chef or a kitchen newbie, this recipe invites creativity and fresh flavors to your table.
Ready to level up your pantry staples? Grab those blossoms, follow the steps, and start experimenting—your taste buds will thank you! 🌸✨