
Vegetables
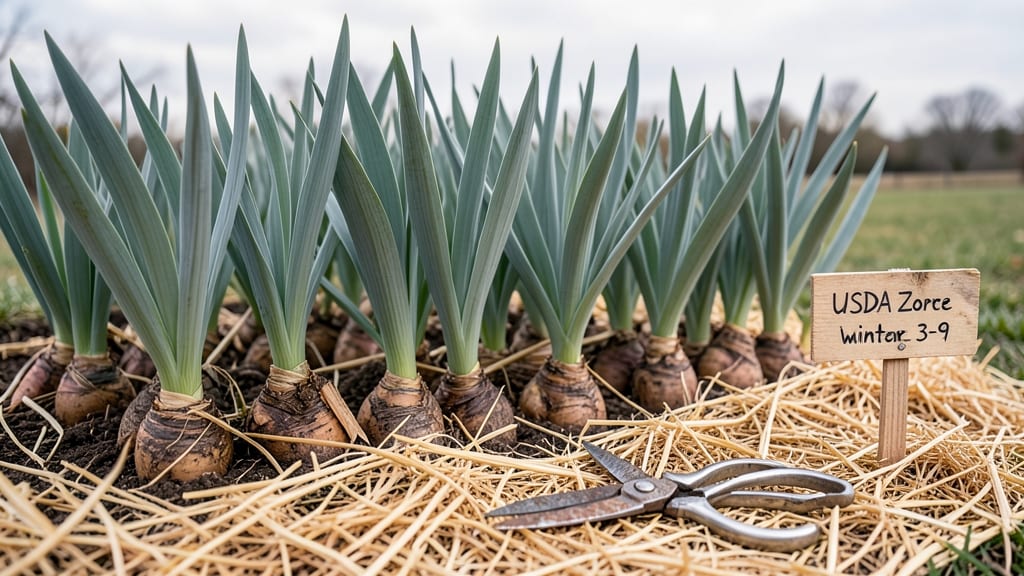
Caring for irises in winter isn't just about survival—it's about setting them up for next year's showstopping blooms before the first frost. I've seen irises wither from winter neglect, but the right care turns them into reliable, long-lived perennials that reward you for years. The secret lies in protecting those thick, fleshy rhizomes from freezing and drying out.
Start by cutting back the foliage to about 4-6 inches once it turns yellow in late fall. This prevents rot while keeping the rhizomes warm. Then, pile on 4-6 inches of mulch—straw or shredded leaves work best—around the base but not touching the rhizomes directly.
In colder zones (5 and below), add an extra layer of burlap or a thick blanket of mulch for insulation.
By spring, you'll notice fresh green shoots pushing through the soil 2-3 weeks earlier than neglected irises, and the blooms arrive with extra vigor. The key is balancing moisture (rhizomes shouldn't dry out) and airflow (too much mulch can cause rot).
This method works for both bearded and Siberian irises, no matter your hardiness zone.
Pro tip: Avoid heavy mulch like wood chips, which can smother rhizomes. And never disturb the mulch until late winter—patience here means bigger blooms later. Your irises will thank you with bold, vibrant flowers that make every spring worth the winter prep.
📚 In This Guide
- What you need
- Instructions
- Tips and common mistakes
- Wrapping up and next steps
What you need
- ● Garden gloves – A sturdy pair (waterproof preferred) to protect your hands while handling rhizomes. Pro tip: Choose gloves with grip for slippery soil!
- ● Pruners or sharp garden shears – For trimming back foliage and dead leaves. Sanitize blades with rubbing alcohol first!
- ● Organic mulch – 3–4 inches of straw, shredded leaves, or pine needles to insulate rhizomes. Avoid clumping mulch like fresh grass clippings.
- ● Garden fork or trowel – For gently lifting and repositioning rhizomes if needed. A 5–6 inch fork works best for digging without damaging roots.
- ○ Burlap or landscape fabric – A 3’x5’ sheet to cover clumps if heavy snow is expected. Optional: Use a breathable fabric to prevent rot!
- ● Rhizome-specific fertilizer – A low-nitrogen, high-phosphorus formula (like 5-10-10) to boost root strength before dormancy. Apply 1 tbsp per square foot in early fall.
- ● Garden twine or stakes – To secure heavy mulch or fabric in windy areas.
- ● Thermometer (soil probe) – To monitor ground temps. Irises thrive when soil stays above 20°F (-6°C).
- ● Compost or aged manure – A 1-inch layer mixed into soil before mulching for added nutrients.
How to protect iris rhizomes through winter
Follow these simple steps to keep your irises thriving even when temperatures drop.
Stop Watering and Reduce Fertilizer
By early fall, when nighttime temperatures consistently drop below 50°F, stop watering your irises completely. This allows the rhizomes to harden off and enter dormancy naturally. I usually cut back on watering in late September, depending on my local climate. Overwatering now can lead to rot, so let the soil dry out between rains.
Also, stop fertilizing at least 6-8 weeks before the first frost. The goal is to encourage the plant to focus on storing energy in the rhizomes rather than producing new growth. You'll notice the leaves start to yellow and die back naturally—this is a good sign that dormancy is beginning.
Trim Back Dead Foliage
Once the leaves turn brown and crispy, it's time to cut them back. Use clean, sharp pruners to trim the foliage down to about 2 inches above the rhizome. I always wait until the leaves are completely brown and brittle before cutting—this ensures the plant has fully absorbed nutrients back into the rhizome. Never cut green leaves, as this removes vital energy stores.
Leave the trimmed foliage on the ground rather than removing it. The dead leaves provide a natural layer of insulation and help protect the rhizomes from temperature swings. If you prefer a cleaner look, you can gather the debris and compost it later in the season.
Apply Mulch for Insulation
Spread a 2-3 inch layer of organic mulch over the rhizome area once the ground begins to freeze at night. I like to use straw or shredded leaves because they break down slowly and provide long-term insulation. Avoid using fresh wood chips, as they can draw moisture away from the rhizomes and create a cold, wet environment.
Gently mound the mulch around the rhizomes, making sure to cover the top of the rhizome completely. This protects against freezing and thawing cycles, which can damage the plant. If you live in a region with particularly harsh winters, you can add an extra layer of mulch in December for added protection.
Monitor for Ice and Snow Buildup
During winter, check your iris beds occasionally to ensure snow and ice aren’t accumulating heavily. A thick layer of snow can actually provide insulation, but if it melts and refreezes repeatedly, it can create ice pockets that damage the rhizomes. If you notice heavy ice buildup, gently brush it away with a broom or shovel.
If your area experiences extreme cold (below 0°F), consider adding a thin layer of burlap or landscape fabric over the mulch for extra protection. Remove it in early spring once the ground begins to thaw. This step is optional but can make a big difference in regions with very cold winters.
Prepare for Spring Growth
In early spring, as soon as the ground thaws and new growth appears, remove the mulch and old leaf debris. This allows sunlight to reach the emerging shoots and encourages vigorous growth. I usually start this process in late February or early March, depending on my climate. You’ll see new leaves pushing through the soil within a few weeks.
Once the new growth reaches about 4-6 inches tall, it’s time to fertilize lightly with a balanced, low-nitrogen fertilizer. This jumpstarts the plant’s energy reserves and prepares it for the blooming season. Avoid heavy fertilization at this stage—irises prefer a gentle wake-up call rather than a sudden nutrient surge.
Tips & tricks for perfect winter iris care
Between us, these small adjustments make all the difference for irises surviving winter's chill.
Timing is Everything: The 6-8 week mark before your first frost is your target for stopping fertilizer. Use a local frost date calculator if you're unsure—this ensures you're not too early (which could encourage late growth) or too late (which might stress the rhizomes). I've seen irises struggle when fertilized just a few weeks before frost, so mark your calendar now!
Insulation Insight: When applying that 2-3 inch mulch layer in Step 3, focus on creating an even, consistent layer rather than piling mulch haphazardly. The goal is to create a stable thermal blanket that protects against both freezing and thawing cycles. For extra security in cold climates, I've found that adding a thin layer of burlap over the mulch (as mentioned in Step 4) can prevent moisture loss during extreme cold snaps.
Visual Cues for Dormancy: The leaves turning brown and brittle is your clear signal to trim in Step 2. At this stage, the leaves should snap easily when bent—this indicates they've fully transferred nutrients back to the rhizomes. If you're unsure, wait another week; cutting too soon removes valuable energy stores the plant needs to survive winter.
Spring Readiness: That 4-6 inch growth mark in Step 5 is your green light to fertilize lightly. I've learned the hard way that impatient gardeners often fertilize too early, which can actually stress young shoots. Wait until you see consistent new growth before adding any nutrients—this ensures your irises wake up gently rather than getting a shock.
Pro Tips for Caring For Irises In Winter
- Between us, these small adjustments make all the difference for irises surviving winter's chill.
- Timing is Everything: The 6-8 week mark before your first frost is your target for stopping fertilizer. Use a local f...
- Insulation Insight: When applying that 2-3 inch mulch layer in Step 3, focus on creating an even, consistent layer ra...
Frequently asked questions
Got questions about keeping your irises thriving through winter? Here are some of the most common concerns—and their answers—to help you protect those stunning blooms year-round!
Do irises need special winter care even in mild climates?
Yes! While irises are hardy, even mild winters can stress rhizomes. A light mulch (2–3 inches of straw or leaves) insulates roots, preventing temperature swings. Pro tip: Avoid heavy mulch that smothers growth—just enough to shield from frost.
When should I cut back iris foliage after blooming?
Wait until late spring or early summer (after foliage yellows) to trim. Cutting too early removes energy stored in leaves for next year’s blooms. Never cut below the rhizome! Use clean shears to avoid disease.
How do I protect irises from heavy rain or snow?
Drainage is key! Ensure planting beds slope slightly, and avoid compacted soil. For snow, gently brush it off leaves to prevent rot. Warning: Prolonged soggy soil can suffocate rhizomes—raise beds if your yard floods.
Can I move irises in winter for better winter care?
No—wait until early spring (before new growth starts). Winter moves shock rhizomes, and frozen soil makes digging difficult. If relocating is urgent, do it in fall (6+ weeks before frost) for best survival.
What pests should I watch for in winter?
Irises are low-maintenance, but check for iris borers (tiny holes in leaves) or slugs (silver trails). Remove damaged leaves immediately. Prevention: Apply diatomaceous earth around rhizomes in early spring.
Wrapping up and next steps
Caring for irises in winter doesn’t have to be stressful—with the right prep, your rhizomes will thrive and reward you with stunning blooms come spring. 🌸 From mulching to strategic watering, these simple steps ensure your irises stay healthy and vibrant all season long.
Now that you’re armed with the know-how, roll up your sleeves and give your irises the winter love they deserve—your future garden will thank you!
Ready to take action? Pick a dry, sunny day this week to inspect your irises, apply mulch, and adjust watering. A little effort now means months of effortless beauty later!