
Vegetables
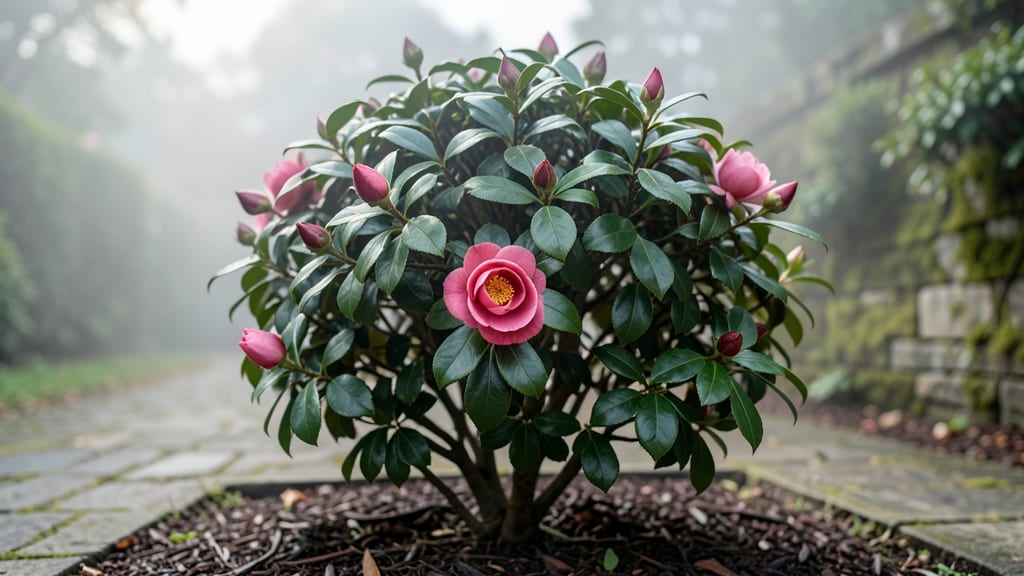
Your camellias aren’t dead just because the frost has them looking like overgrown twigs—this is their secret survival mode. 🌿 Winter care is what turns those bare branches into next year’s showstopper blooms, and I’ve learned the exact moves that keep my camellias thriving through the coldest months.
The key? Understanding when to protect, when to prune, and how to water without drowning roots in the chill.
First, let’s talk frost protection—the real game-changer. Mature camellias can handle light freezes, but those delicate winter buds? They need a little help. Wrapping them in burlap or using frost cloth when temps drop below 20°F saves more blooms than you’d think.
And here’s the trick: never prune until after the last frost—you’ll cut off next year’s flowers before they even form. Watering? Cut back to once a month unless we’re in a drought, and always use a deep soak.
By spring, you’ll see those branches bursting with fresh green, and by late winter, the buds will swell like they’re ready to pop. The payoff? A camellia that looks like it spent the winter on a tropical vacation, not hibernating in your yard.
It’s all about working with the plant’s natural rhythm, not against it.
Now, let’s tackle the common winter mistakes—like over-pruning or ignoring soil moisture—that turn camellias into sad, leggy shadows. (Yes, I’ve been there.) The right winter care means your plant will reward you with bold, healthy blooms come February, not a sparse, struggling shrub.
Ready to make this your best camellia season yet?
📚 In This Guide
- What you need
- Instructions
- Tips and common mistakes
- Wrapping up and next steps
What you need
- ● Pruning shears – Sharp, sterilized (bypass or anvil type, 6–8" blades). Pro tip: Disinfect with rubbing alcohol between cuts to prevent disease spread! 🔥
- ● Gloves – Heavy-duty, cut-resistant (gardening gloves with reinforced palms).
- ● Mulch – 3–4 inches of organic mulch (pine bark, shredded leaves, or straw). Why? Insulates roots and retains moisture! ✨
- ● Balanced fertilizer – 10-10-10 or 20-20-20 (slow-release granules or liquid). Dosage: Follow label instructions (typically ½ cup per bush).
- ● Watering can or hose – With a gentle spray nozzle (avoid blasting roots).
- ● Frost cloth or burlap – Lightweight, breathable (for severe freezes; 4’x6’ sheets work for small bushes).
- ● Hand pruners – For delicate trimming of smaller branches.
- ● Root stimulator – Mycorrhizal fungi or seaweed extract to boost root health post-frost.
- ○ Thermometer – Soil or air to monitor temperature extremes (optional but handy!).
- ● Epsom salt – 1 tablespoon per gallon of water (for magnesium-deficient soil; spray foliage or water roots).
Step-by-Step guide to reviving camellias after winter frost
Here’s how to nurse your camellias back to health after cold snaps—no guesswork, just proven care.
🌿 Step 1: Inspect for Frost Damage and Prune Dead Growth
Start by gently examining each branch. Look for brown, mushy stems or blackened buds—these are dead and won’t recover. Use clean, sharp pruning shears to cut back to the first healthy set of leaves or outward-facing bud below the damage. I always prune on a dry day to avoid spreading disease through fresh cuts.
Don’t over-prune—camellias bloom on old wood, so aggressive cuts reduce next year’s flowers. If more than half the plant is damaged, it’s better to wait until spring for a more accurate assessment. Healthy growth will show as firm, green stems with tight buds.
☀️ Step 2: Provide Shelter from Wind and Late Frost
Camellias hate drying winds and late frosts. If your plant is still in bud or your area gets sudden freezes, drape frost cloth over the plant during cold snaps. Secure it loosely—too tight, and you’ll trap moisture and encourage rot. I use stakes to hold the fabric above the plant, leaving room for airflow.
If your camellia is near a wall or fence, that’s great—it acts as a natural windbreak. Avoid plastic covers, which trap heat and can scorch leaves. Instead, focus on creating a microclimate that mimics the plant’s natural shade and humidity preferences.
💧 Step 3: Adjust Watering to Prevent Root Stress
Winter watering is tricky—too much causes root rot, too little stresses the plant. Water only when the top 2 inches of soil feel dry to the touch. Stick your finger in the soil; if it’s damp, wait. Camellias in containers dry out faster, so check them weekly, even in cold weather.
Mulch heavily with 2-3 inches of organic mulch (like pine straw or shredded bark) to insulate roots. Keep mulch away from the stem to prevent rot. This layer helps regulate soil temperature and retains moisture without suffocating the plant.
✂️ Step 4: Fertilize Lightly to Encourage New Growth
Wait until late winter or early spring (when new shoots appear) before fertilizing. Use a balanced, slow-release fertilizer (like 10-10-10) at half strength. Over-fertilizing now can burn roots or encourage tender growth that won’t survive another frost.
I like to mix fertilizer into the top 2 inches of soil rather than top-dressing. This ensures even distribution and prevents salt buildup on the surface. Water thoroughly after applying to help nutrients penetrate the soil.
⏰ Step 5: Monitor for Pests and Disease After Thaw
As temperatures rise, check for aphids, scale, or fungal spots on new growth. Wipe leaves with a damp cloth to remove pests, and treat fungal issues with a copper fungicide if needed. Camellias are tough, but stress from frost makes them vulnerable to secondary problems.
If buds swell but don’t open, it’s often due to late frost or drought stress. Keep an eye on the forecast and be ready to protect the plant if another cold snap is predicted. Healthy buds will firm up and turn glossy—those are the ones to watch.
Tips & tricks for perfect camellia revival after frost
These simple strategies will help you bring your frost-bitten camellias back to life with confidence—and avoid common mistakes that can set them back even further.
Pruning Precision: When cutting back damaged branches in Step 1, make your cuts at a 45-degree angle just above an outward-facing bud. This encourages new growth to shoot out rather than inward. I always disinfect my pruning shears with rubbing alcohol between cuts to prevent spreading any hidden pathogens. The goal is to remove only what’s truly dead—healthy buds will look firm and green, not shriveled or blackened.
Shelter Strategy: For Step 2, if you don’t have frost cloth, use lightweight shade cloth or even an old bedsheet secured with clothespins. The key is airflow—never let the cover touch the leaves. I’ve seen camellias recover beautifully under these makeshift shelters, especially when paired with a nearby windbreak like a fence or wall. Just remember to remove covers during the day if temperatures rise above freezing to prevent overheating.
Watering Wisdom: In Step 3, the 2-inch soil test is your best guide, but I’ve learned to adjust for container plants. Potted camellias dry out faster, so I check their soil every 3-4 days in winter, even if it hasn’t rained. For in-ground plants, water deeply but infrequently—camellias prefer slightly dry conditions in winter. Always water at the base, never overhead, to prevent fungal issues on the leaves.
Fertilizer Timing: The late winter/early spring window in Step 4 is crucial—don’t rush it! I wait until I see new shoot growth about 1 inch tall before applying fertilizer. This tells me the plant is actively growing and can handle nutrients. If your area has unpredictable late frosts, consider waiting until mid-spring to be extra safe. And remember, half-strength fertilizer is still plenty strong—camellias are sensitive to salt buildup.
Pro Tips for Camellia In Winter
- These simple strategies will help you bring your frost-bitten camellias back to life with confidence—and avoid common...
- Pruning Precision: When cutting back damaged branches in Step 1, make your cuts at a 45-degree angle just above an ou...
- Shelter Strategy: For Step 2, if you don’t have frost cloth, use lightweight shade cloth or even an old bedsheet secu...
Frequently asked questions
Got questions about keeping your camellias thriving through winter’s chill? You’re not alone! Here are answers to the most common concerns—from frost protection to post-winter care—so your plants bounce back stronger than ever.
Can camellias survive a hard frost?
Yes! Camellias are winter-hardy (USDA Zones 7–9), but severe freezes (below 10°F) can damage tender leaves or buds. Mulch heavily (4–6 inches) with pine straw or shredded bark to insulate roots. For extra protection, wrap young plants in burlap or use frost cloths—just remove them during the day to avoid overheating.
Should I prune camellias after winter?
Wait until late winter or early spring (after the last frost) to prune. Remove dead, diseased, or crossing branches first, then shape lightly to encourage airflow. Avoid heavy pruning—camellias bloom on old wood, so cutting back too much may reduce flowers. Use sterilized shears to prevent bacterial spread.
How often should I water camellias in winter?
Water deeply but less frequently—about once every 2–3 weeks—unless your soil is sandy or the weather is unusually dry. Overwatering can drown roots in cold soil. Check moisture by poking your finger 2 inches into the soil; if it’s dry, water slowly at the base of the plant (avoid wetting foliage to prevent fungal issues).
Why aren’t my camellias blooming after winter?
Blooming delays often stem from improper pruning, nutrient deficiencies, or stress (e.g., transplant shock). Ensure your plant gets full sun to partial shade and acidic soil (pH 5.5–6.5). Fertilize lightly in early spring with a balanced, iron-rich formula (like 8-8-8 or 10-10-10). If buds form but drop, it could signal thrips or frost damage—inspect leaves and treat accordingly.
Are there winter-friendly alternatives to camellias?
If camellias struggle in your climate, try these low-maintenance, cold-tolerant perennials:
- Dwarf Gardenia (Zones 8–10): Fragrant blooms, but needs winter mulch.
- Pieris Japonica (Zones 5–8): Evergreen with red new growth—great for structure.
- Viburnum (Zones 3–9): Hardy, disease-resistant, and offers winter interest.
- Hellebore (Lenten Rose) (Zones 4–9): Blooms early spring and thrives in shade.
Wrapping up and next steps
Winter may test your camellia’s resilience, but with the right care, these hardy perennials can bounce back stronger than ever! 🌱 From protecting roots to pruning with precision, your efforts will reward you with vibrant blooms come spring.
Don’t wait—grab your tools and give your camellia the TLC it deserves before the next frost hits.
Next steps:
- Check your camellia’s soil and mulch now.
- Plan a light pruning session in early spring.
- Keep an eye on pests—prevention is key!