
Vegetables
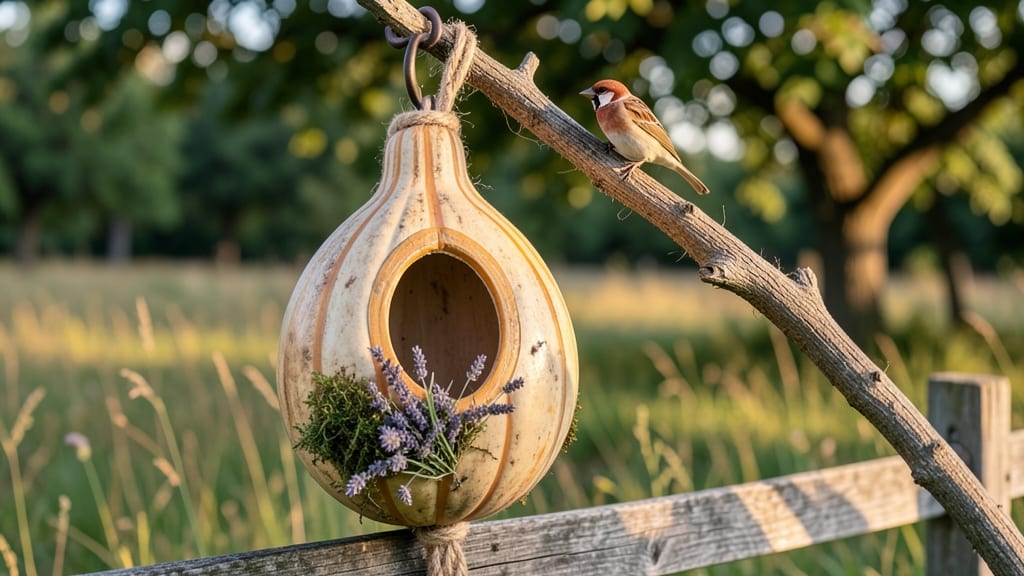
Transforming a bottle gourd into a birdhouse turns your garden into a living art piece. 🌿 These hollowed-out gourds create natural nesting spaces while adding rustic charm to any outdoor area—no two will look the same.
The best part? Birds adore them, and you’re giving them a home made from something that would otherwise go to waste.
You’ll need a mature bottle gourd (harvested when fully dried), a sharp knife or saw, sandpaper, and a few basic tools for carving the entrance and ventilation holes. The process is simple but satisfying—like whittling a piece of nature’s own furniture.
Once dried, the gourd’s natural texture and shape make it far more appealing than plastic alternatives.
Place your birdhouse in a quiet corner, about 5-10 feet off the ground, near shrubs or trees where birds feel safe but can still spot predators. Paint it with non-toxic milk paint for extra flair, or leave it natural for a true earthy look.
Watch as finches, wrens, or even hummingbirds claim it as their own.
This project works year-round in warm climates, or you can store gourds indoors over winter and reuse them. It’s eco-friendly, budget-friendly, and a conversation starter—plus, you’re giving local birds a handmade haven. Ready to turn a gourd into garden art?
📚 In This Guide
- What you need
- Instructions
- Tips and common mistakes
- Wrapping up and next steps
What you need
- ● 1 large bottle gourd (mature, dried, and hollowed—at least 12 inches in diameter for a standard birdhouse size).
- ● Natural wood or bamboo (for the roof and base): 1 small wooden or bamboo circle (6–8 inches in diameter) for the roof.
- ● 2–3 thin wooden strips (½ inch wide, 6–8 inches long) for structural support.
- ● Waterproof glue (like E6000 or outdoor-rated wood glue).
- ● Twine or jute rope (for hanging—at least 18 inches long).
- ○ Non-toxic paint or natural dyes (optional, for decorating the gourd).
- ● A sharp knife or craft knife (for carving entry/exit holes).
- ● Drill or awl (to make precise holes for ventilation and perches).
- ● Sandpaper (120–220 grit, to smooth rough edges).
- ● Hammer or mallet (for securing wood pieces).
- ● Ruler or measuring tape (for accuracy).
- ● Safety gloves (to protect hands while handling gourds or tools).
- ● Prerequisite: A dried, hollowed bottle gourd (let it cure for at least 2–3 months after harvesting).
- ● Small pebbles or moss (to line the gourd for a cozy nest).
- ● Decorative elements (like dried flowers, beads, or painted designs).
- ● Stainless steel screws (if you prefer a sturdier attachment for the roof).
- ● Weatherproof sealant (to extend the gourd’s lifespan outdoors).
Step-by-step instructions for crafting a bottle gourd birdhouse
Here’s how to transform a bottle gourd into a charming, functional birdhouse that blends seamlessly with your garden.
🪴 Step 1: Select and Prepare the Bottle Gourd
Choose a medium-sized bottle gourd (about 6-8 inches long) that’s fully mature and hard when tapped—it should sound hollow. Let it cure on a dry, shaded porch for 2-3 weeks until the skin turns tough and the stem dries completely. This prevents rot and ensures durability.
Once cured, use a sharp knife or pruning shears to cut the gourd lengthwise into two equal halves. Remove the seeds and fibrous pulp with a spoon, leaving only the hard shell. Rinse the halves with warm water and a soft brush to remove any remaining debris. Let them dry completely in the sun for 1-2 days before proceeding.
✂️ Step 2: Carve the Nesting Chamber and Entry Hole
Flip one gourd half cut-side down and trace a 4-inch diameter circle near the stem end using a permanent marker. This will be the nesting chamber floor. Carefully cut along the line with a jigsaw or coping saw, sanding the edges smooth afterward. The chamber should be deep enough to hold nesting materials but not so deep that birds feel trapped.
On the opposite end of the gourd, mark a 2-3 inch diameter entry hole (adjust for your local bird species—smaller for wrens, larger for chickadees). Drill or saw out the hole, then sand the edges smooth and rounded to prevent splinters. Place the gourd halves cut-side together and secure them with waterproof glue or staples along the seam, ensuring a snug fit.
🌿 Step 3: Add Mounting Hardware and Weatherproofing
Drill two small holes near the top of the gourd (opposite the entry hole) for sturdy mounting hooks or screws. If using hooks, thread them through and bend the ends to secure. For screw mounting, pre-drill pilot holes to prevent splitting. Seal all raw edges and seams with outdoor wood sealant or clear silicone caulk to protect against rain and pests.
Paint the exterior with non-toxic, water-based acrylic paint if desired—light colors blend better with gardens, while bold hues add whimsy. Let it dry 24 hours before hanging. Avoid painting the interior to keep it natural for nesting birds.
☀️ Step 4: Hang and Monitor the Birdhouse
Mount the birdhouse 5-10 feet high on a tree, fence post, or shepherd’s hook, facing east or north to shield nests from harsh afternoon sun and predators. Ensure it’s level and stable—birds won’t use a wobbly house. Place it at least 10 feet from other birdhouses to reduce competition.
Check the house once a month during nesting season (spring/summer) to ensure it’s secure and free of debris. If birds claim it, resist the urge to peek—they’ll abandon the nest if disturbed. By late fall, remove any old nesting materials to prevent pests and prepare for next year.
Tips & tricks for crafting the perfect bottle gourd birdhouse
Between us, the difference between a birdhouse that lasts and one that falls apart in a month comes down to these little details. Let me save you the trial-and-error I went through.
Gourd Selection Secret: Tap your bottle gourd before buying—it should sound hollow and firm, not dull. I’ve learned this the hard way: gourds that feel soft or squishy will never cure properly, no matter how long you leave them. Also, look for ones with a natural neck—it makes carving the entry hole easier later. The 6-8 inch size is perfect for most backyard birds, but if you’re targeting hummingbirds, you can go smaller.
Curing is Non-Negotiable: Those 2-3 weeks of curing on a shaded porch are critical. I’ve tried skipping this step, and after a few weeks of rain, the gourds turned mushy. Place them where they get airflow but stay dry—under a covered porch or carport works great. If your climate is humid, add a small fan nearby to speed up the drying process. The stem should be completely dry and brittle before you even think about cutting.
Carving Precision Matters: When tracing that 4-inch circle for the nesting chamber, use a ruler to keep your marker line straight. I mark the center point first, then measure 2 inches out in all directions to ensure perfect symmetry. For the entry hole, draw your 2-3 inch diameter circle on the opposite end—this natural positioning helps birds feel secure. A coping saw gives you more control than a jigsaw for these precise cuts, especially around the edges where you’ll be sanding later.
Weatherproofing Wins: Don’t skimp on the outdoor wood sealant or silicone caulk. I’ve seen birdhouses fall apart after just one rainy season because people used regular glue or paint thinner. Apply a second thin coat after the first one dries completely—this creates a proper barrier against moisture. For extra durability, consider adding a small overhang around the entry hole using a piece of scrap wood and more sealant. This keeps rain out while still allowing birds to enter easily.
Pro Tips for Bottle Gourd Birdhouse
- Between us, the difference between a birdhouse that lasts and one that falls apart in a month comes down to these lit...
- Gourd Selection Secret: Tap your bottle gourd before buying—it should sound hollow and firm, not dull. I’ve learned t...
- Curing is Non-Negotiable: Those 2-3 weeks of curing on a shaded porch are critical. I’ve tried skipping this step, an...
Frequently asked questions
Got questions about crafting or using a bottle gourd birdhouse? You’re not alone! Here are answers to the most common queries to help you create a charming, functional garden feature with ease.
What’s the best way to prepare a bottle gourd for a birdhouse?
Start by cleaning the gourd thoroughly—remove seeds and any remaining pulp. Let it dry in the sun for 2–3 weeks to harden the shell. Once fully dry, sand rough edges gently to prevent splinters. Pro tip: Seal the inside with non-toxic wood sealant (like beeswax) to deter pests and extend durability.
Which birds are most likely to use a bottle gourd birdhouse?
Small songbirds like chickadees, wrens, and sparrows love bottle gourd birdhouses! Aim for a 2–3 inch entrance hole to attract the right tenants. Avoid placing it near predators (like cats) and ensure it’s elevated 5+ feet off the ground for safety.
How long does it take for a bottle gourd to dry and harden?
Drying time varies by climate, but expect 2–4 weeks in warm, dry conditions. Place gourds in a well-ventilated spot (like a garage or porch) and flip them occasionally for even drying. Test readiness: Tap the shell—if it sounds hollow and firm, it’s ready!
Can I paint or decorate the outside of the birdhouse?
Yes! Use non-toxic, water-based paints (like acrylic) for a pop of color. Avoid glossy finishes—they can trap heat. For a rustic look, try natural stains or twine wraps. Skip the inside to keep it bird-friendly.
What if my bottle gourd birdhouse gets wet or damaged?
If moisture seeps in, let it dry completely in the sun. For minor cracks, patch with epoxy or hot glue. If mold appears, scrub with a vinegar-water mix and reseal. Prevent future issues: Add drainage holes (if needed) or relocate to a sheltered spot.
Are there alternatives if bottle gourds aren’t available?
Try dried calabash gourds, hollowed-out logs, or repurposed clay pots with a small entrance. Even a plastic milk jug (with holes drilled) works in a pinch—just ensure it’s safe and secure.
Wrapping up and next steps
Creating a bottle gourd birdhouse is more than just a craft—it’s a way to blend sustainability, creativity, and nature into your garden. 🌿 Whether you’re drawn to the rustic charm or the eco-friendly appeal, this project brings life to your outdoor space while offering birds a cozy, natural home.
Ready to turn your garden into a haven for feathered friends?
Start by gathering your materials, follow the simple steps, and let your imagination guide the design. Now’s the perfect time to dive in—your garden (and local birds) will thank you! 🐦💚
- Next step: Sketch your design or pick a bottle gourd from your harvest to begin building!