
Vegetables
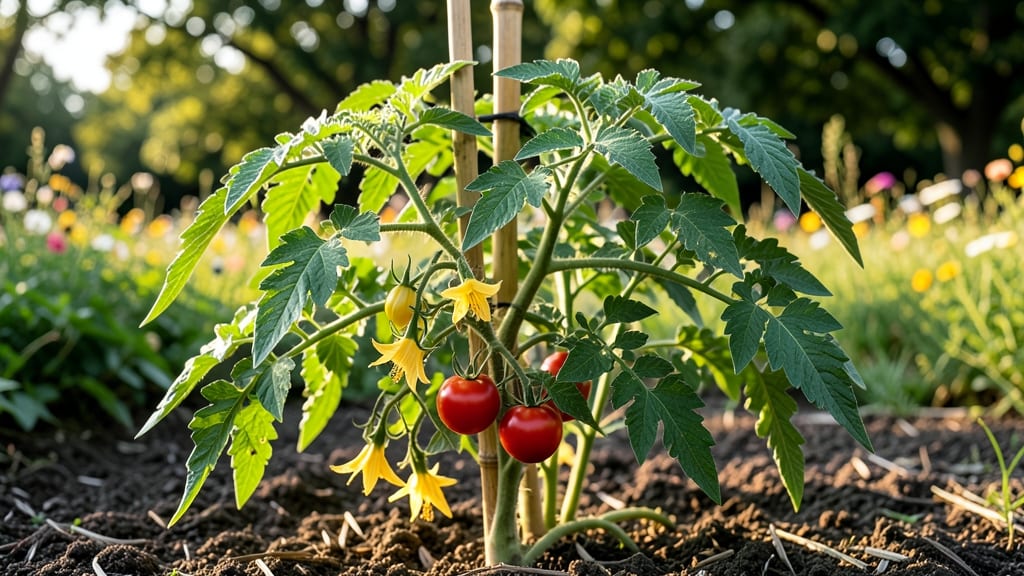
Growing Aunt Ruby tomatoes means discovering a flavor explosion in every bite—deep, smoky sweetness with just a hint of tang. 🌿 I’ve grown dozens of heirlooms, but this pink-beefsteak variety steals the show every time, producing 3-pound fruits that look like edible art and taste even better.
The secret isn’t just good soil—it’s patience and the right balance of sun, water, and careful handling.
Start with rich, well-draining soil mixed with compost, and plant after your last frost when nighttime temps stay above 55°F. These plants need full sun (6-8 hours daily) and consistent moisture—never soggy soil.
I’ve found that drip irrigation keeps the fruit from cracking, which is a common problem with heavy varieties. Prune suckers regularly to focus energy on those massive fruits, and stake them early—they get top-heavy.
By midsummer, you’ll be harvesting tomatoes so rich they’ll change how you think about tomato flavor. The first bite is always a revelation—juicy, complex, and packed with garden-fresh intensity.
Just watch for blossom end rot (calcium deficiency) and hornworms—they adore these plants. A simple calcium spray and neem oil keeps them in check.
This variety thrives in USDA zones 4-10, making it adaptable for most gardeners. Whether you’re growing in raised beds or containers, the key is giving them space—they spread wider than you’d expect.
Save seeds from your best tomatoes for next year, and you’ll have a plant that becomes the star of your garden for decades.
📚 In This Guide
- What you need
- Instructions
- Tips and common mistakes
- Wrapping up and next steps
What you need
- ● Seeds or Seedlings: 5–10 Aunt Ruby tomato seeds (or 2–3 healthy seedlings from a nursery).
- ● Growing Containers or Garden Bed: For containers: 5-gallon pots or larger (at least 12–18 inches deep).
- ● For in-ground planting: Well-draining soil in a sunny spot (6+ hours of sunlight daily).
- ● Soil & Fertilizer: High-quality potting mix (for containers) or compost-amended garden soil (for in-ground).
- ● Balanced 10-10-10 fertilizer or tomato-specific fertilizer (follow package instructions).
- ○ Slow-release organic fertilizer (optional but recommended for extra nutrients).
- ● Support Structures: Cage (5–6 feet tall) OR sturdy stakes (2–3 per plant).
- ● Watering Supplies: Watering can or hose with a gentle spray nozzle.
- ○ Drip irrigation system (optional, for consistent moisture).
- ● Tools: Trowel or small shovel for transplanting.
- ● Pruning shears (for trimming suckers).
- ● Gloves (to protect hands from thorns).
- ● Climate: Aunt Ruby thrives in USDA Zones 4–10. Start seeds indoors 6–8 weeks before the last frost or transplant seedlings after soil warms to 60°F+.
- ● Sunlight: Full sun (6+ hours/day) is a must—no shade allowed!
- ● pH Level: Aim for 6.0–6.8 (test soil with a kit if unsure).
- ○ Pest Control (Optional but Helpful): Neem oil or insecticidal soap (for aphids/spider mites).
- ● Row covers (to deter early pests).
Step-by-step guide to growing Aunt Ruby tomatoes
Here's how to coax these sweet, meaty tomatoes from seed to vine with minimal fuss.
🌱 Step 1: Start Seeds Indoors at the Right Time
Plant Aunt Ruby seeds indoors 8-10 weeks before your last frost date—these beauties need time to mature. I like to use biodegradable pots (like peat or coconut fiber) to avoid disturbing roots later. Fill them with sterile seed-starting mix (not garden soil) and press it down gently—just firm enough to hold the seed in place.
Sow seeds ¼ inch deep and mist the surface until damp. Cover the pots with plastic wrap or a humidity dome to keep warmth and moisture trapped. Place them in a warm spot (75-85°F)—a seedling heat mat works wonders. You'll see sprouts in 7-14 days, depending on your room's warmth. Real talk: if your home runs cooler, germination might take the full two weeks.
☀️ Step 2: Provide Light and Prevent Leggy Growth
The instant those first leaves appear, move seedlings under grow lights or to a south-facing window. Aunt Ruby tomatoes need 14-16 hours of light daily—a window alone won't cut it unless it's brutally sunny. Position lights 2-4 inches above the plants and raise them as the seedlings grow to maintain that gap.
Watch for leggy growth (long, pale stems with leaves spaced far apart)—this means they're stretching for light. If you see this, lower the lights immediately. Strong seedlings have thick stems, deep green leaves, and compact spacing between leaves. I rotate my trays quarter-turn daily so they grow straight instead of leaning.
🪴 Step 3: Harden Off and Transplant Carefully
Two weeks before your last frost date, start hardening off your seedlings. Place them outside in a sheltered spot for 1-2 hours the first day, then gradually increase time by 1 hour daily until they're out all day. This toughens their skin and prevents shock when they meet real-world conditions.
Transplant after soil warms to at least 60°F and nighttime temps stay above 50°F. Bury seedlings deeper than the pot—Aunt Ruby tomatoes have strong stems that root along the buried portion. Space plants 24-36 inches apart to give them room to sprawl. Water deeply at planting to settle the soil and encourage root growth.
💧 Step 4: Water and Fertilize for Maximum Sweetness
Aunt Ruby tomatoes thrive with consistent moisture—water 1-2 inches per week, more in extreme heat. I water at the base in the morning so foliage dries quickly, which prevents fungal diseases. These tomatoes are drought-sensitive, so let the top 1-2 inches of soil dry between waterings, but never let them wilt.
Feed plants every 2-3 weeks with a balanced fertilizer (like 10-10-10) until flowers appear, then switch to a low-nitrogen, high-phosphorus formula (like 5-10-10) to boost fruiting. Too much nitrogen = leafy vines, fewer tomatoes. I also side-dress with compost mid-season for extra nutrients.
✂️ Step 5: Prune and Support for Heavy Harvests
Aunt Ruby tomatoes grow indeterminate vines that need strong support—install cages or stakes at planting and secure the main stem as it grows. Prune suckers (the little shoots in the leaf axils) to direct energy to fruit production. I leave 2-3 main stems per plant for better air circulation and easier harvesting.
Remove any yellow or diseased leaves immediately to keep the plant healthy. As fruit sets, thin clusters to 5-6 tomatoes per truss—this ensures larger, sweeter tomatoes. Aunt Ruby's are known for their meaty, low-acid flesh, so every effort to reduce stress on the plant pays off in flavor. Harvest when fully colored and slightly soft to the touch.
Tips & tricks for perfect Aunt Ruby tomato growth
Here's what nobody tells you about growing these prized heirlooms—secrets that'll make the difference between a decent harvest and a jaw-dropping bounty.
Germination Conditions: The 75-85°F warmth range is critical for those first sprouts, but consistency matters more than exact degrees. I've seen germination fail in homes with inconsistent heating—place your seed trays on top of the fridge or near a sunny window if your room runs cool. A simple seedling heat mat ($15 at garden centers) can cut germination time by half if your home stays below 70°F. The ¼-inch depth is non-negotiable—any deeper and they won't surface, any shallower and they dry out.
Light Strategy: Those 14-16 hours of light daily aren't just about duration—the quality matters too. LED grow lights are your best bet for full-spectrum coverage, but if using fluorescent tubes, place them 2-3 inches above seedlings (closer than the instructions suggest) for the first week. Watch for leaves turning toward the light—this means they're not getting enough. I rotate my trays every 8 hours instead of daily to prevent leaning while still getting full light exposure.
Transplanting Hack: Burying seedlings deeper than their pots might seem counterintuitive, but Aunt Ruby's indeterminate vines will thank you. The buried stem develops additional roots, creating a stronger plant. I make small slits in the soil with my finger to create pockets for the stem—this prevents air pockets that could rot. For extra insurance, I water the soil before transplanting to create a slurry that helps roots establish contact immediately.
Fertilizer Timing: The switch from 10-10-10 to 5-10-10 at flowering is crucial, but I've found even better results by introducing fish emulsion (1-2-2 ratio) at this stage. The organic nitrogen in fish emulsion is gentler than synthetic fertilizers and won't cause that "leafy vine" problem. Apply it in the morning so it has time to absorb before evening moisture. I also mix a handful of compost into the planting hole—this creates a nutrient-rich zone right where the roots will develop most.
Pro Tips for Aunt Ruby Tomato
- Here's what nobody tells you about growing these prized heirlooms—secrets that'll make the difference between a decen...
- Germination Conditions: The 75-85°F warmth range is critical for those first sprouts, but consistency matters more th...
- Light Strategy: Those 14-16 hours of light daily aren't just about duration—the quality matters too. LED grow lights ...
Frequently asked questions
Got questions about growing Aunt Ruby tomatoes?
You're not alone! Here are some of the most common queries—plus quick, practical answers to help you cultivate a thriving harvest.
What’s the best climate for growing Aunt Ruby tomatoes?
Aunt Ruby tomatoes thrive in warm climates with long, hot summers (USDA Zones 7-10). They need at least 60-85°F (15-29°C) daytime temps and 60+ frost-free days to ripen fully. In cooler zones, start seeds indoors 6-8 weeks before the last frost and use black plastic mulch to warm the soil.
How long does it take for Aunt Ruby tomatoes to produce fruit?
From seed to harvest, expect 70-85 days for Aunt Ruby tomatoes. If you transplant seedlings, fruit typically appears in 60-70 days. Patience is key—these heirlooms need time to mature, but the wait is worth it for their sweet, meaty flavor!
Can I grow Aunt Ruby tomatoes in containers? Yes—but here’s how!
Choose a 5-gallon+ container with drainage holes and fill it with light, well-draining potting mix. Use a cage or trellis to support vines, as Aunt Ruby can grow 3-4 feet tall. Place containers in full sun (6+ hours/day) and water consistently—containers dry out faster than garden beds.
What pests or diseases should I watch for with Aunt Ruby tomatoes?
Aunt Ruby tomatoes are resistant to many diseases, but keep an eye out for:
- Blossom end rot: Caused by calcium deficiency. Fix with egg shells or calcium supplements and consistent watering.
- Hornworms: Large green caterpillars that devour leaves. Handpick them or use BT (Bacillus thuringiensis) spray.
- Fungal issues (early blight): Space plants for airflow and avoid overhead watering. Copper fungicide can help if needed.
Rotate crops yearly to prevent soil-borne pests.
How do I know when Aunt Ruby tomatoes are truly ripe?
These tomatoes are ripe when they’re deep red with a slightly glossy sheen and yield gently to touch. The color should be even all over—no green shoulders! For best flavor, harvest when fully ripe (they won’t ripen further off the vine). Store at room temp for 3-5 days or refrigerate for longer shelf life.
Wrapping up and next steps
Growing Aunt Ruby tomatoes is a rewarding journey that brings vibrant flavors and stunning beauty to your garden—or even your windowsill! 🌱 With the right soil, sunlight, and care, you can enjoy a bountiful harvest of these sweet, deep-red heirlooms.
Whether you're a seasoned gardener or just starting, every seed planted is a step toward fresh, homegrown goodness.
Now that you’re armed with the secrets to success, why not take the next step? Start your plants today—whether from seed or transplant—and watch your garden transform into a tomato paradise.
Share your progress with fellow gardeners, and soon, you’ll be savoring the fruits (and veggies!) of your labor. Happy growing! 🍅✨